Need to communicate with your workmates and important clients quickly? You may already be using Microsoft Teams. Teams allows you to keep in touch with others using text chat, audio, and video communication.
However, before you join or start a meeting in Teams, you should test your audio settings to make sure everything is working correctly. To help you, we’ll show you how to test your audio in Microsoft Teams to ensure your microphone, speakers, and even your camera are working.
How to Use the Test Call Feature in Microsoft Teams
The test call feature in Microsoft Teams lets you check your audio devices and settings before joining a meeting. It works by setting up a fake call (just with yourself) that lets you test your microphone, speakers, and camera.
You can use the test call to adjust your volume controls and check that everything works properly. To use the test call feature in Microsoft Teams, follow these steps.
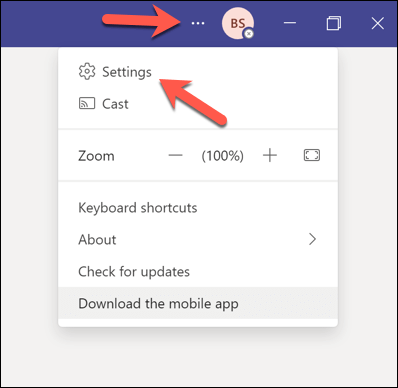
- Open Microsoft Teams and press the three-dots menu icon in the top-right.
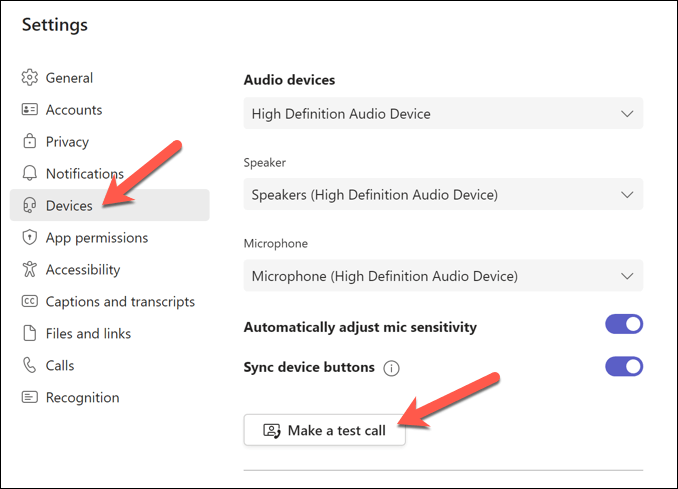
- From the menu, select Settings.
- Press Devices from the menu on the left.
- Under Audio devices, make sure your preferred microphone and speakers are selected from the drop-down menus.
- Press Make a test call under the Test Call section.
Listen, watch, and monitor the test call, follow any on-screen instructions, and adjust your volume settings as required. If you have a camera, you’ll see yourself on the screen. Make sure your camera is positioned correctly and has good lighting.
If the test call was successful, you can proceed to joining your Teams meeting.
How to Test Audio in Microsoft Teams Without Joining a Meeting
If you want to test your audio in Microsoft Teams without joining a meeting, you can try recording a video clip. This way, you can see and hear how you sound and look before joining a meeting with others.
To record a video clip with yourself in Microsoft Teams, follow these steps.
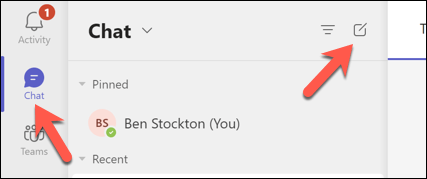
- Open Microsoft Teams and press the Chat icon on the left.
- Press New chat at the top of the chat list.
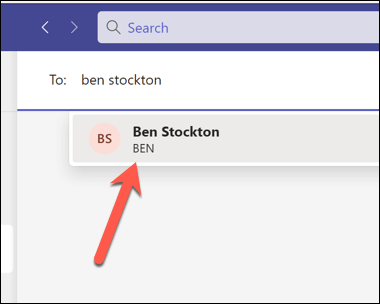
- Type your name or email address in the To field and press Enter.
- In your self-chat window, press the Record a video clip icon in the bottom right.
- You’ll see yourself on the screen and hear yourself through your speakers—make adjustments as necessary.
You may also need to consider other things (such as your internet connectivity) before you start or join a real meeting in Teams, however.
How to Test Audio Before a Teams Meeting in Windows 11
If you want to test your audio settings outside the Teams client, you can do so via the Windows 11 Settings menu. You can test your microphone and speaker settings to check that the volumes are correct and that everything is working as expected.
You can then adjust these settings before you launch Teams and join a meeting. To test your audio before a Teams meeting in Windows 11, follow these steps.
- First, right-click the Start menu and select Settings.
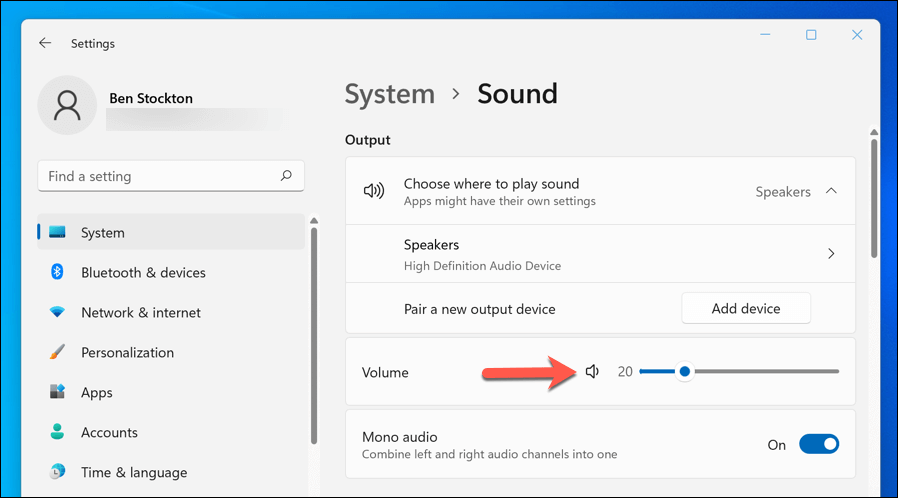
- In Settings, press System > Sound.
- Under the Output section, you’ll see the speakers or headphones that are currently selected as the default output device. You can change the output device by pressing the drop-down menu and selecting another option. You can adjust the output volume by dragging the slider or using the volume buttons on your keyboard or device.
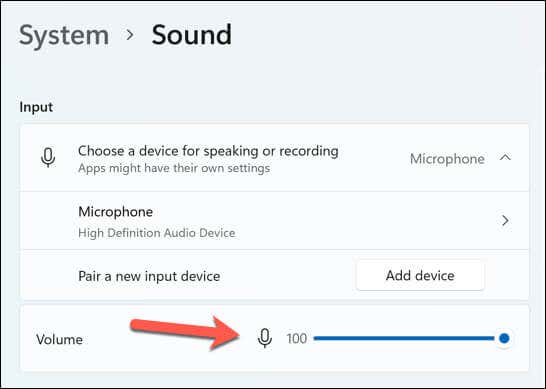
- Under the Input section, you’ll see the microphone currently selected as the default input device. Like with your speaker or headphone settings, you can change the input device via the drop-down menu. You can also adjust the input volume by dragging the slider.
- To test your microphone, tap the Microphone option, then press the Start button. You’ll see a blue bar moving as you speak into your microphone. If your microphone isn’t working, make sure it’s plugged in, turned on, and not muted. You can also try restarting your computer or updating your audio drivers.
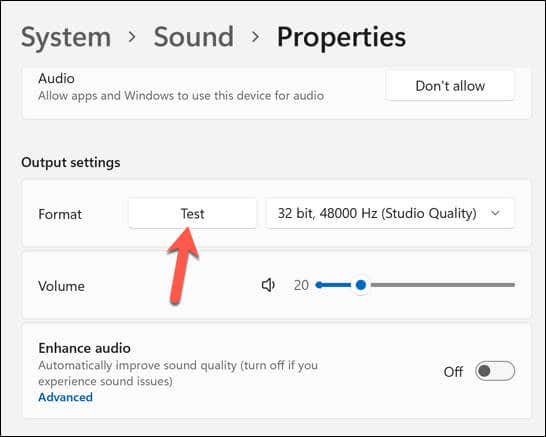
- To test your speakers or headphones, tap the Speaker option, then press the Test button in the Output settings section. You’ll hear a sound playing from each of your output devices. If you don’t hear any sound, run the same checks on your output device to ensure it’s plugged in and working correctly. You can also try restarting your computer to see if it fixes the problem.
After testing your audio devices, close the Settings app and open Teams. You can then repeat the Test call test using the steps above or try joining a call to see if it’s working.
How to Troubleshoot Audio Issues in Microsoft Teams
If you encounter any audio issues during or after the test call, here are some possible solutions:
- Check your internet connection to ensure it is stable and fast enough for video calls.
- Close any other applications using your microphone, speakers, or camera.
- Update your device drivers and Microsoft Teams app to the latest version.
- If you’re using a headset or external microphone, make sure it is plugged in securely and not muted.
- If you’re using Bluetooth devices, ensure Bluetooth is switched on, that your devices are paired correctly and have enough battery power.
- Finally, if you’re using speakers, make sure they are not too close to your microphone to cause unnecessary feedback.
Managing Your Microsoft Teams Settings
Testing your audio in Microsoft Teams is important to ensure that your essential meetings go smoothly without technical interruptions. If your mic or audio isn’t working in Teams, you must follow these steps to troubleshoot the problem.
Want to keep a record of important meetings? You can record a Teams meeting to help you—just make sure you have permission to do so first. If you want to improve productivity in Teams, you can also learn some helpful Teams keyboard shortcuts to help you.


