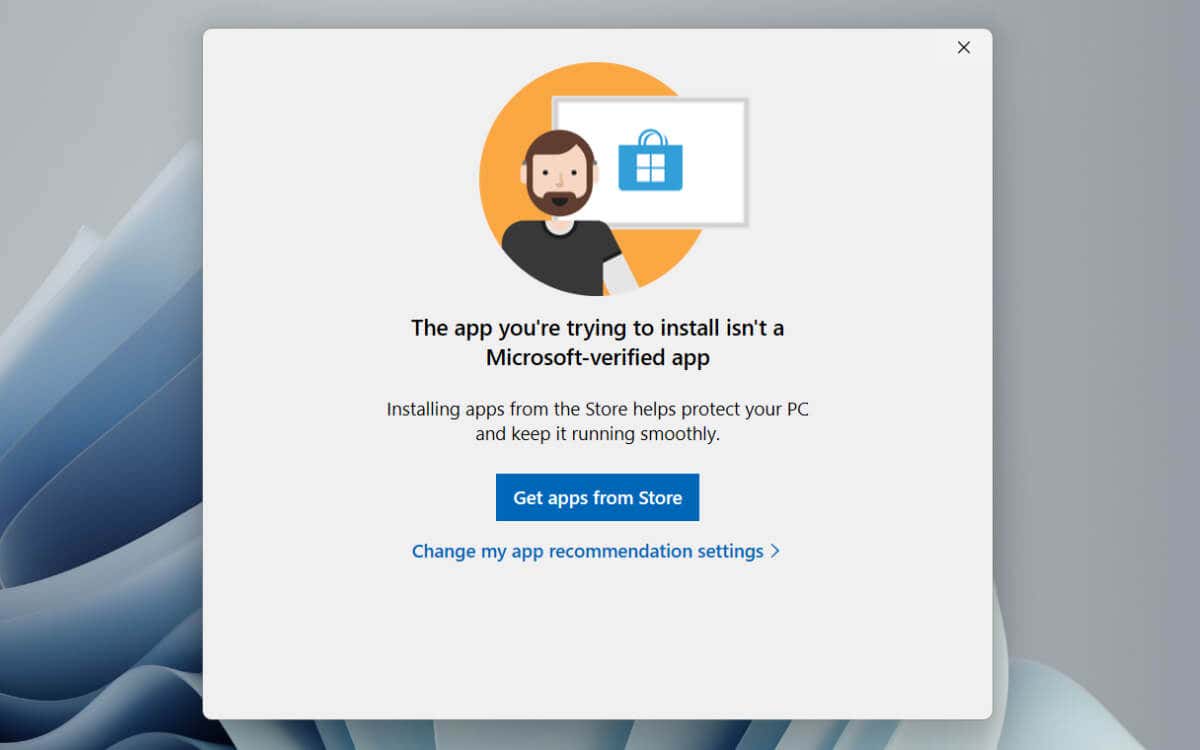
Do you keep encountering a “The app you’re trying to install isn’t a Microsoft-verified app” notification when attempting to install an application in Windows 11? Why does that happen? Can you bypass it?
The “Microsoft-verified app” warning is a security feature that prevents potentially harmful software from getting on your PC. This tutorial will explain why Microsoft’s verified app warning appears and how to get around it.
What Is the Microsoft-Verified App Warning?
Windows 11 displays a “Microsoft-verified app” alert when installing third-party apps outside the Microsoft Store (formerly the Windows Store). Microsoft argues this reduces the chances of infecting your PC with malware, and that’s a valid concern since the internet is full of malicious programs masquerading as legitimate software.
Depending on Windows 11’s app recommendation settings, the “Microsoft-verified app” warning could merely caution you about the risks of non-Microsoft Store apps or completely restrict you from installing them.
Should You Turn Off the Microsoft-Verified App Warning?
While Microsoft’s intentions may be good, the Microsoft Store is not a reliable source for applications. For starters, even though the platform boasts a sizable app library, it’s doubtful you’ll find everything you’re looking for since only some developers publish programs on it.
Also, the Microsoft Store has a reputation for failing to work correctly—the app may struggle to download apps or even launch itself in the first place, often requiring lengthy troubleshooting. Worse yet, although Microsoft vets programs on its storefront, apps that are either deceptive or dangerous can still make their way inside.
If you’re positive that an app you’re about to install is from a trustworthy source, feel free to select Install anyway within the “Microsoft-verified app” warning. If the option’s not present, you must lift the Microsoft Store-only restriction via the Windows Settings app or Local Group Policy Editor.
Steps to Turn Off the Microsoft-Verified App Warning
Selecting the Change App Recommendation Settings option within the “Microsoft-verified app” warning takes you to the Apps & Features pane in Windows 11, which, for some reason, doesn’t allow you to modify the relevant settings. Instead, here’s what you must do:
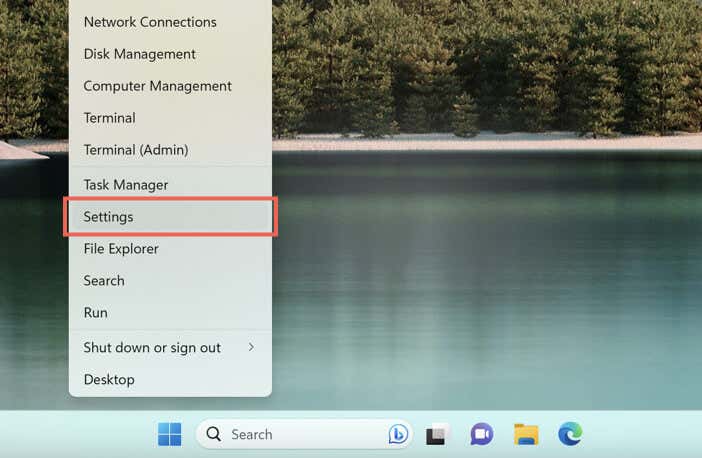
- Right-click the Start menu button and select Settings.
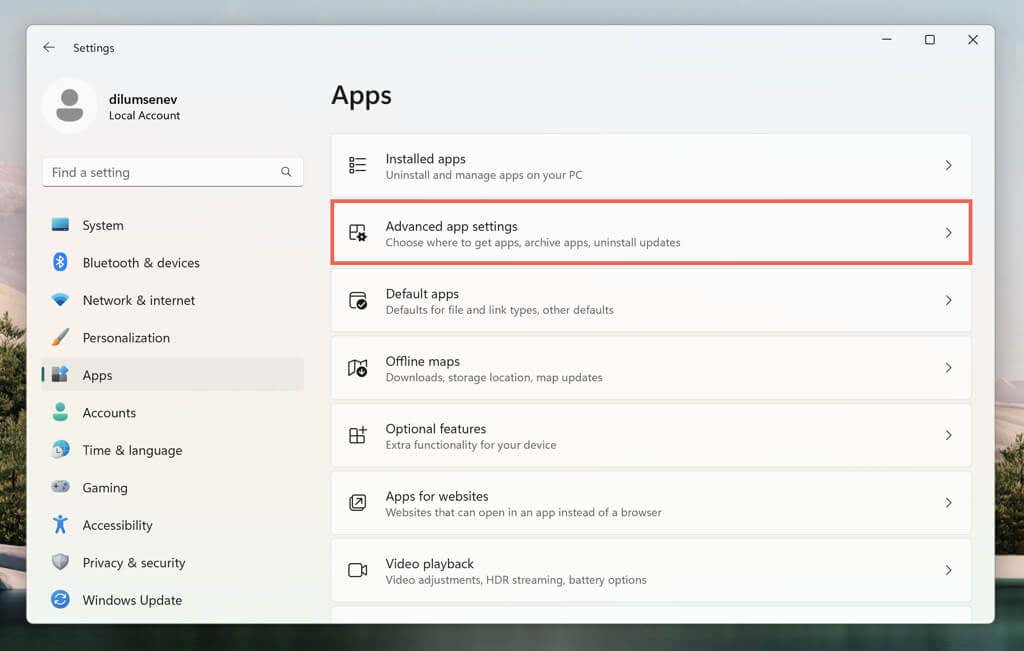
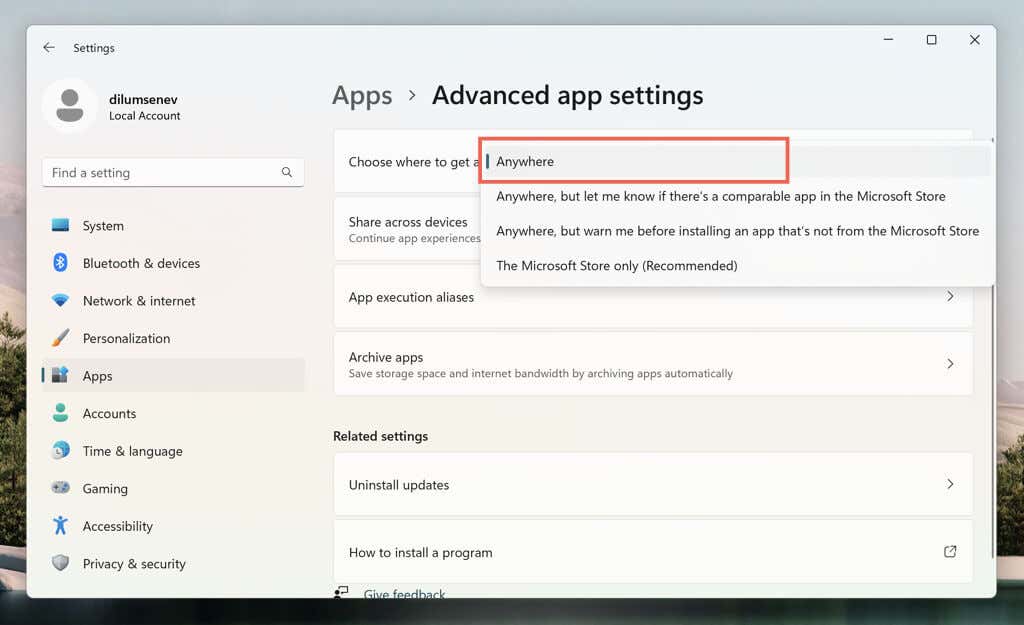
- Select Apps on the left sidebar and choose the Advanced app settings category.
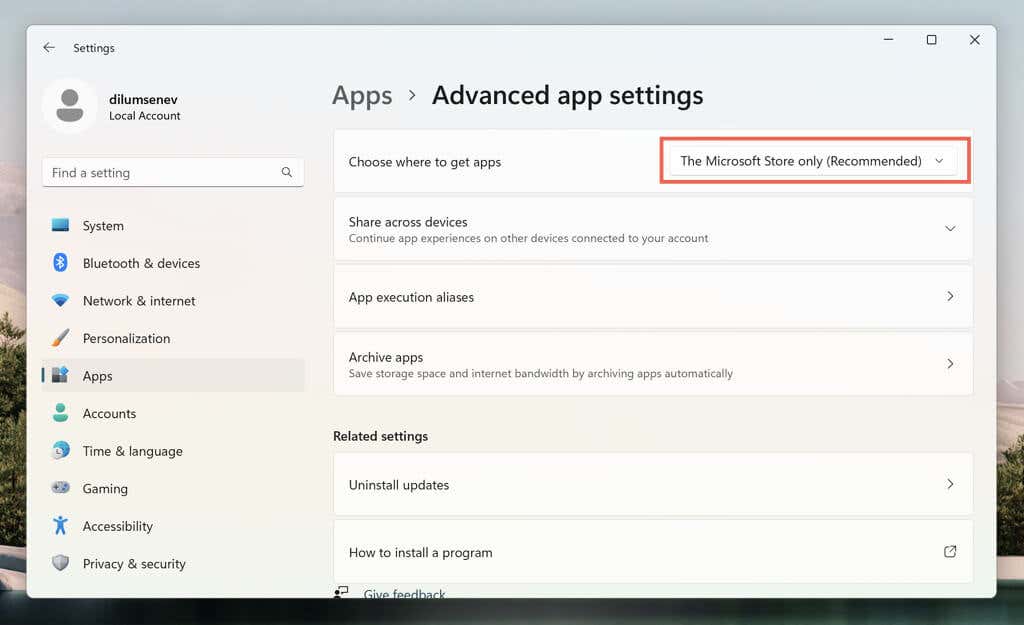
- Open the drop-down menu next to Choose where to get apps.
- Switch from The Microsoft Store only (Recommended) to Anywhere.
If you have trouble accessing the Settings app in a Windows 11 Pro installation, use the Local Group Policy Editor to disable the “Microsoft-verified app” warning. Just:
- Press Windows + R, type gpedit.msc into the Run box, and select OK.
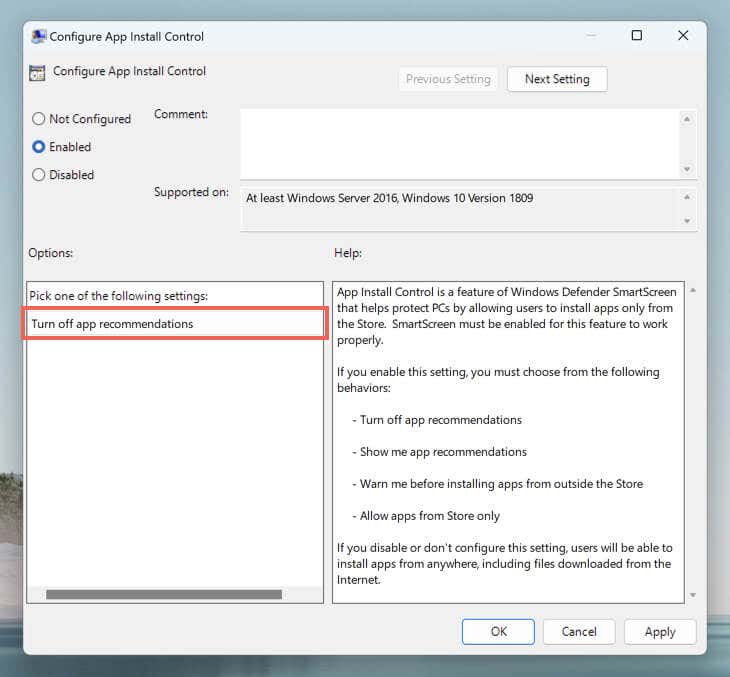
- Go to Computer Configuration > Administrative Templates > Windows Components > Windows Defender SmartScreen > Explorer and double-click the Configure App Install Control policy.
- On the “Configure App Install Control” dialog, select the radio button next to Enabled and pick the Turn off app recommendations setting under Options.
- Select Apply to save your changes.
Get Windows 11 Out of S Mode
If you can’t access the above settings via the Settings app or Local Group Policy Editor, Windows 11 is likely in S Mode. Windows 11 S Mode allows app installations through the Microsoft Store and limits web browsing to Microsoft Edge.
The only way to install apps outside the Microsoft Store is to get Windows 11 out of S Mode. Just note that it’s impossible to revert the operating system to S Mode once you leave it. If you’d like to proceed:
- Open the Settings app.
- Go to System > Activation.
- Under the Switch to Windows 10 Home or Switch to Windows 10 Pro sections, select Go to Store.
- On the “Switch out of S Mode page,” select Get.
Take Caution While Downloading Apps From External Sources
Staying safe while downloading apps outside Microsoft’s app store is crucial for privacy and security in Windows 11. Here are some strategies to help you with that.
Download from Reputable Sources: Always download software from trusted, official sources or the developer’s website. Avoid “cracked” versions of paid software or downloads from suspicious websites, as they almost always contain malware.
Check What Others Say: Read reviews and recommendations from reputable tech sites or forums before downloading—users often share their experiences and alert others about problematic apps.
Use Antivirus Software: Windows Security is built into Windows 11 and offers real-time protection against malware and potentially unwanted applications. However, you can always beef things up with third-party antivirus software.
Scan Download Links: You can paste links directly to an online tool like VirusTotal to check for malware before downloading applications to your PC.
Beware of Bundleware: Some installers offer bundled applications that can clutter or slow down the operating system. Always choose the Custom or Advanced installation options and uncheck unwanted software.
Run the Program in a Sandbox: If you’re unsure about the safety of an application, you can use virtualization software to test it in an isolated environment. In the Windows 11 Pro version of Windows, you can also use Windows Sandbox.
Besides the pointers above, always back up important data in Windows 11. A recent backup can save you from data loss if something goes seriously wrong while installing an application.


