Use it to personalize your experience
If you’re a Windows 11 user, you may wonder why you want to install themes on your computer. The answer is simple: themes help you personalize your desktop, express your style and preferences, and freshen up the user experience.
By changing your desktop backgrounds, colors, and other visual elements, you create a unique and appealing look that reflects your mood, tastes, or work needs.
In this tutorial, we’ll explore several methods to install free and hidden themes on your Windows 11 computer and show you how to do it quickly and safely.
Related: Using Windows 10? Check out our compilation of top themes for Windows 10 desktops.
How to Switch Themes on Windows 11
Windows 11 comes with a handful of default themes you can readily switch between. To get to Windows 11’s Themes management screen, you must:
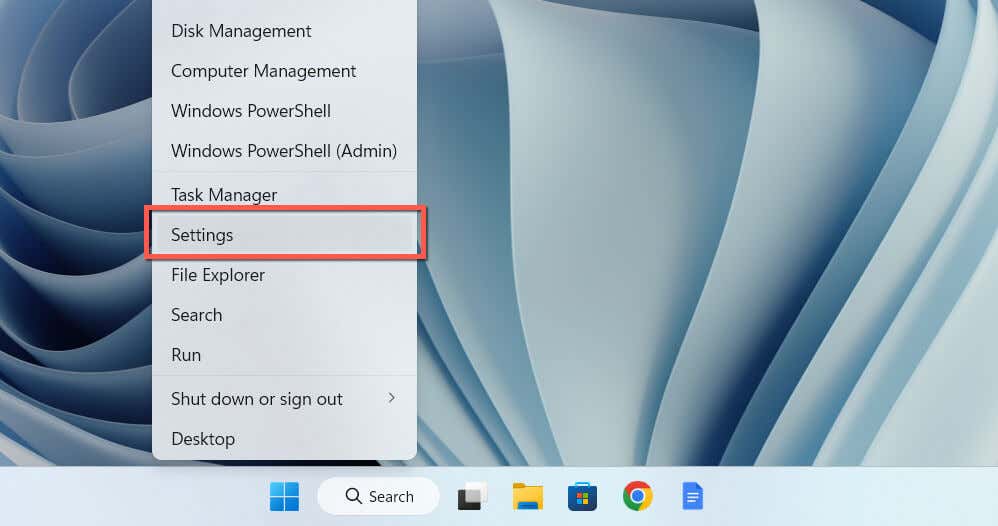
- Open the Windows Settings app—right-click the Start button and select Settings or use the Windows + I keyboard shortcut.
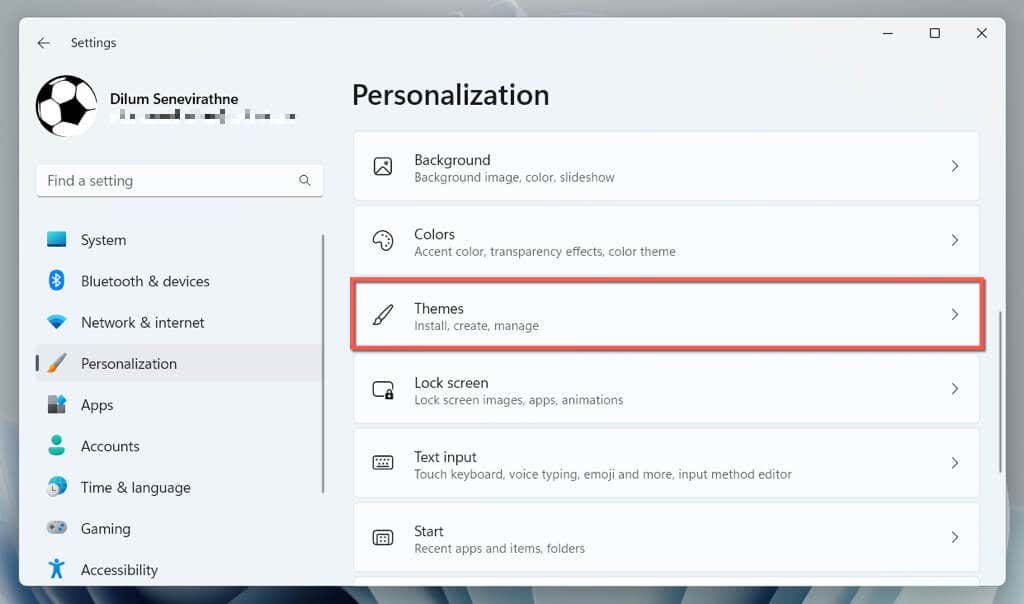
- Select Personalization on the sidebar and enter the Themes category.
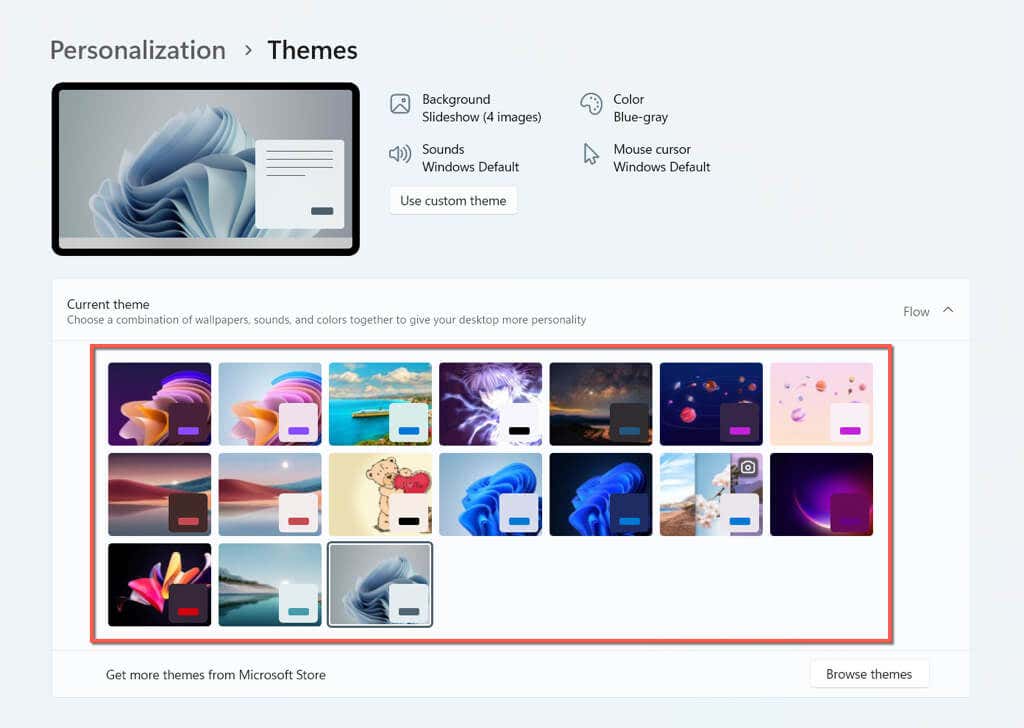
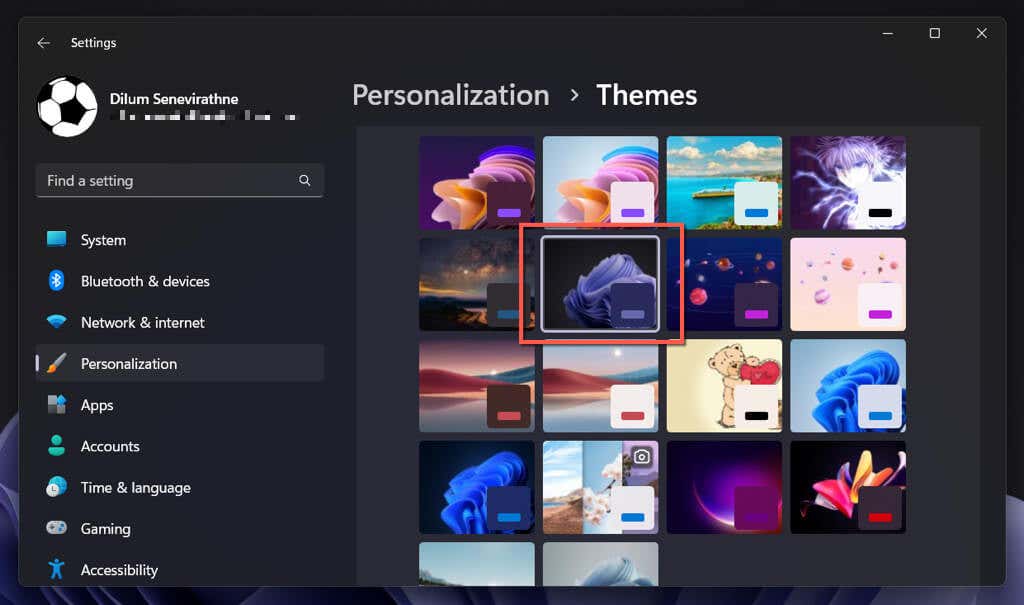
- Expand the Current themes section to view a list of available themes. All themes you add to Windows 11 using the methods below will appear here. Select the theme you want; Windows 11 should apply it.
You should see all pertinent details related to the selected theme at the top of the window, such as the number of desktop wallpapers, colors for the cursor, taskbar, and windows, etc. You can also tweak various aspects of a theme, such as how the backgrounds rotate and the accent color in use.
How to Install Themes From Microsoft Store
The Microsoft Store features loads of free themes from Microsoft that you can easily install on your computer. To view, download, and apply them:
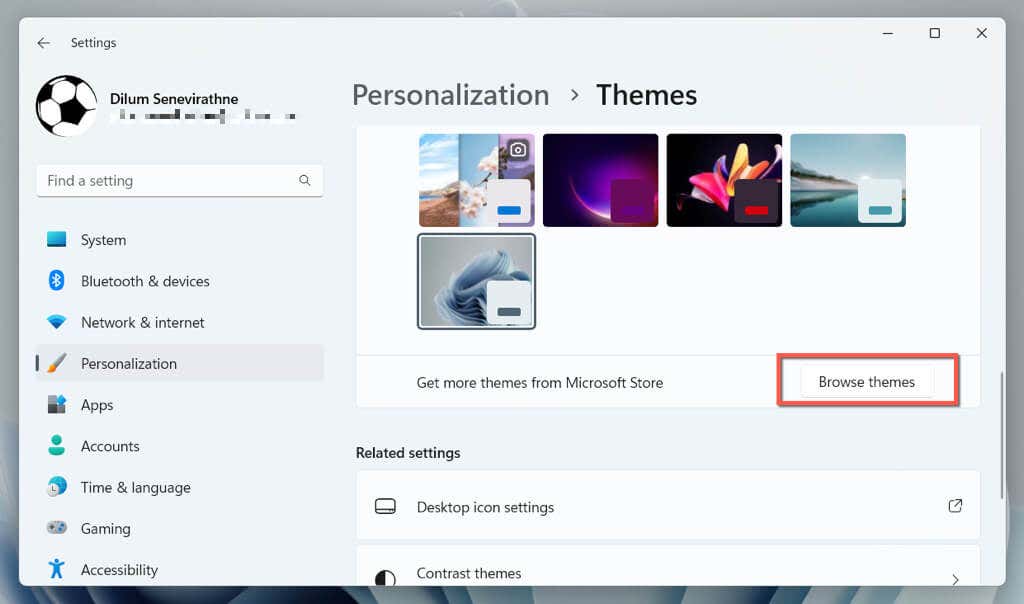
- Visit the Themes management screen on your Windows 11 computer and select the Browse themes button.
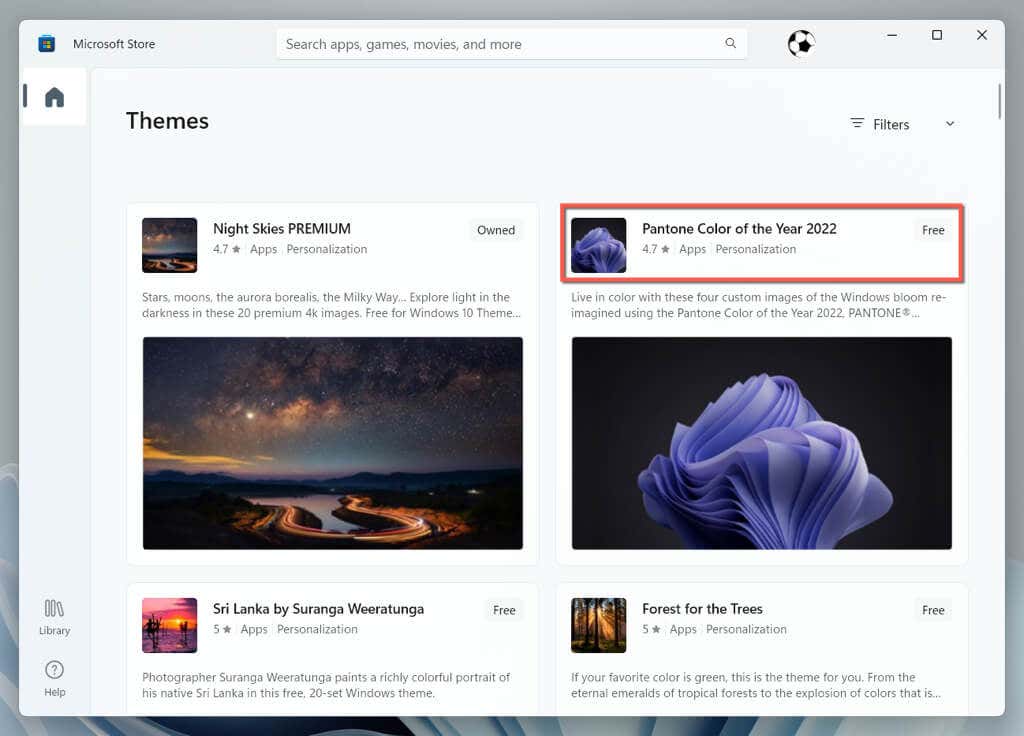
- The Microsoft Store should automatically launch and display all installable themes from Microsoft. Scroll through them and pick a theme you want to add.
- Select the Get button.
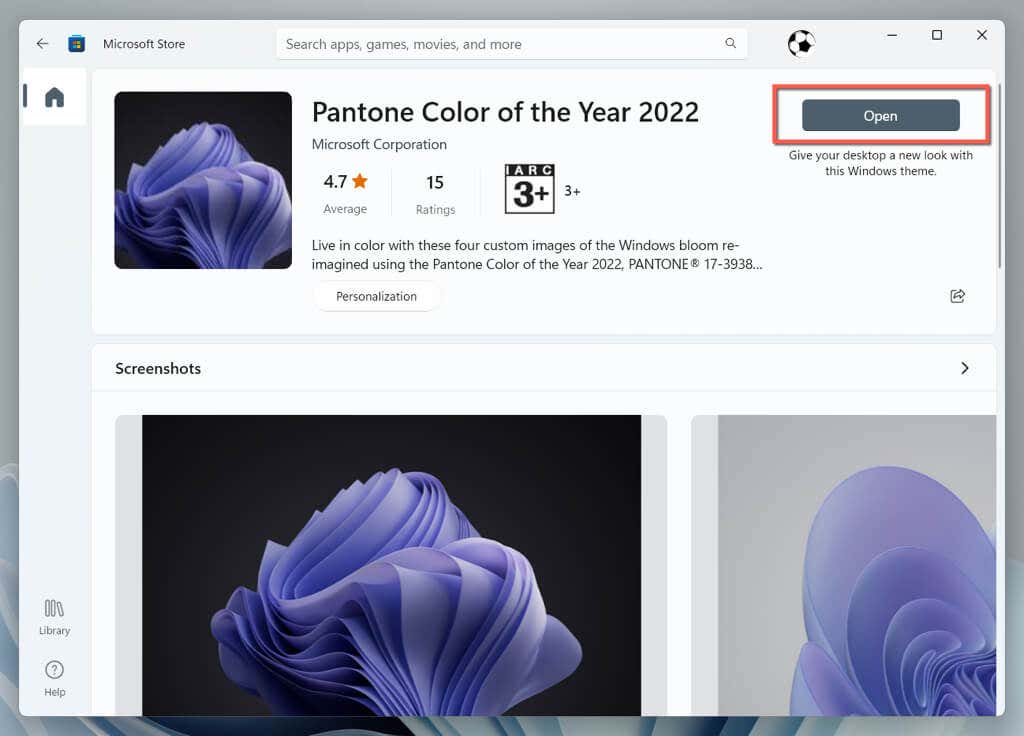
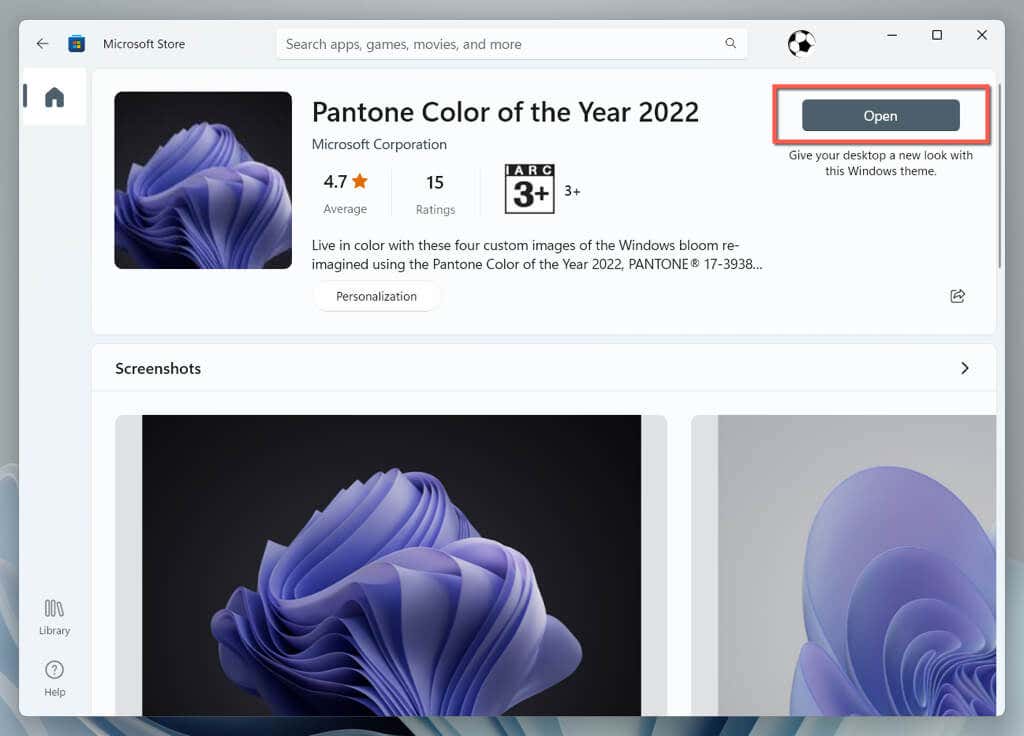
- Wait until the Microsoft Store installs the theme on your PC, and then select the Open button to switch back to Windows 11’s Themes management screen.
- Pick the theme under the Current theme section.
How to Download and Install Themes from Microsoft
If you have trouble using the Microsoft Store, you can download and install Windows 11 themes directly through the Microsoft website. Here’s how:
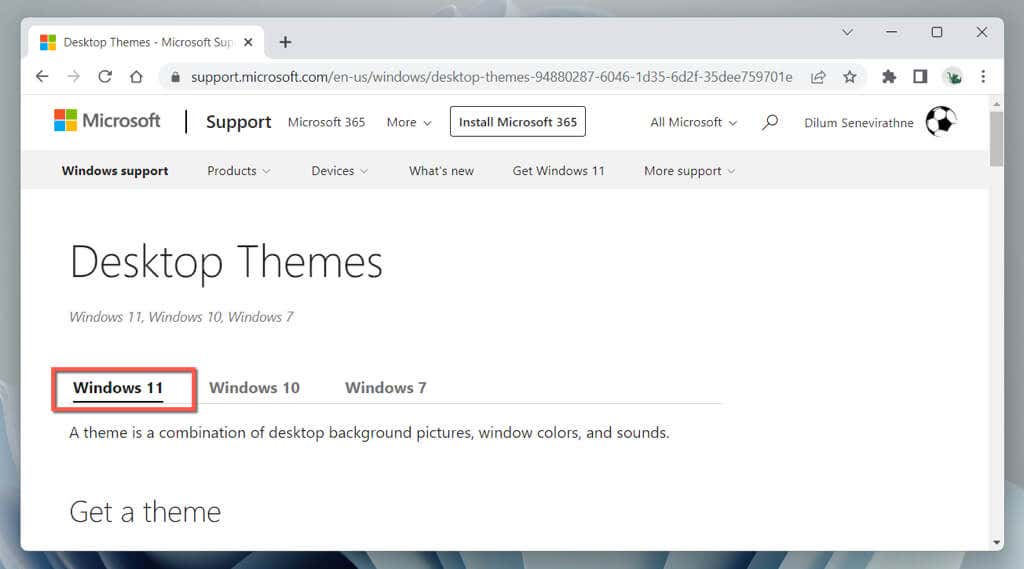
- Visit Microsoft’s official Desktop Themes page via Microsoft Edge, Google Chrome, or another web browser and make sure you’re on the Windows 11 tab.
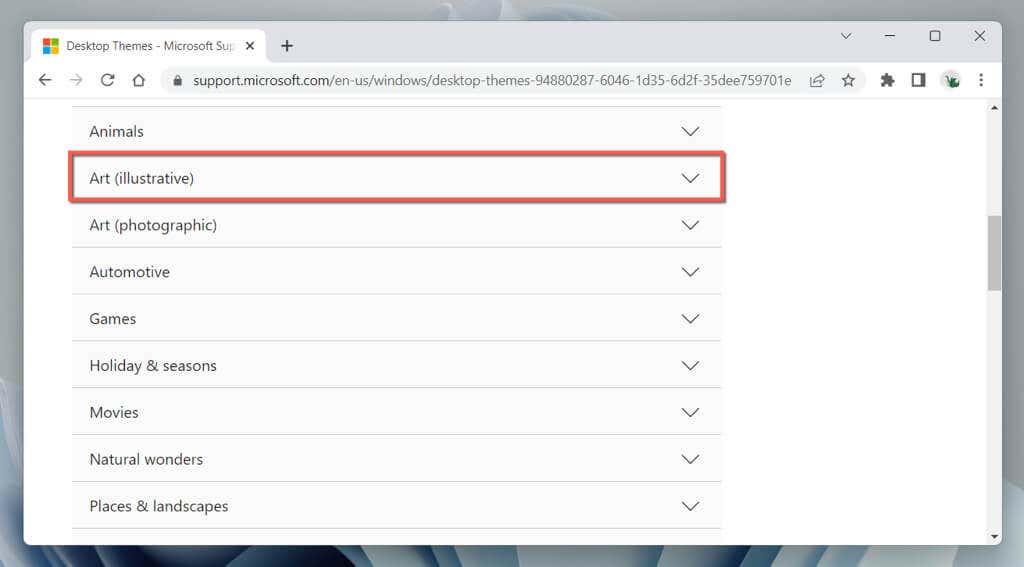
- Expand an available category—Animals, Natural wonders, Places & landscapes, etc. There’s also a Branded themes category that features themes from device manufacturers like ASUS and Intel.
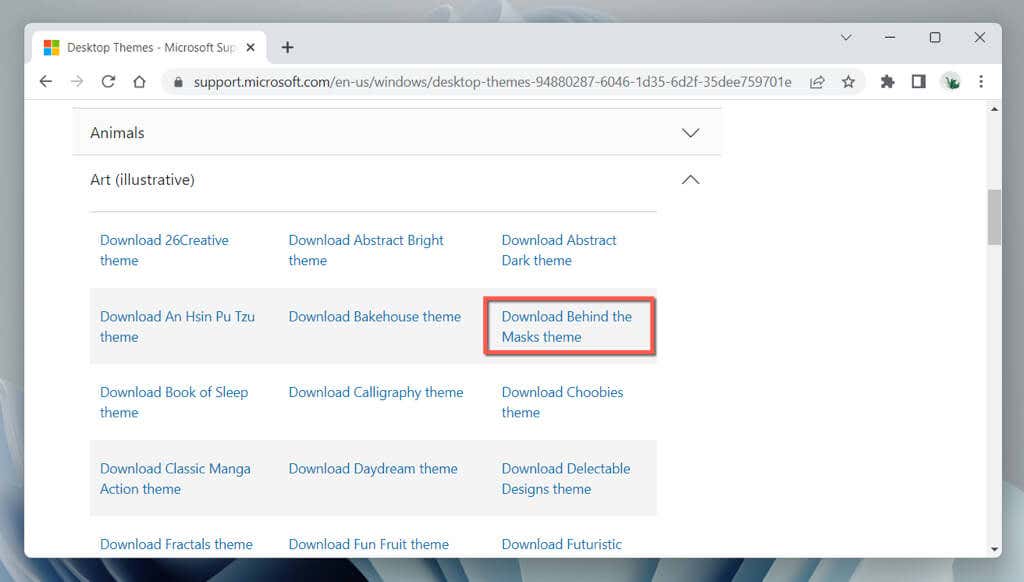
- Pick a theme, and your browser should automatically download a Windows Desktop Theme Pack file to your computer. Expect a theme to weigh in around 10-25 megabytes.
- Run the downloaded Windows Desktop Theme Pack file and wait until the operating system adds it to its themes library.
Windows 11 should automatically apply the theme. If it doesn’t, head to the Themes management screen and select the theme under the Current theme section.
How to Download Themes Through Third-Party Websites
The Microsoft Store and Microsoft’s Desktop Themes page aside, you can get loads of free third-party themes from download sources all over the internet—e.g., Themepack.me, WindowsThemePack.com, and Themes10.win.
Here’s how to download and install a theme from a third-party website:
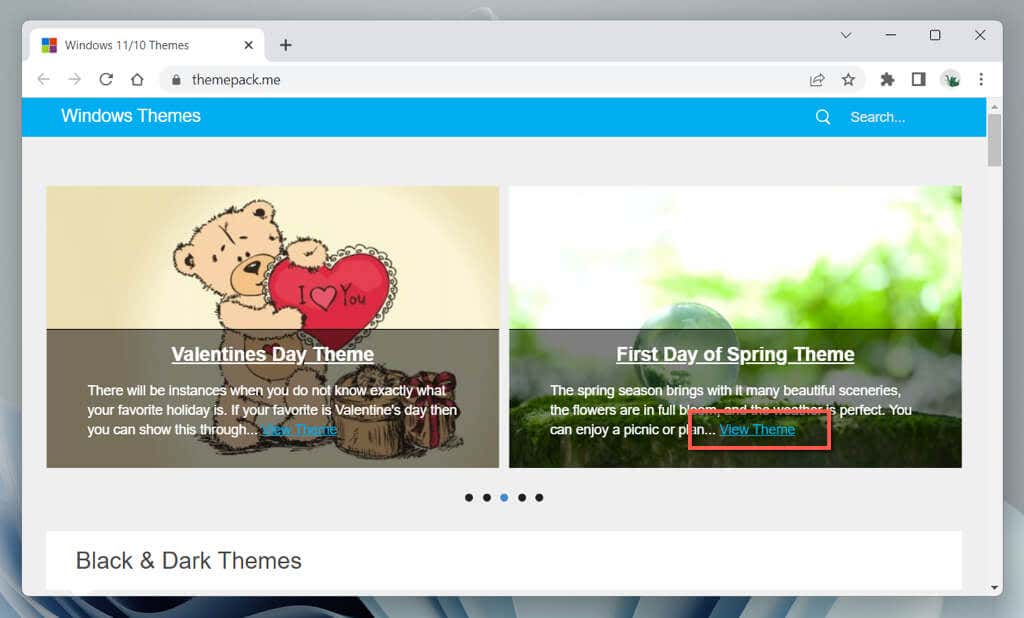
- Visit a third-party theme download portal like Themepack.me, sift through the available categories, and pick a theme you would like to have.
- Download the Windows 11 version of the theme.
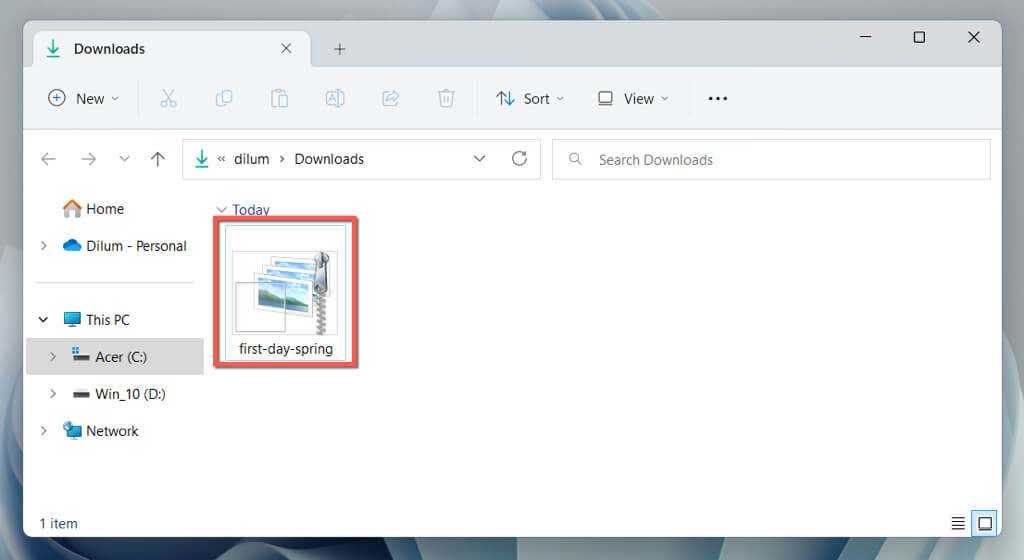
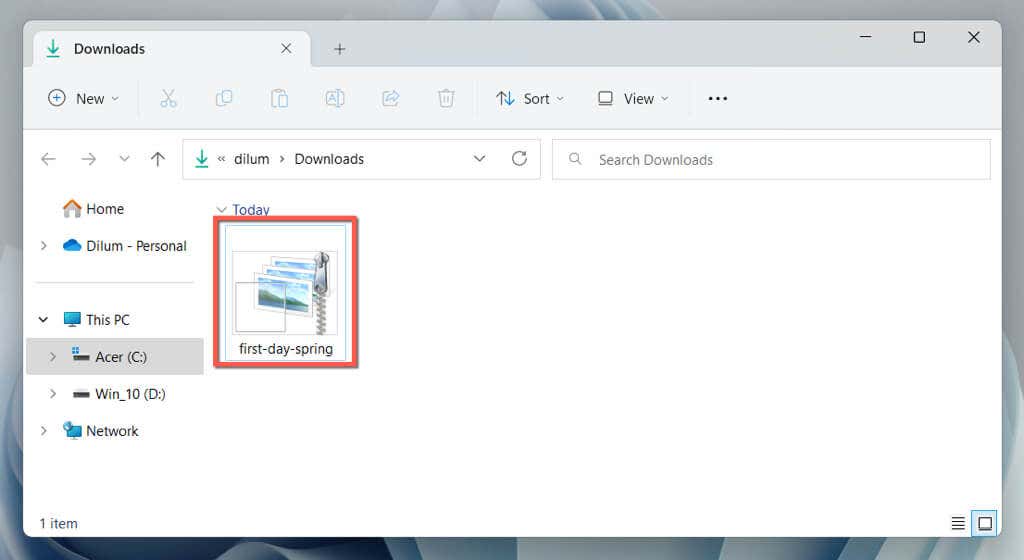
- Select the downloaded Windows Desktop Theme Pack File to add it to Windows 11.
If Windows 11 won’t apply the theme automatically, switch to the theme manually via the Themes management screen.
How to Enable Hidden Windows 11 Education Themes
If you use Windows 11 22H2 or later, you can unlock hidden Windows themes—a new feature exclusive to the Education edition of the operating system—via a registry hack.
To check your version of Windows 11, open the Start menu, type winver, and select OK. If you’re using an older version of the operating system, go to Settings > Windows Update to update it.
Note: Incorrectly modifying the Windows Registry can destabilize the system. We strongly recommend you back up the system registry before you go ahead.
To enable hidden education themes in Windows 11:
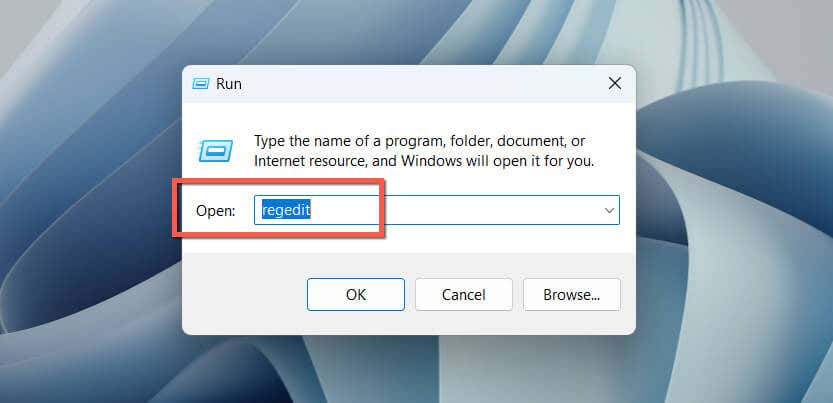
- Press Win + R to open a Run box, type regedit, and select OK.
- Copy and paste the following path into the address bar at the top of the Registry Editor and press Enter;
HKEY_LOCAL_MACHINE\SOFTWARE\Microsoft\PolicyManager\current\device
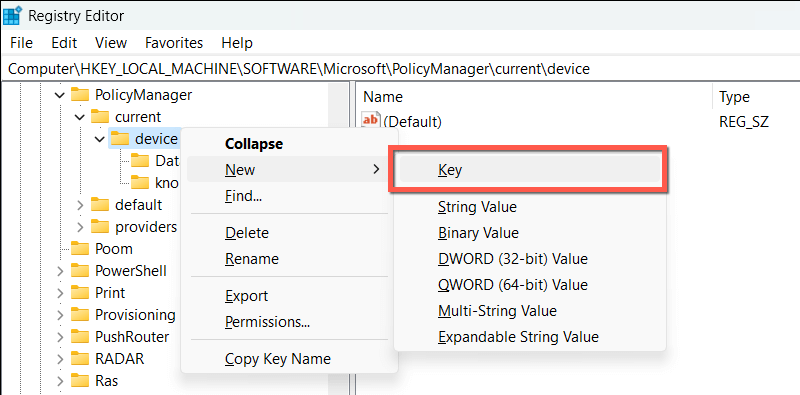
- Right-click the device key on the left and select New > Key.
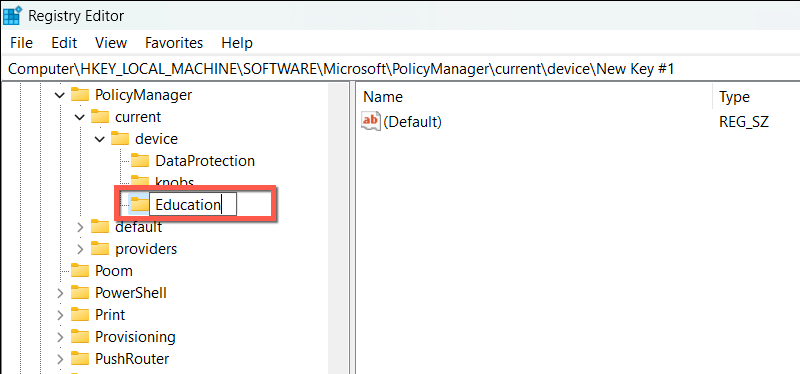
- Name the new key as Education.
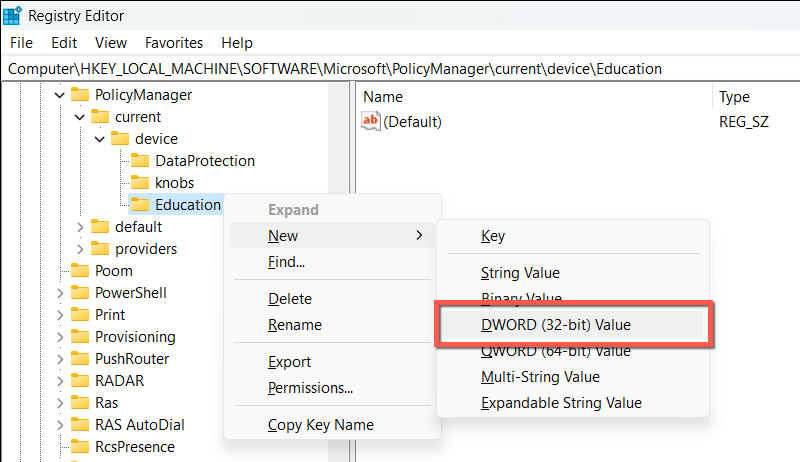
- Right-click the Education key and select New > DWORD (32-bit) Value.
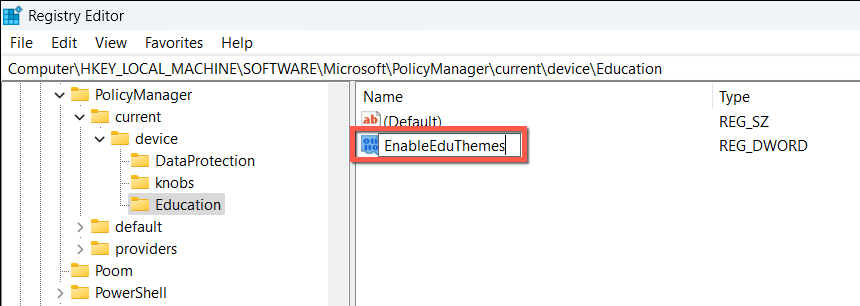
- Name the new value on the right side of the window as EnableEduThemes and press Enter.
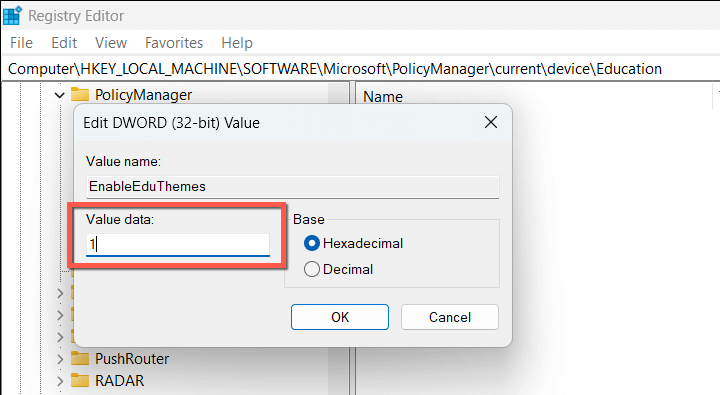
- Double-click the EnableEduThemes key, enter 1 into the Value data field, and select OK.
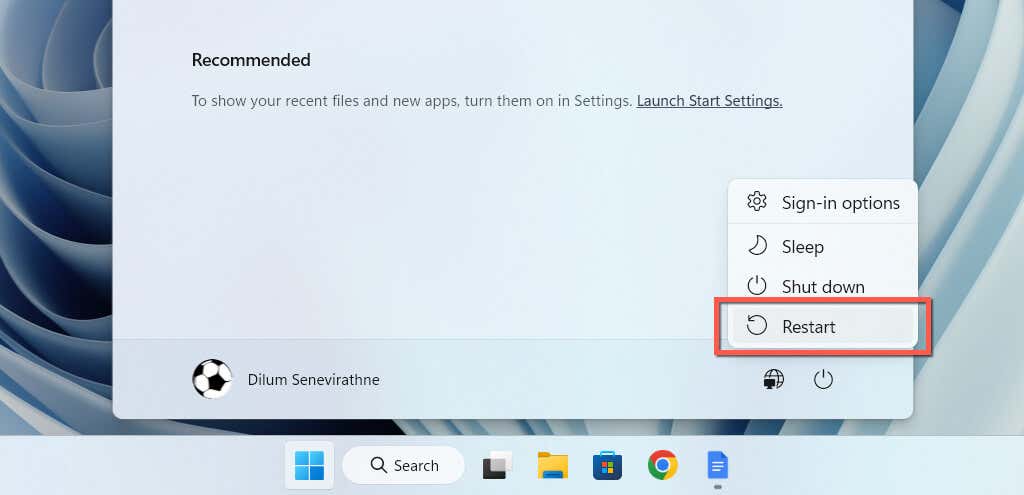
- Exit the Windows Registry and restart your computer.
Visit the Theme’s management screen in Windows 11, and you should be able to find the new themes under the Current themes section.
Use Themes to Personalize Your Windows 11 Experience
By following the methods we’ve shared, you can conveniently access a range of free and hidden themes for your PC. From nature scenes to abstract designs, you can choose a theme that fits you just right. Give them a try and enjoy a new level of creativity and productivity on Windows 11.


