This will work with most versions
If you want to know how to make a background transparent in Photoshop, you’ll need to follow a few different steps. Thankfully, the whole process is straightforward once you get to grips with the right tools. We’ll guide you through everything you need to know, from removing a background from an image, to saving it with a transparent background.
For this tutorial, we’ll be using Adobe Photoshop CC, but you’ll be able to follow these steps with most versions of Photoshop.

How To Remove a Background From an Image in Photoshop
Before we can make a background transparent in Photoshop, we’ll need to remove the existing background. If you have already done this, you can skip this step and follow the guide in the next section instead.
It’s well worth learning this step though, so you might want to read it anyway to learn more about how to use Photoshop.

For this guide, we’ll be using a free stock photo on Pexels. Follow the steps with your own image to remove the background.

- First, find your photo on your PC, right click the image, and click open with > Adobe Photoshop.
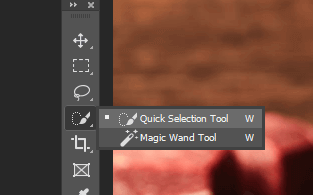
- Once your photo is in Photoshop, you’ll need to remove the existing background. The best way to do this is to use the Quick Selection Tool. Click the fourth icon down on the Photoshop toolbar and then select Quick Selection Tool to activate it. After, you can just press W to start using it.

- The Quick Selection Tool is a powerful feature in Photoshop that can calculate the edges of an image for you. With this, we want to highlight the object in the foreground. That way we can copy that part of the image and remove the background behind it. Simply click and drag quickly around your object and you’ll have a line around it.
Whilst the Quick Selection Tool does a great job at highlighting edges, it’s not perfect. You’ll need to adjust your selection a little.
Below are some controls that can help you to refine your edges.
- Hold Alt + click/drag to delete areas
- Hold shift + click/drag to add areas
- Use scroll wheel to zoom in to get closer to your object
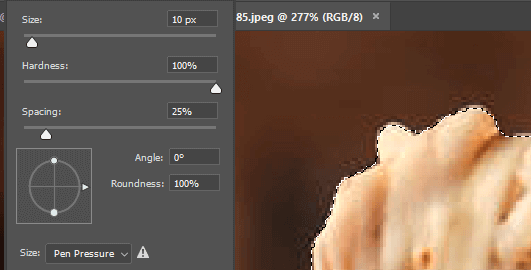
To get the best cut, you should zoom in as close as possible and adjust the brush size. For smaller areas, you should click instead of dragging.

- Once you have the selection you’d like, press Ctrl+X. This will cut out the image and you’ll be able to see if there are any areas of your image left behind that you may have missed. In this case, press Ctrl+Z to redo that step. Then simply use the Quick Selection Tool to select that area. Keep doing this until you have the full image selected.
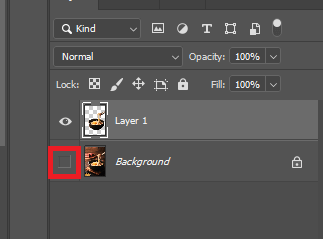
- You now need to press Ctrl+C to copy the image, then press Ctrl+V to paste it onto a new layer.
- Next, press F7 to open the layers tab if it isn’t open already. It should appear in the bottom right of your screen. Click the eye icon next to the background layer to hide it.
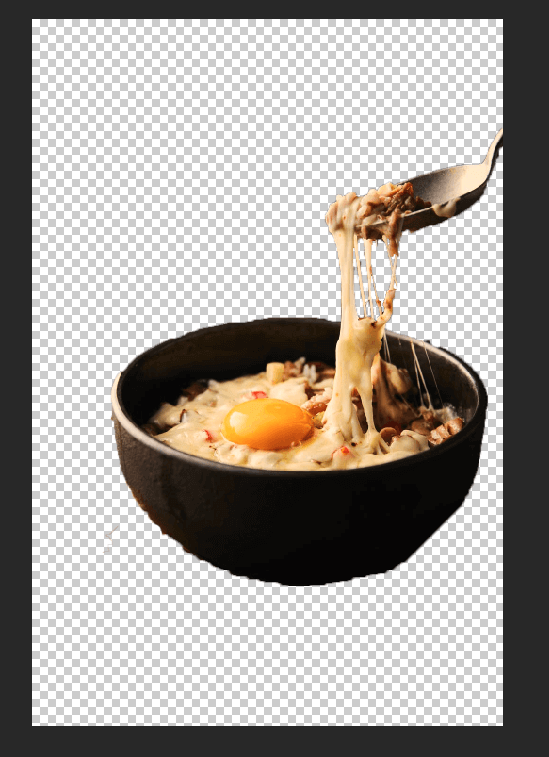
- You will now have removed the background in Photoshop. Before you follow the last step to save your work as a transparent image, you should erase any marks that may have been missed when you cut your image. Press E to access the eraser tool and zoom in to carefully erase any mistakes.
- You can also reselect the Quick Selection Tool by clicking it in the toolbar, and switch it to the Magic Wand Tool. With this, you’ll find it easier to select patches of similar colored pixels on your image. It’s useful to do this so that you only erase areas in your image that aren’t needed.
How To Save An Image With Transparent Background In Photoshop
Only certain file types support transparent backgrounds, so you’ll need to choose the right file when exporting your image in Photoshop. We would recommend using PNG – it’s a popular web format that can support transparent backgrounds, and it can easily be compressed to save storage or online bandwidth.
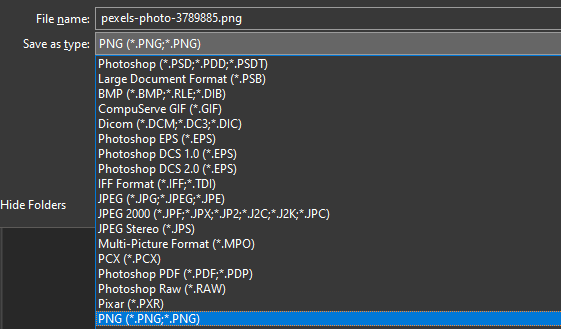
- Press Ctrl+Shift+S to open the Save as window. Click the Save as type: dropdown window and select .PNG.
- Give your image a name. Make sure you keep the .png file extension.
- Click Save.
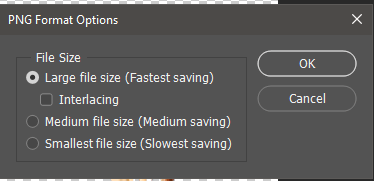
- A new window will appear – you can select Large File Size and then click OK. You will now have a new transparent PNG image on your computer in the location you choose to save it in.
When you upload this photo online, the background should remain transparent. Just note that some websites will not support transparent backgrounds. As an example, if you upload a Twitter profile image that’s transparent, a white background will automatically be added.
Summary
We hope that our guide on how to make a transparent background in Photoshop has helped you. If you get confused along the way, leave a comment below and we’ll reach out to offer some more help.


