The most annoying key on the board
The Numlock key is perhaps the most useless and irritating key on a modern keyboard. One accidental tap and a bunch of your keys are suddenly sprouting numbers. How do you permanently turn off Numlock on a computer?
This is especially a problem in laptop keyboards where instead of a numeric keypad there are numbers printed on your normal keys. And the Numlock is situated somewhere at the top, where you end up pressing it while reaching for the Home button.
Why the Numlock Key Is a Problem
The Numlock key, like the Caps Lock button, is a toggle. If you accidentally press Numlock, can’t you just tap it again to unlock it?
You certainly can, but that’s only good for a one-off situation. If you find Numlock getting enabled repeatedly on your PC, you need a more permanent solution.
Not only does the Numlock interrupt your flow and mess up whatever you are working on, but wastes an inordinate amount of time and effort in cleaning up the mistake. And unlike the Caps Lock key, it’s almost never useful, since barely anyone uses a number pad.
Why Does Numlock Keep Getting Activated On My Computer?
There are three possible reasons why you see the Numlock indicator pop up frequently on a PC.
First, by accident. This is the most common reason, as many fast typists end up hitting the Numlock key by mistake.
It might also be enabled by default. While the standard is to keep the Numlock deactivated on startup, a bug – or a change in the relevant setting – can enable it every time you boot your PC.
And finally, it can be a software issue. Very rarely, there is a problem in which the Num Lock gets activated without the physical key being pressed. This is the trickiest issue to deal with, as the source of the error is hard to determine.
How to Turn Off Num Lock
The problem faced by most people is accidentally tapping the number lock key while typing. This is easily fixed by disabling the key using AutoHotkey.
Fix 1: Disable the Num Lock Key Using AutoHotkey
AHK is a lightweight utility for remapping keys and creating custom hotkeys for Windows 10 and 11. And while it uses scripts, simple things like creating key binds take very little code. For example, we can disable Numlock using a single line:
NumLock::Return
Easy, isn’t it? Here is a step-by-step method for installing AutoHotkey on your computer and running this script.
- First, download AutoHotkey from the official website.
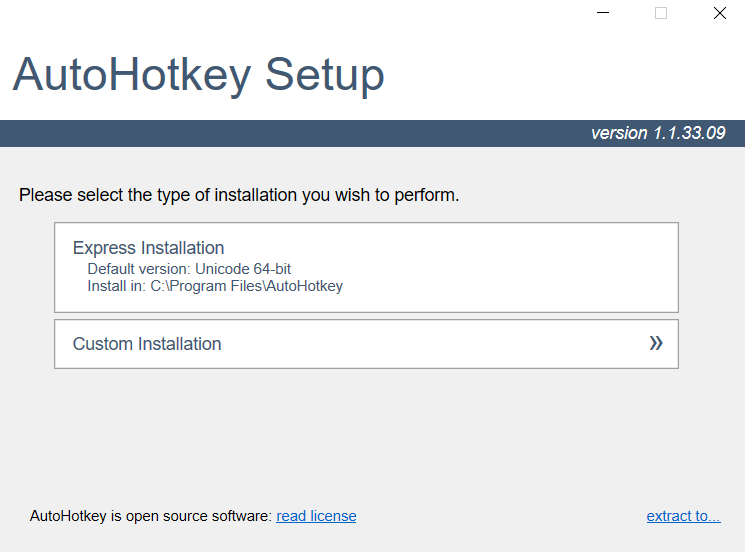
- Run the downloaded setup to install AutoHotkey on your PC.
- Once AutoHotkey is installed, you can create an AHK script anywhere. Right-click on the empty space in any folder and select New > AutoHotkey Script.
- Give it an appropriate name and hit enter. To actually edit the script, right-click on the file and select Open with > Notepad.
- There is a bunch of stuff already in the file, setting things up for you. Ignore that, and enter the following in a new line:
NumLock:: Return
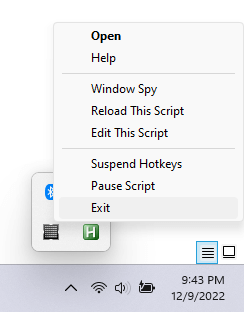
- Save the file and exit Notepad. To apply the script, double-click on it. The Numlock key will no longer work. You can close the script at any time by right-clicking on the AHK system tray icon and selecting Exit.
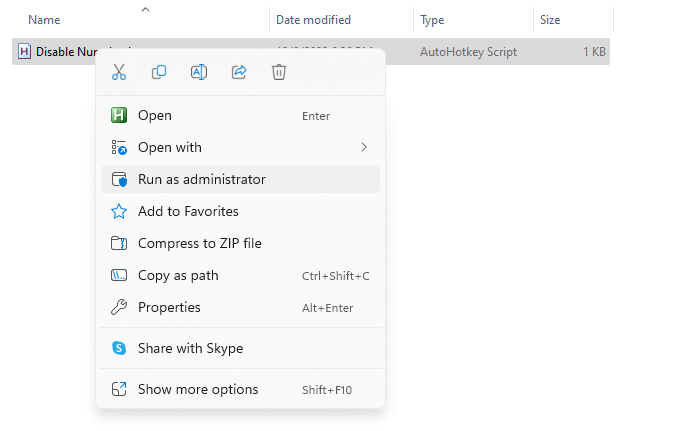
Note that some applications (video games, mostly) might interfere with AHK, so it’s often a good idea to run the script by right-clicking on it and selecting Run as Administrator. This gives the script priority, allowing it to run over any application.
Fix 2: Disable the Num Lock Key Using SharpKeys
AutoHotkey is not the only way to remap keys in Microsoft Windows. You also have SharpKeys, which is a GUI-based app that does basically the same thing.
SharpKeys works by directly making changes to the Windows registry instead of intercepting keypresses like AHK. As such, it doesn’t have quite the flexibility afforded by AHK’s scripting system, but we don’t need anything fancy to remap a single key.
- Download the utility from its GitHub page. You can grab a zip file that acts as a portable app, or an MSI installer if you want.
- Run the app once you have installed or extracted SharpKeys.
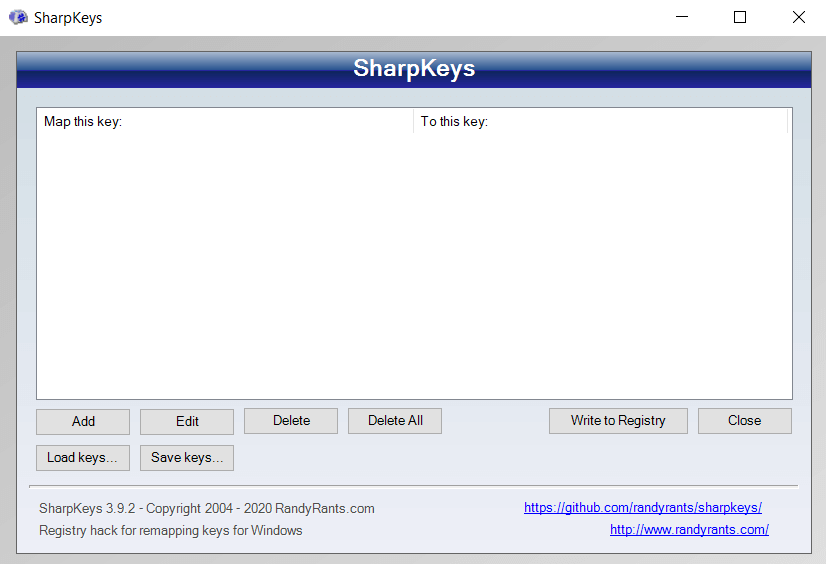
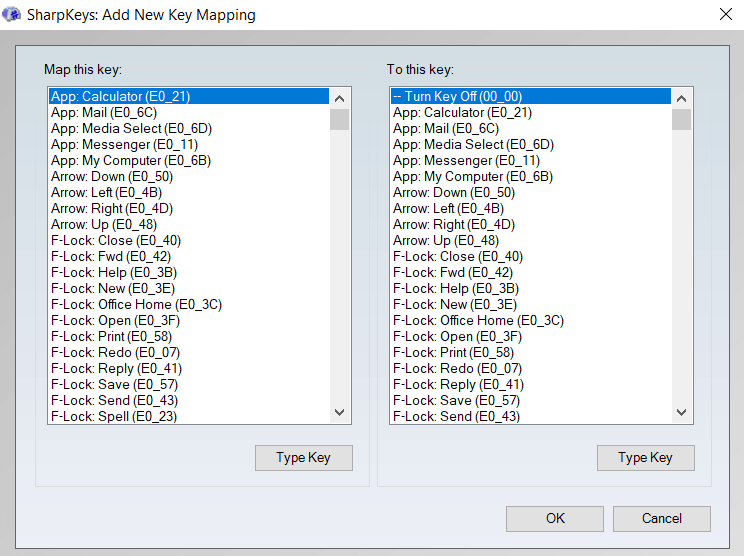
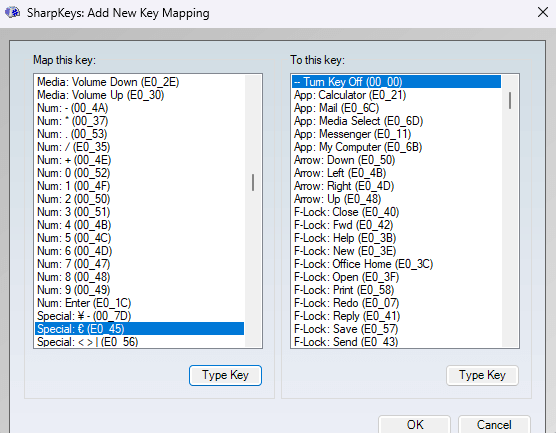
- The main window will list all key bindings you choose to make in SharpKeys. To create a new one, click on the Add button. This opens the Add New Key Mapping window, with parallel lists of keys and functions you can replace them with.
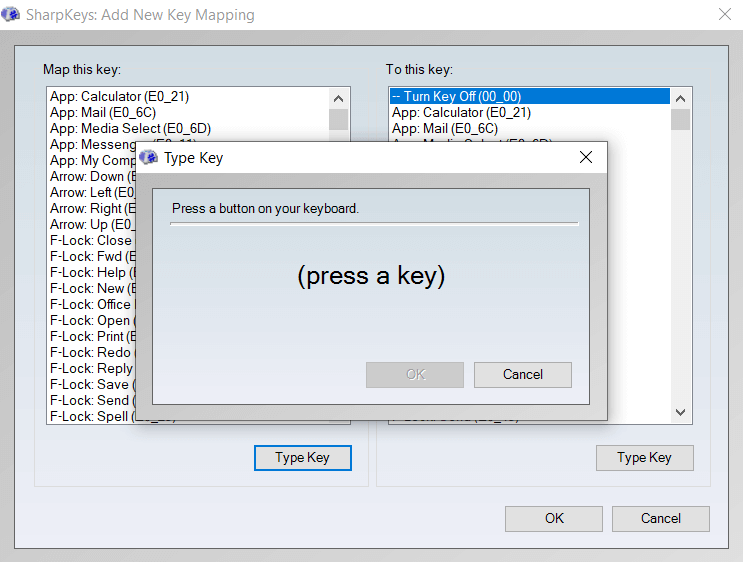
- Manually finding a specific key can take a while, so select Type Key below the left pane and hit the Numlock key on your keyboard. After SharpKeys has detected the keypress, select OK to continue.
- The default action on the right is Turn Key Off, which is exactly what we want. Just select OK. again.
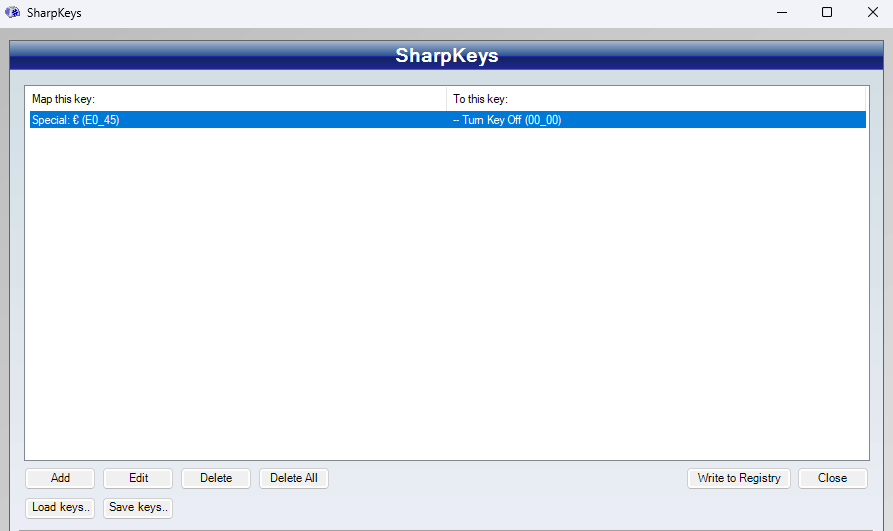
- As you can see, the main screen now has a new entry describing the new change. To actually apply this change, use the Write to Registry button.
The effect is the same as with an AHK script – the Numlock key of your keyboard will no longer work. This one is a bit harder to undo than a script though, as you need to fire up SharpKeys again and delete the change, rather than just quit the program.
Fix 3: Set Default Num Lock State to Off in Registry
For many people, the problem is not that they accidentally hit the Numlock key, but rather that Numlock starts enabled by default on their computer.
Let’s make one thing clear at the very beginning – changing the default behavior of Numlock is not a simple fix. It requires a modification of the relevant setting from the BIOS or the registry.
Honestly, this is not even a problem that requires a fix, as you can always disable Numlock manually every time you start your computer. Better yet, the AHK script we describe in Fix 5 takes care of disabling Num Lock automatically, regardless of whether it was triggered by default or not.
If you still want to tinker with the Registry setting, here is the step-by-step method to do so.
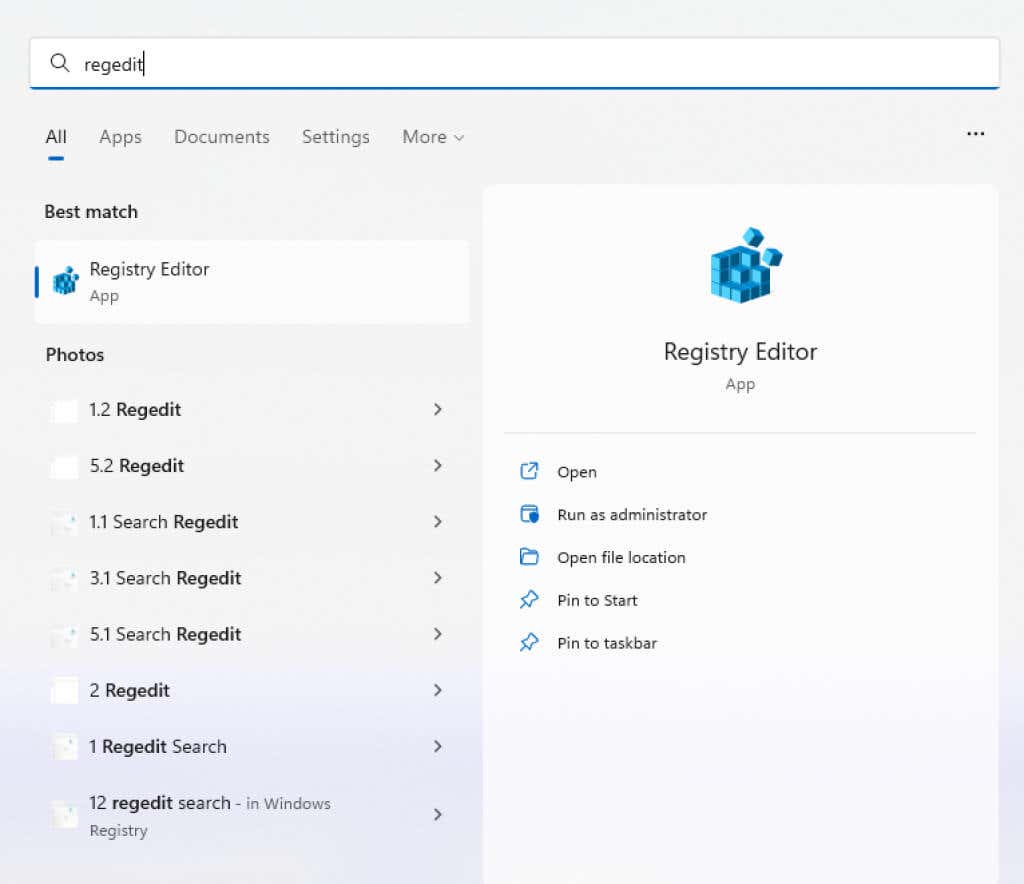
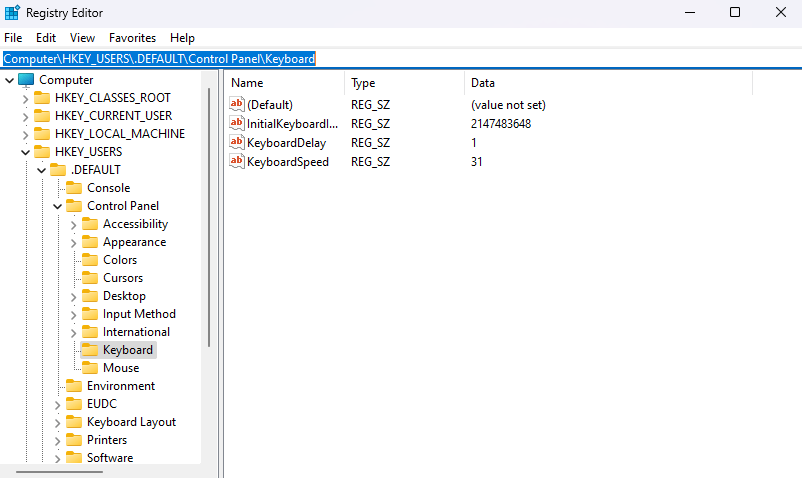
- Open the Registry Editor by searching for Regedit in the Start Menu.
- Navigate to HKEY_USERS\.Default\Control Panel\Keyboard\ in the left panel. You can also append this address to the root in the address bar at the top like this:
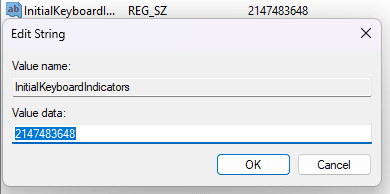
- You will see a bunch of keys on the right side including one named InitialKeyboardIndicators. Double-click on this entry to modify its value.
- Change the value to 0 to automatically turn Numlock off at startup. Select OK and close Regedit to save the changes. The new setting will take effect when you next reboot the computer.
Fix 4: Set Default Num Lock State to Off in BIOS
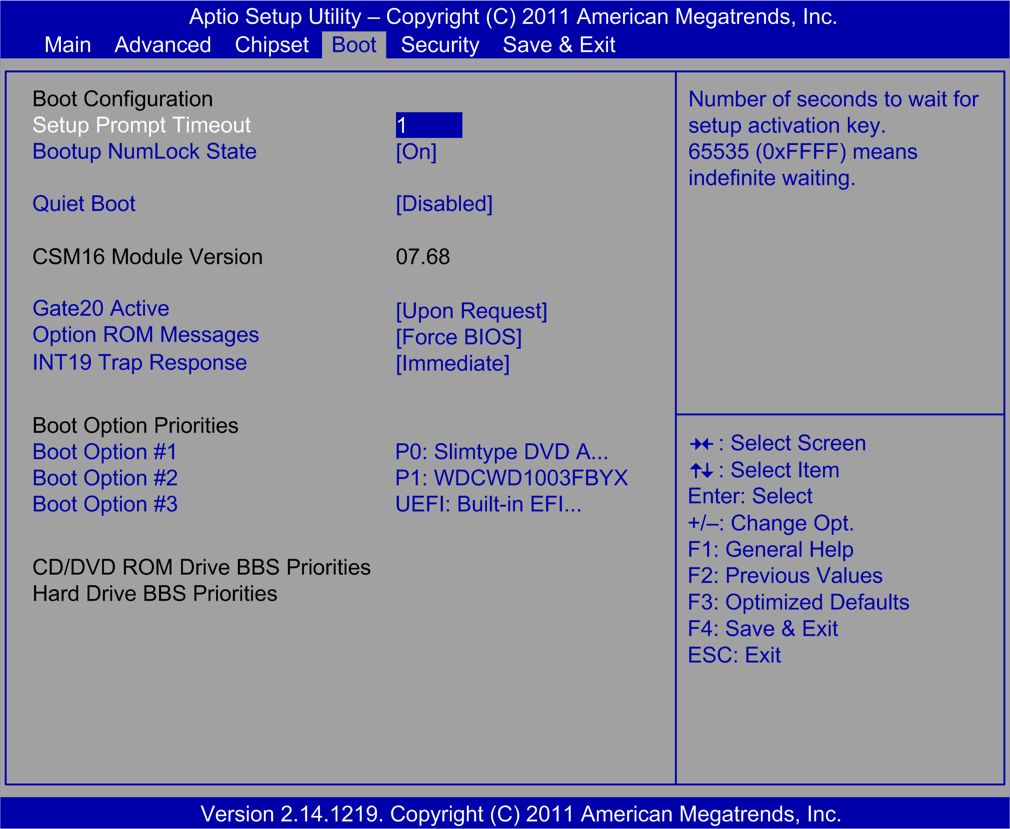
On most laptops and desktop computers, it is also possible to modify the default state of Numlock from the BIOS settings. This is usually a more permanent fix than the Registry edit, which can often be undone by Windows.
There is no specific walkthrough for changing the Numlock state in the BIOS though, as BIOS layouts differ from motherboard to motherboard. Just poke around in the BIOS settings of your computer and check for anything that says Num Lock – that is usually the default setting.
Fix 5: Keep Num Lock Constantly Disabled With AutoHotkey
We have already seen how to remap the Numlock key to nothing using AHK, but what about keeping Num Lock disabled entirely? There are two ways to go about this.
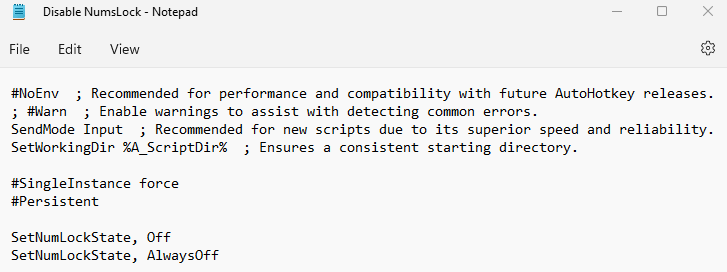
The first method is to use AHK’s built-in SetNumLockState function. Using this you can force the Numlock to stay disabled, regardless of how many times an app (or accidental keypress) tries to enable it. Just put the following lines into a fresh AutoHotkey script and save it:
#SingleInstance force
#Persistent
SetNumLockState, Off
SetNumLockState, AlwaysOff
Now run this script as Administrator. It will no longer be possible to enable Numlock on your computer, with the key or otherwise. Even if Numlock was enabled before running the script, it will be turned off.
In case you want to use Numlock again, you can always pause or suspend the script from the system tray icon.
Now on some systems, the AlwaysOn feature will fail to work consistently. This is usually when the state is triggered by an app rather than a key.
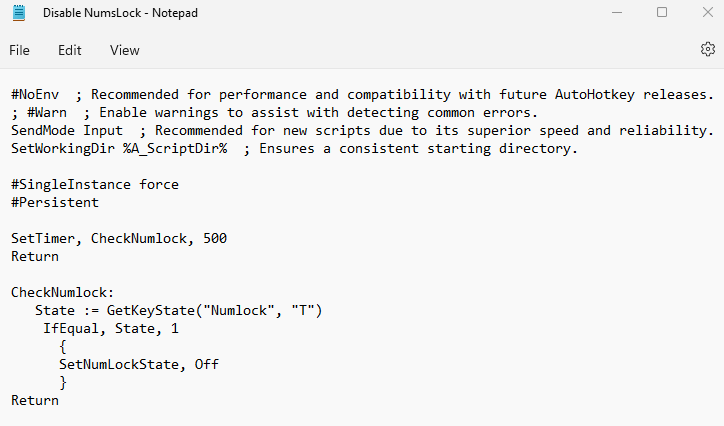
For these situations, a slightly more complex script is required. Basically, we need a timer that will check the state of Num Lock every few hundred milliseconds, turning it off in case it is found to be enabled. Sounds complicated, but is very simple in practice.
#SingleInstance force
#Persistent
SetTimer, CheckNumlock, 500
Return
CheckNumlock:
State := GetKeyState(“Numlock”, “T”)
IfEqual, State, 1
{
SetNumLockState, Off
}
Return
Run this script as Administrator and Numslock will never be able to activate on your computer again.
What Is the Best Way to Turn Off Num Lock on Your Computer?
The most foolproof way to completely deactivate Numlock on your PC – and keep it that way – is to use an AutoHotkey script that continuously checks the state of Num Lock and disables it when needed.
That being said, most users don’t need such a comprehensive script. If all you want is to disable the physical Numlock key on your keyboard, a one-line AHK script is enough.
For modifying the default state of Numlock at startup, you either need to delve into the registry or make changes through the BIOS settings. You can also just tap it once every time you boot your PC, in case both of those options seem too technical for you.


