You basically have 3 options
The best way to deal with a virus on your computer is to run your antivirus program and let it remove the malicious files. Most antivirus programs are adept at searching for and destroying malicious files, clearing out the infection, and restoring your computer to a working state.
But what if your antivirus doesn’t do the job? How do you remove stubborn malware from your PC when your antivirus fails?
How To Remove Stubborn Malware
A virus that won’t budge is no fun. More than that, it is potentially dangerous and could lead to other issues (if it hasn’t already). If you have a virus, the potential for data loss, including passwords, banking information, and so on, is heightened.
That’s not to say that the virus is stealing your data. Some malware types turn your computer into a zombie as part of a wider botnet, while others will spam your screen with popups for malware removal tools that cost a lot but do absolutely nothing.
You have a few options to remove stubborn malware from your computer.
1. Upgrade your antivirus program and rescan.
2. Boot into Safe Mode and rescan.
3. Factory reset your operating system.
Let’s look at the options in order.
Upgrade Your Antivirus and Rescan Your System
The first option is the most basic, but it is the easiest to achieve. If you have a virus, it suggests that your existing antivirus program didn’t catch the malware entering your system, or that the malware disabled your antivirus before infecting your system.
Either way, you should rescan your system with a different antivirus program and see if that removes the virus.
Bitdefender Antivirus Free
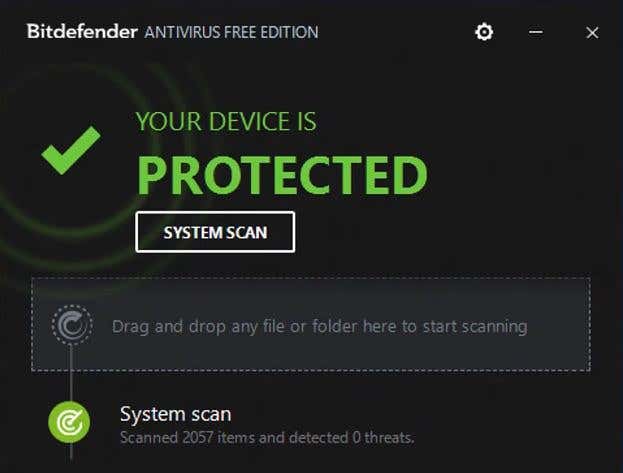
First up, download and install Bitdefender Antivirus Free. The free version of Bitdefender’s antivirus program comes highly recommended and scores consistently well in malware removal testing.
Scan your system with Bitdefender Antivirus Free for any lingering malware and remove any nefarious entries.
Malwarebytes
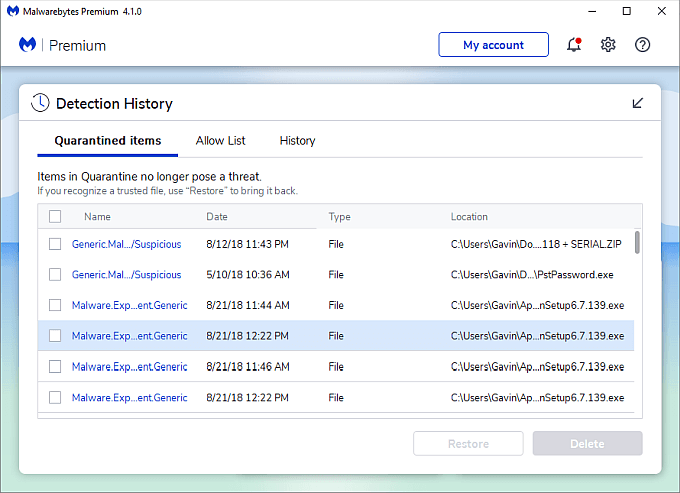
Your next stop is Malwarebytes, another excellent anti-malware tool. You can use the free version of Malwarebytes to scan your system and remove any viruses Bitdefender Antivirus Free misses.
As with Bitdefender, download and install the latest version of Malwarebytes, then scan your system. The latest version of Malwarebytes (version four at the time of writing) is faster than ever before and can intelligently scan your system in minutes.
Boot Into Safe Mode & Rescan Your System
Depending on the type of malware on your system, you might struggle to download and install antivirus software. If that is the case, you should boot Windows into Safe Mode and then attempt to scan for any viruses.
Safe Mode is different from your regular Windows installation in that it doesn’t load the full spectrum of services and drives, and is used primarily as a diagnostic tool. Since it doesn’t load the full array of Windows servers and drivers, there is a strong chance the malware lurking on your system will also fail to run. If the malware fails to boot, it cannot block your attempts to remove it.
There are several methods you can use to enter Safe Mode on Windows 10. The easiest option is to type advanced startup in your Start Menu search bar and select the Best Match. Now, under Advanced Start-up, select Restart Now.
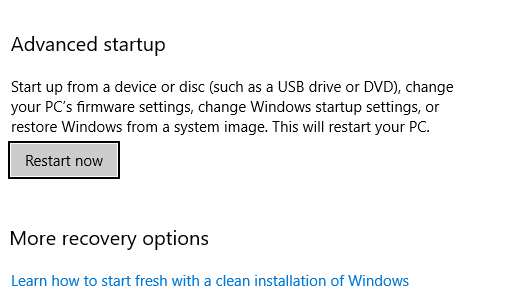
Your system will restart as soon as you hit Restart Now. When it reboots, you’ll see three options: Continue, Troubleshoot, and Turn Off Your PC. Select Troubleshoot, followed by Advanced Options. From the Advanced Start-up Settings, select Restart, then Safe Mode.
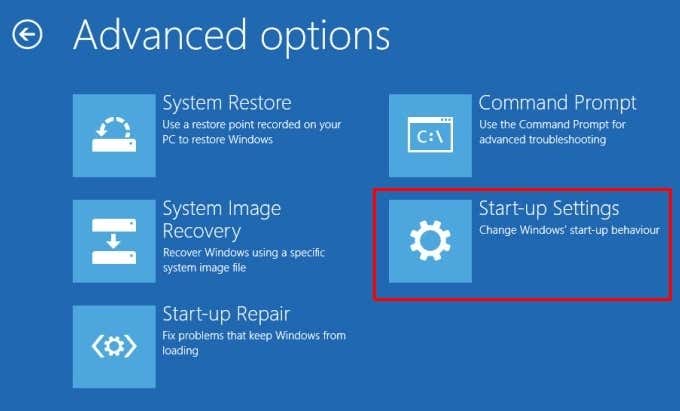
Once you boot into Safe Mode, you can run the antivirus programs from the first section of the article. As Safe Mode is running fewer services and drivers, including those relating to the malware, the antivirus programs are more likely to uncover and remove any dangerous files.
Check out our guide on removing malware before Windows boots for more information.
Factory Reset Windows 10 To Its Original State
If the malware still doesn’t shift, you can attempt to restore Windows 10 to its out of the box state. That is to say, you can factory reset Windows 10 to remove all files and all data, obliterating the malware in the process. Of course, factory resetting Windows 10 involves removing all files to ensure any traces of the virus also evaporate.
There are several factory reset options in Windows 10. The best option is the standard factory reset, which allows you to keep or remove all of your personal files along with your Windows installation.
Remove Everything
Removing stubborn malware requires a strong response, and the Remove everything option is the nuclear option. Remember, this will remove all files from your computer. You should back up your personal files to a separate drive before proceeding.
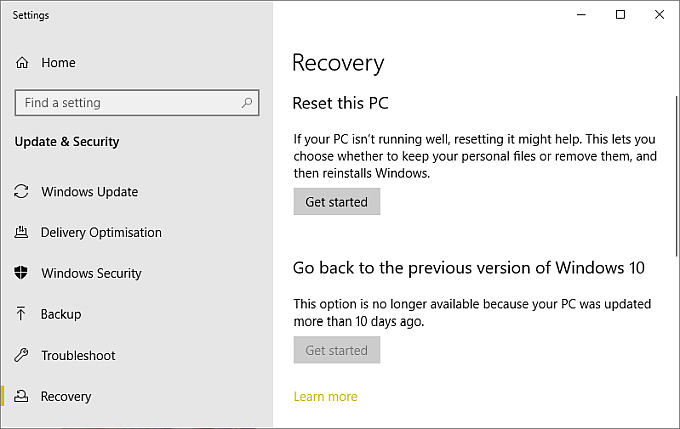
Head to Settings > Update & Security > Recovery. Under Reset this PC, select Get Started. Next, select Remove everything.
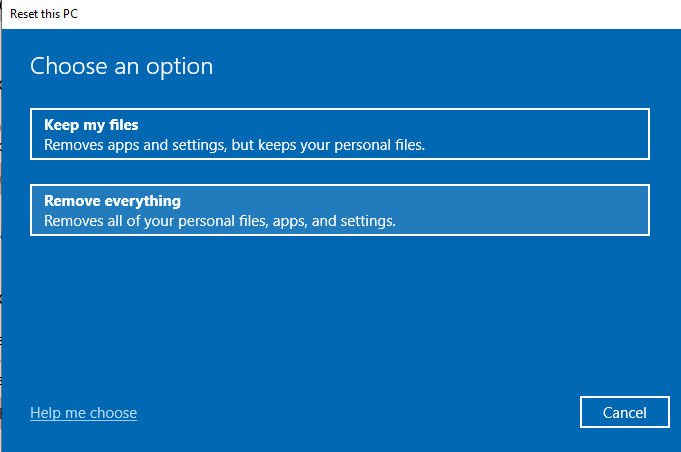
You’ll now encounter two more options: Data erasure, and Data drives. The Data erasure option removes all of your files without securely wiping the drive. The Data drive wipes all drives connected to your machine, including external drives and recovery drives. Do not choose this option as it will wipe every drive currently connected to your machine.

Confirm your options, then proceed to factory reset your machine.
Before restoring your data to your nice and clean Windows 10 installation, scan the external drive with Malwarebytes to ensure the files are virus-free, stopping the chance of reinfection.
Are You Finding Removing Malware Difficult?
Removing a virus that doesn’t want to shift is painful. It comes with worry for your data and eats into your valuable time. Follow the steps above, and you should remove your stubborn malware issues!
If you are still struggling with malware, check out our guide on how to remove malware completely with free tools. And if that doesn’t work, you should consider scanning your system for a rootkit.


