Great for graphics designers or media creators
Have you ever wanted to copy a color from your screen and use it for your projects? Whether designing a website, editing an image, or creating a presentation, you might need to find the exact shade of a color that catches your eye. But how do you do that without guessing or through trial and error?
That’s where the Windows Color Picker comes in handy. It’s a free utility tool from Microsoft that lets you pick any color from any application on your Windows 10 PC. You can then copy the color code in different formats and use it according to your needs.
We’ll show you how to install and use the Windows Color Picker on your Windows PC below.
What Is the Windows Color Picker and What Is it Used For?
The Windows Color Picker is a tool that lets you pick any color from your screen and copy its code in different formats. It’s useful for anyone who works with colors, such as designers, developers, artists, or educators.
The color picker works with any application on your Windows PC. You can use it to find out what colors are used in a logo, an image, or in the app you’re using. You can also use it to create custom themes, palettes, or gradients for your projects.
Once you’ve picked a color, you can copy the color code in different formats, such as HEX, RGB, HSL, or CMYK. Next, you can adjust the color value with sliders or enter values with your keyboard. Finally, you can save the colors you picked to a palette and export them as a text file.
How to Install the Windows Color Picker
The Windows Color Picker is part of the PowerToys suite, a collection of useful tools for Windows 10 and Windows 11 users. You can download PowerToys from Microsoft’s website or via the Microsoft Store for free.
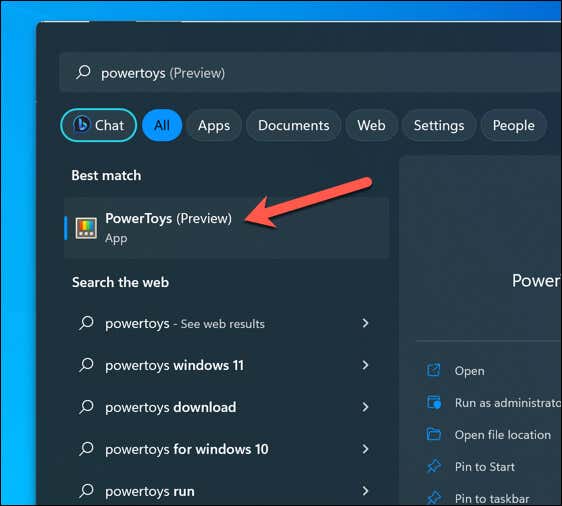
After the installation is complete, launch the PowerToys app from the Start menu.
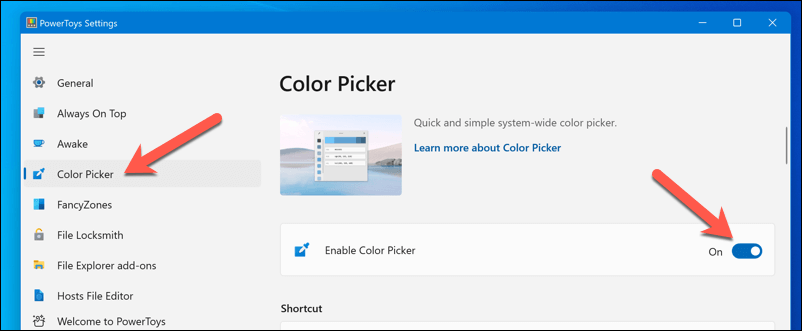
In the PowerToys Settings window, press Color Picker in the menu on the left. On the right, ensure the Enable Color Picker slider is switched to On.
Once Windows Color Picker is enabled, you can start using it immediately.
How to Use the Windows Color Picker
Once you’ve enabled the color picker, you can use it anytime by pressing the keyboard shortcut (Windows key + Shift + C by default) on your keyboard.
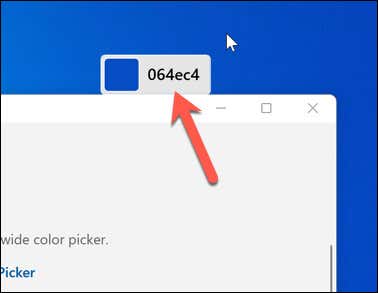
Once you activate the shortcut, a small pop-up box will appear next to your mouse cursor. This box will display a preview of the color you are pointing to in the form of a square and its corresponding hexadecimal (hex) code.
You can point your mouse cursor at any on-screen item to find the color at that position. For instance, you could point it at an image you’ve opened or an application’s user interface element (such as a button or sidebar).
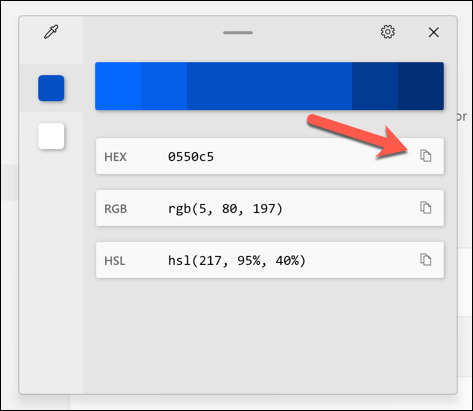
To see additional information about a color on-screen, simply hover over it and press the left mouse button. This action will prompt a window to appear, providing you with the hex color code, RGB (red, green, blue) value, and HSL (hue, saturation, lightness) value of the selected color.
To copy one of these values as a text string to your clipboard, hover over it and select the Copy icon.
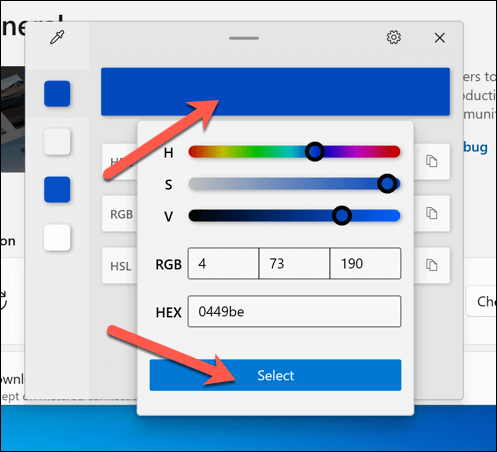
The color value you have chosen can be further customized within the color picker by clicking in the center of the large color bar at the top of the window. This action will take you to a new menu with values you can adjust with either your mouse or manually using your keyboard.
When you’re done, click Select. The color will be added to the menu on the left for you to use or export later.
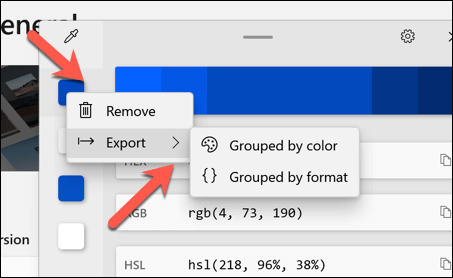
If you need to remove a color from the palette on the side of the window, right-click the color square and select Remove. To export the palette as a text file, right-click any color square and select Export instead.
If you choose to Export, you can select Grouped by color or Grouped by format, depending on how you’d like the file to be exported.
How to Customize the Windows Color Picker
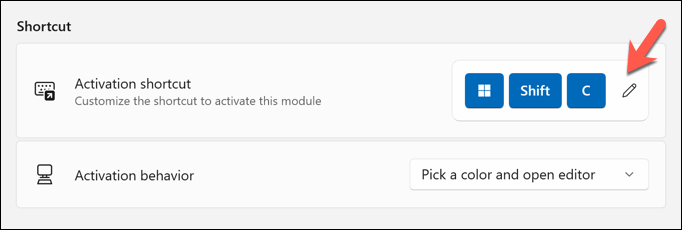
The Windows Color Picker also allows you to customize some of its settings and features. For example, you can change the behavior of the activation shortcut, the default format of the copied color, and the appearance of the editor window.
To customize the Windows Color Picker, open PowerToys Settings and select Color Picker in the sidebar. You’ll see a list of options you can tweak according to your preferences.
Here are some of the settings that you can currently customize:
- Activation keyboard shortcut: You can change the keyboard shortcut that activates the color picker. By default, it’s Windows key + Shift + C, but you can choose any combination of keys that works for you.
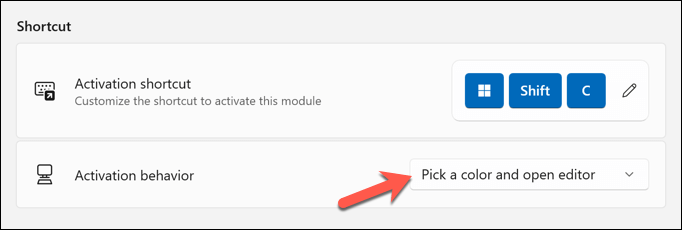
- Behavior of the activation shortcut: You can choose what happens when you press the activation shortcut. You can either open the color picker with the editor or without it.
- Default format of a copied color: You can choose which format of the color code you want to copy to your clipboard by default. You can choose from HEX, RGB, HSL, CMYK, and more.
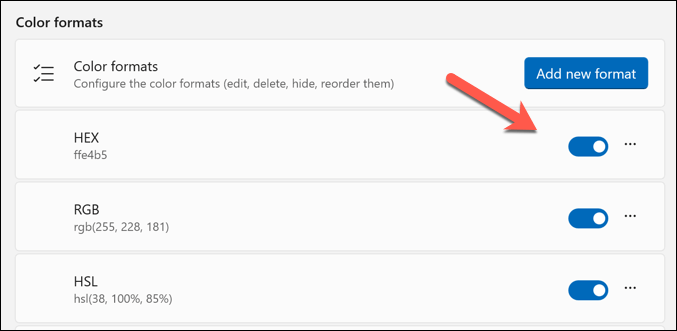
- Visible color formats in the editor window: You can choose which color formats are visible in the editor window and in what order they appear. You can also change the size and opacity of the editor window.
You can experiment with different settings and see what works best for you. Any changes you make aren’t permanent—you can repeat these steps to restore them afterward.
Using the Windows Color Picker
If you’re a graphics designer or media creator, using the Window Color Picker is a great way to quickly identify colors (and their representative color codes) in different formats and use them in future projects.
However, there are other tools you can use to help you pick out colors. For instance, you could use a color picker extension in Chrome to identify colors you like in Google Chrome (or Microsoft Edge. Also, try inverting colors in pictures to find striking colors for a more dramatic effect in your images.
Are you a graphics designer looking to make a professional document? Then, explore some free tools to make amazing infographics.


