Don't fret, it's actually super easy
Wanting to format your SD card, USB drive, or external hard drive is a good move. But what if you encounter an error that says “Windows was unable to complete the format” along the way?
Getting this error message can cause you to panic. That, or it might make you want to pass up the task.
But don’t fret. Finding a way to fix the problem is easy-peasy!
In this post, we’ll learn what to do. This way, you won’t feel discouraged whenever you want to format your drive.
Using Command Prompt
Windows’ Command Prompt can help you out with this. After all, the command prompt is the most basic way to format a hard drive.
So first up is to launch Command Prompt from the Windows menu.
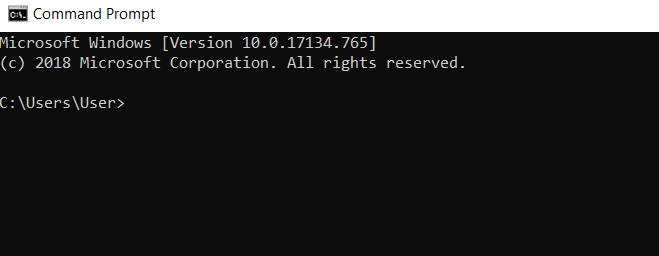
Then type the following command and hit enter: format C: /fs:ntfs

In this case, I chose to format drive “C”, with “ntfs” as the file system.
This is why I entered the specific command. I chose it because, in my case, this drive is problematic. It doesn’t have to be the case with you.
If your own drive C doesn’t need formatting, you may choose to leave it be. You can change drive C into the drive letter that you want to format.
For example, the drive letter you want to format is drive “J”. And the file system you want to have on on the drive is “FAT32”. Therefore, what you should be entering in the Command Prompt window is this: format J: /fs:FAT32.

Using Disk Management
One of the relatively easy ways to go about this is to turn to the Windows Disk Management tool. It’s the program that can help you manage the different drives on your computer.
To begin, fire up Disk Management from the Windows menu.
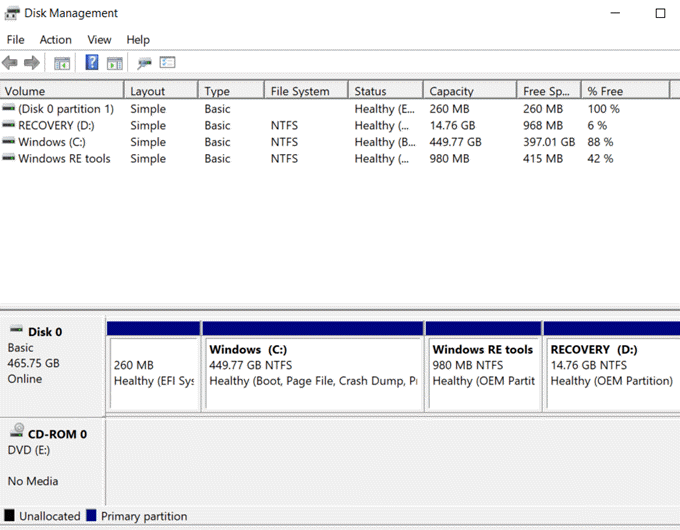
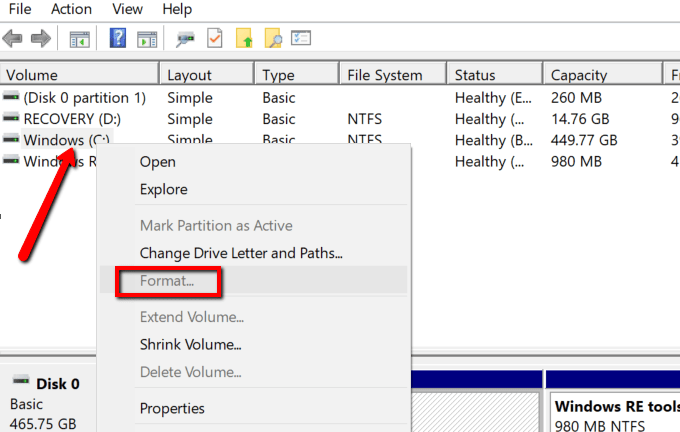
Choose the drive where you received the “Windows was unable to complete the format” error message. Then right-click and choose Format.
Using Third-Party Tools
You can also seek the help of third-party tools for this. A benefit of going with this approach is that you will be using tools that were specifically designed for the purpose.
If the Windows tools mentioned above have failed to resolve this error, another practical solution is to let these tools work for you. Just make sure the ones you download and install in your system are 100% safe. The ones below have been checked by us and are clean.
EaseUS Partition Master
It’s a disk management software for Windows and Mac users. Its free version can handle the task seamlessly. And if you end up liking how it works and can’t get enough of it, you can turn to a premium version.
So to start, go ahead and launch EaseUS Partition Master.
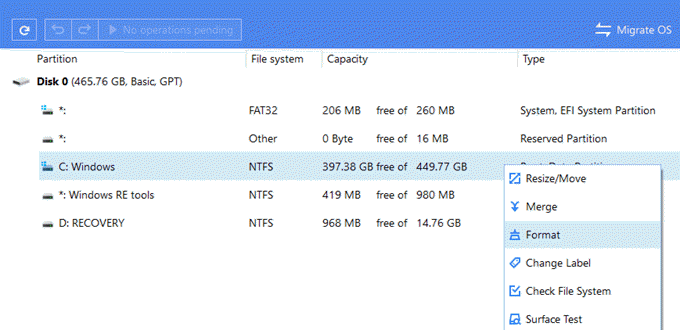
Next, select a disk. Right-click on your selection and choose Format.
AOMEI Partition Assistant
It’s another useful tool that helps you manage partitions. It works for different Windows versions including Windows 7, 8.1, and 10.
With it, you can copy, move, resize, and merge partitions. You can also turn to it to migrate OS and convert MBR/GPT disk with no data loss.
To begin, load up AOMEI Partition Assistant.
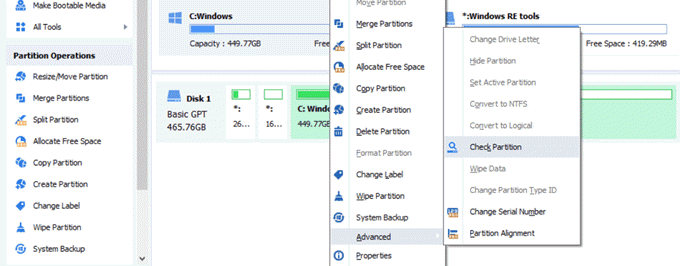
Select a partition and right-click on it to reveal a drop-down menu.
Choose Advanced > Check Partition.
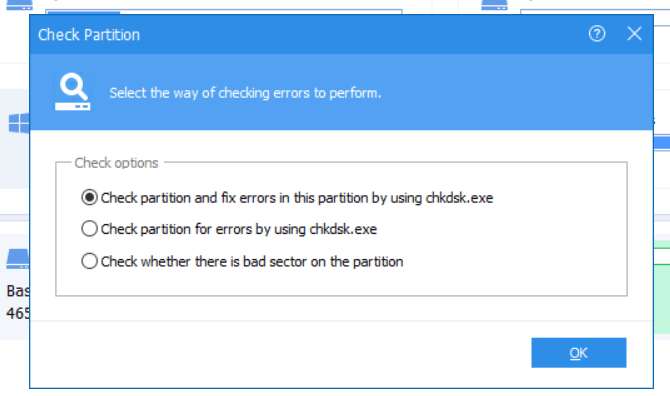
From the Check Options, select Check partition and fix errors in this partition using chkdsk.exe and hit OK.
