Before switching to a different browser
There are any number of issues that could prevent you from loading webpages in Google Chrome, from a broken internet connection to a domain name server (DNS) outage. It can also be caused by a form submission (err_cache_miss) error or, if the problem isn’t on your end, a slow or broken web server that stops responding.
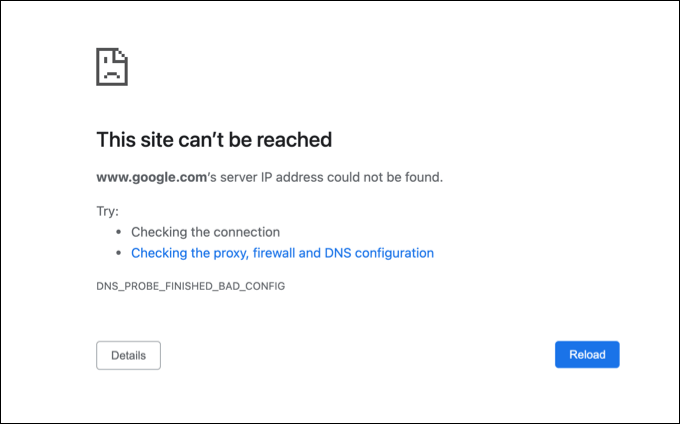
One unfortunate error in Chrome that could stop pages loading, however, is the “dns_probe_finished_bad_config” error. This has a number of causes, but it usually points to a problem with a domain name server configuration. If you want to know how to fix a dns_probe_finished_bad_config error, here’s what you’ll need to do.
What Is a dns_probe_finished_bad_config Error in Google Chrome?
A dns_probe_finished_bad_config error message usually appears in Google Chrome when your device’s DNS server can’t resolve a website address you’ve attempted to visit. In many cases, this is due to some undetected issue with the DNS configuration on your device.
This could be due to a DNS server that’s offline or no longer responding or due to misconfigured network settings on your device. For instance, if the wrong DNS server settings are added, Chrome won’t be able to load websites, resulting in a dns_probe_finished_bad_config error (or similar).
This message is device independent and could appear in Chrome on any device that it supports (including Windows or Mac). Unfortunately, there isn’t a single identifiable cause for this message, but there are some common troubleshooting steps you can take to resolve the issue that should work for most users.
How to Fix a dns_probe_finished_bad_config Error in Google Chrome
There are several ways you can fix a dns_probe_finished_bad_config error in Google Chrome. These include:
- Restarting your device to flush your current network connection.
- Resetting your internet connection, including forcibly rebooting your network router or modem.
- Using the Windows PowerShell or Mac Terminal to reset your network settings.
- Switching to a public DNS server.
- Disabling any third-party ad blocking or web censoring tools or extensions.
- Temporarily disabling any third-party antivirus or firewall software.
While these steps aren’t guaranteed to fix the problem, they should resolve it for most users. If you continue to face issues, you may need to troubleshoot your internet connection further.
Restart Your Device and Network Connection
Before you consider changing any settings on your device, a simple fix for many users is to consider a restart (especially for PC or Mac users). Restarting your device will force it to close and reestablish the current connection to your local network which, in some cases, can help to fix a broken DNS configuration.
You should also consider restarting your network connection by rebooting your network router or internet modem. You may be able to do this via a web interface or through power cycling by switching your router or modem off and on.
If you continue to face DNS issues, however, you’ll need to continue with the steps below.
Reset Your Network Settings on Windows or Mac
While the dns_probe_finished_bad_config error can occur on any device, Windows and Mac users can reset their network settings to try and resolve it. This involves resetting the TCP/IP stack, causing your device to clear any current settings, releasing your existing IP address and establishing a new connection.
On Windows
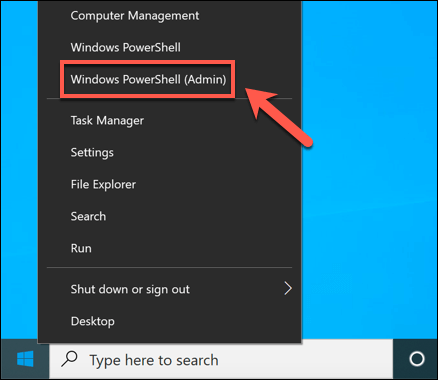
- If you’re using Windows, you can do this using the Windows PowerShell. Right-click the Start menu and select the Windows PowerShell (Admin) option to begin.
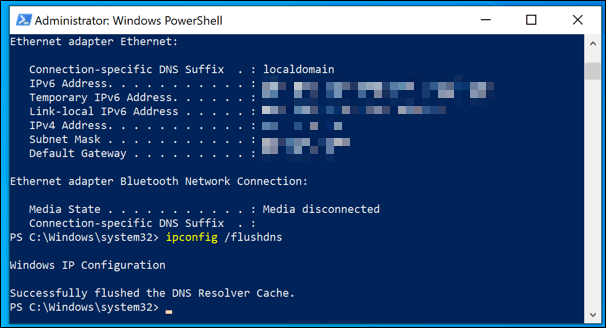
- In the PowerShell window, type the following commands in sequence to reset your network settings:
- netsh int ip reset
- netsh interface ipv4 reset
- netsh interface ipv6 reset
- netsh advfirewall reset
- netsh winsock reset
- ipconfig /release
- ipconfig /renew
- ipconfig /flushdns
- Once you’ve run the commands above, restart your PC.
On Mac
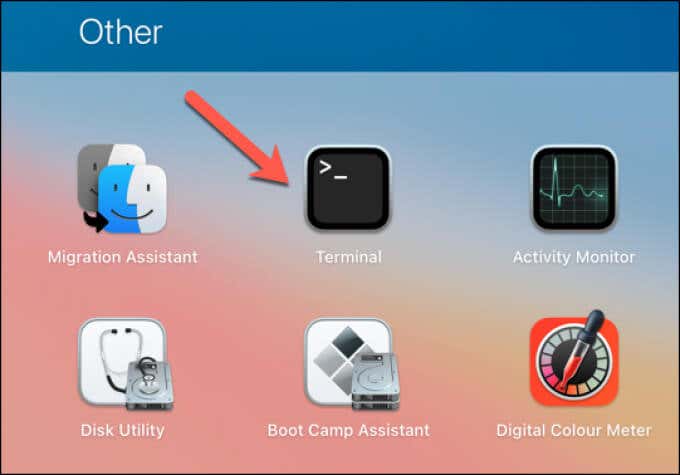
- To quickly reset your network settings on Mac, you’ll need to open a new Terminal window. You can launch this by selecting Launchpad > Other > Terminal.
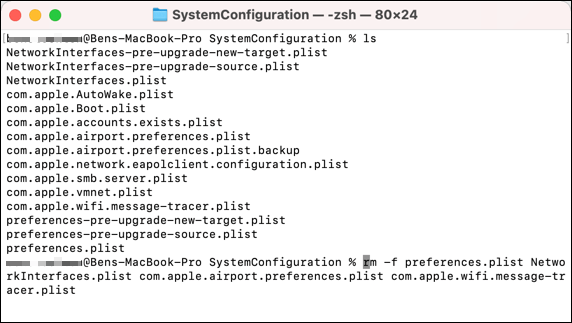
- In the Terminal window, type cd /Library/Preferences/SystemConfiguration/ and select Enter to move directories. Once moved, type rm -f preferences.plist NetworkInterfaces.plist com.apple.airport.preferences.plist com.apple.wifi.message-tracer.plist to remove your network configuration files, then select Enter to confirm.
- Type sudo killall -HUP mDNSResponder ; sudo dscacheutil -flushcache to wipe your DNS cache, then restart your Mac to confirm the changes. You’ll need to reconnect to your Wi-Fi network (if you’re connected wirelessly) after you restart.
Switch to Alternative DNS Servers
Domain name service faults can often be traced back to a faulty DNS server. DNS servers provided by an internet service provider, for instance, are sometimes unreliable and can suffer outages, resulting in a dns_probe_finished_bad_config error (or similar).
To overcome this issue, you can change your DNS provider to an alternative provided by public organizations such as Google.
On Windows
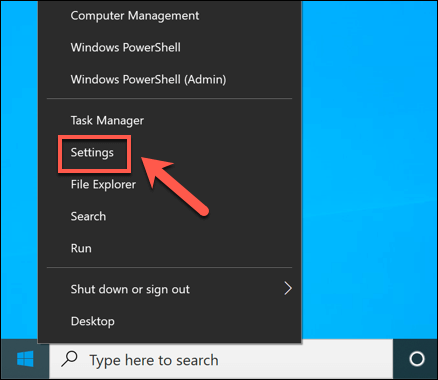
- To do this on Windows, right-click the Start menu and select Settings.
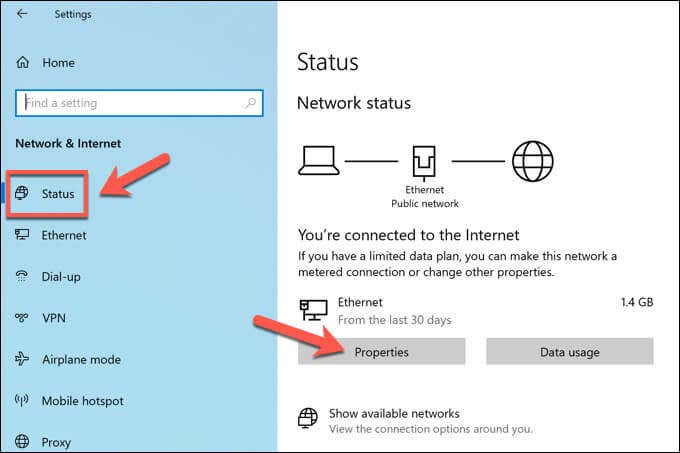
- In the Settings menu, select Network & Internet > Status > Properties.
- In the settings menu for your connection, select the Edit option.
- Select Manual from the drop-down menu, then select the IPv4 slider. In the Preferred DNS and Alternative DNS boxes, type the IP addresses for suitable replacement DNS servers (such as 8.8.8.8 and 8.8.4.4 for Google’s public DNS servers) then select Save to confirm.
- Restart your PC to ensure the DNS server change is successfully applied.
On Mac
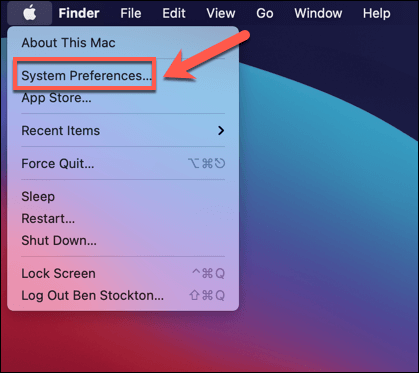
- To do this on a Mac, select the Apple menu icon > System Preferences from the menu bar.
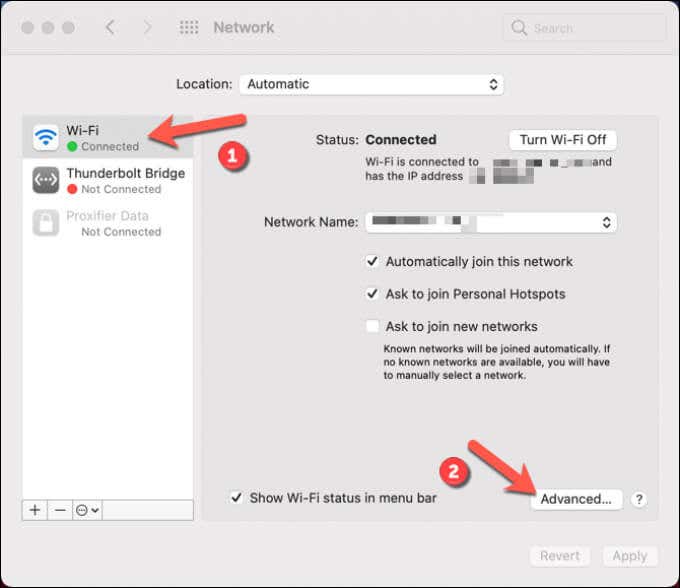
- In the System Preferences menu, select Network, choose your internet connection from the side menu, then select Advanced.
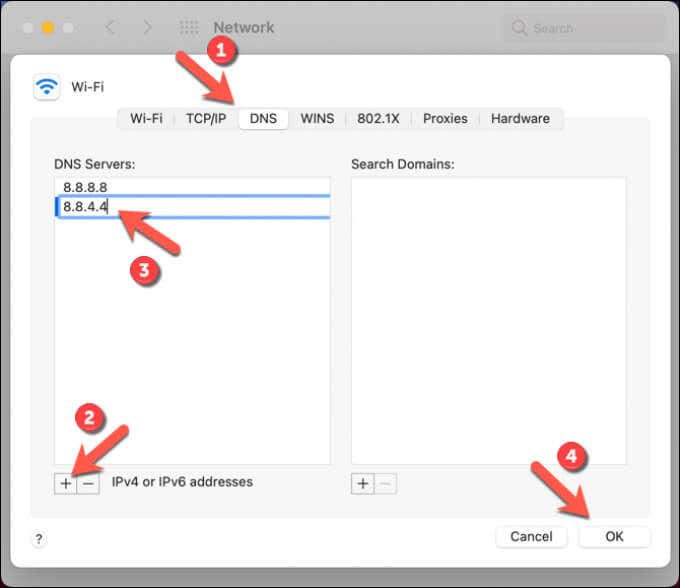
- In the menu, select the DNS tab. Under the DNS Servers section, select the plus icon, then type the IP address for a public DNS server (eg. 8.8.8.8 for Google). Repeat the process to add a secondary DNS server (eg. 8.8.4.4 for Google). Select OK to save, then select Apply.
- With the DNS servers changed, restart your Mac.
Disable Third-Party Tools
Several third-party tools or browser extensions could also have an impact on your network connectivity, resulting in a dns_probe_finished_bad_config error. This includes ad blockers, web censoring tools, antivirus software and firewalls.
Due to the nature of how these tools and extensions work, it’s possible that they could interfere with certain websites loading in Chrome. If you suspect that this is the case, you’ll need to disable or remove them entirely.
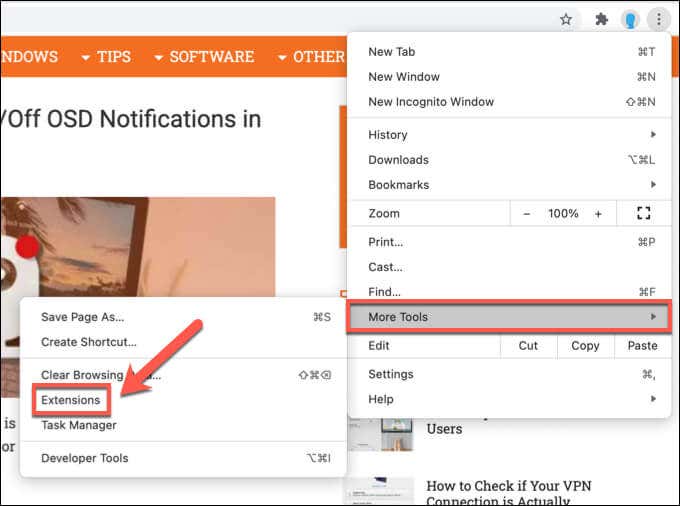
If they’re installed to your PC or Mac, it should be a simple process to remove the software using the Windows Settings menu or via the Finder app. If the tool is installed in Chrome, you should be able to remove the extension directly by selecting the three-dots menu icon > More Tools > Extensions in Chrome.
Fixing Google Chrome Issues
The steps above should help you to fix a dns_probe_finished_bad_config error in Google Chrome. If you’re still having issues, however, you may need to look at switching to another browser to further investigate the issue or consider resetting Google Chrome to default settings.
There are other steps you can take if Chrome stops responding or crashes regularly, including reinstalling it or switching to the Chrome Canary test build version, although this may prove unstable. If you want to optimize Chrome further, however, you may want to enable certain Chrome settings flags to help you do so.


