Need to compare the changes in two documents? Notepad won’t help you, but Notepad++ might. Notepad++ is a powerful text editor for Windows, offering many functionality and customization improvements over its similar namesake.
With the help of a third-party plugin, you can use Notepad++ to help identify differences between two versions of a text document. This is especially helpful when you’re collaborating on projects together or trying to revise some code.
To compare two files in Notepad++, follow these steps.
Installing the Compare Plugin in Notepad++
Unlike Microsoft Word, which allows you to compare Word documents, Notepad++ doesn’t include the ability to compare files by default. Instead, you’ll need a third-party plugin to enable the feature.
The well-named Compare plugin for Notepad++ enables you to view the changes and differences between two text files side-by-side. While it doesn’t come preinstalled with Notepad++, you can install it quickly using these steps.
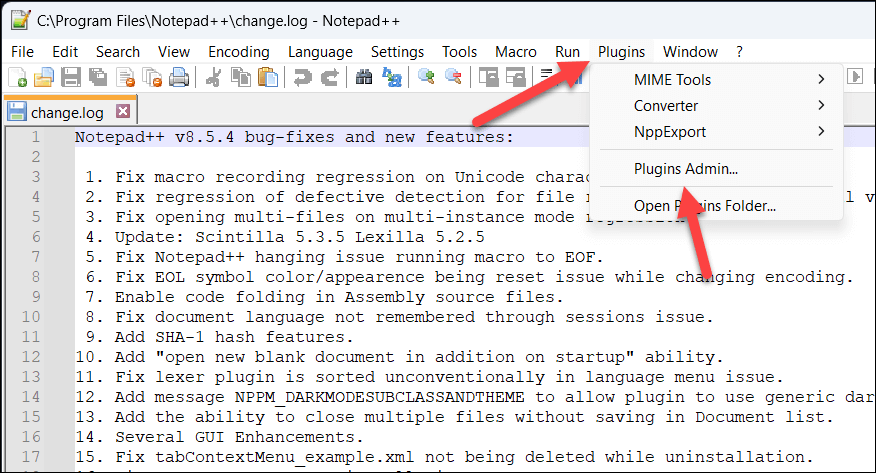
- First, open Notepad++ and press Plugins > Plugins Admin from the drop-down menu.
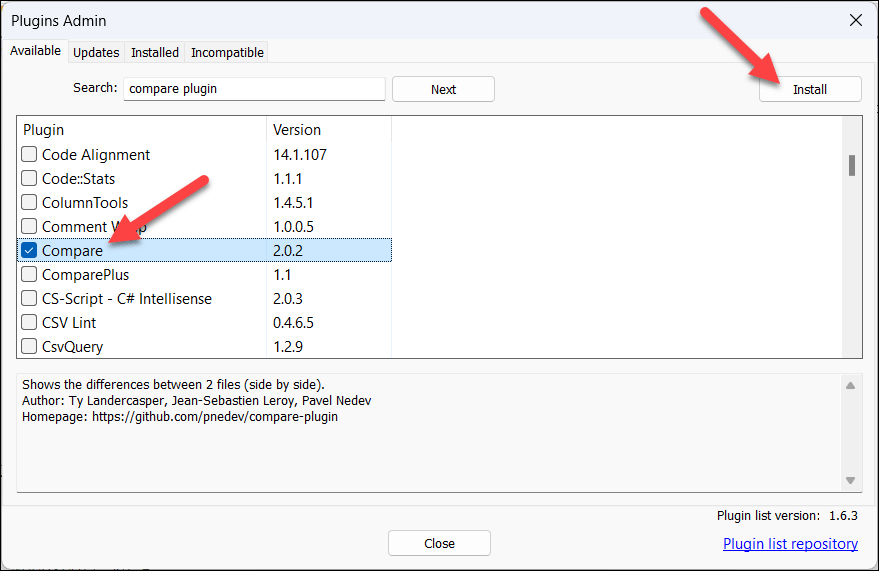
- In the Plugin Admin window, you’ll see a list of available plugins. Search for the Compare Plugin in the Available tab.
- Check the box next to the Compare plugin name, and click the Install button. This will initiate the installation process. You can also install the ComparePlus plugin as an alternative based on the original Compare plugin we recommend.
- Notepad++ may prompt you to restart the application to complete the plugin installation—click Yes to approve the action and allow the software to restart.
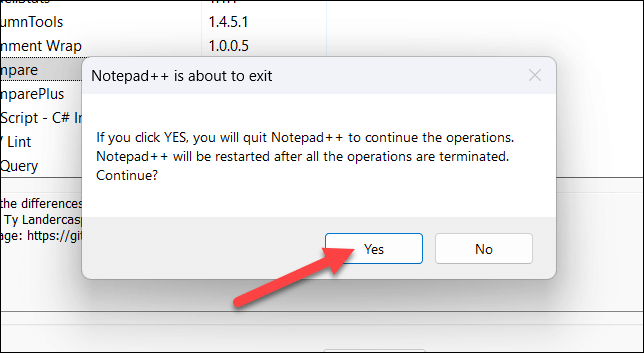
After completing these steps, you should have successfully installed the Compare plugin in your Notepad++ application. The plugin will now be accessible through the Plugins menu.
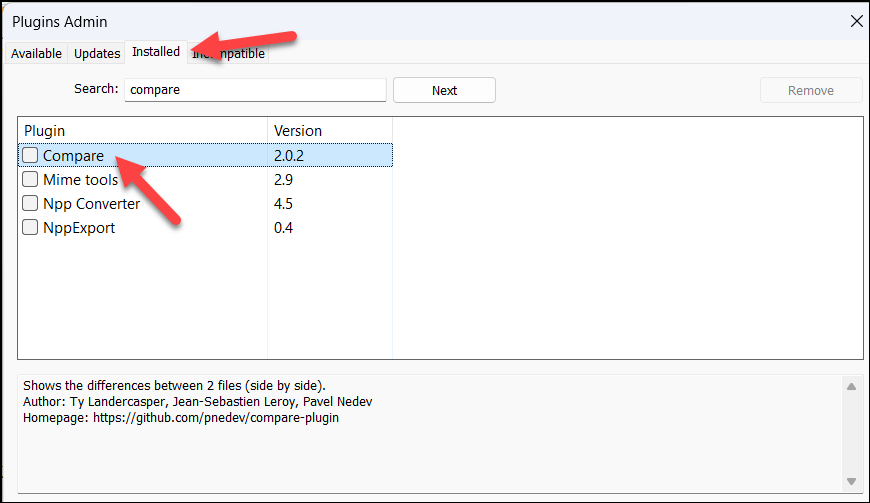
To ensure it’s installed correctly, press Plugins > Plugin Admin and check that Compare is visible in the Installed tab.
How to Compare Two Files in Notepad++
Once you’ve installed the Compare plugin, you can open and compare two documents in Notepad++. You’ll see the differences, line by line, across both documents.
To compare two files in Notepad++, follow these steps.
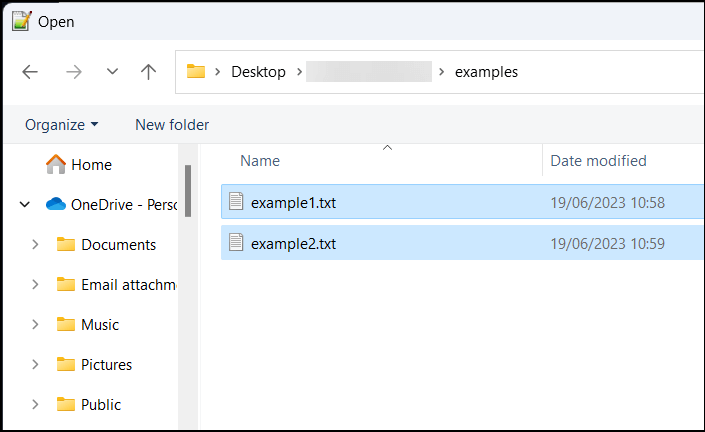
- Open the two files you wish to compare in Notepad++. You can do this by going to File > Open and selecting the appropriate files.
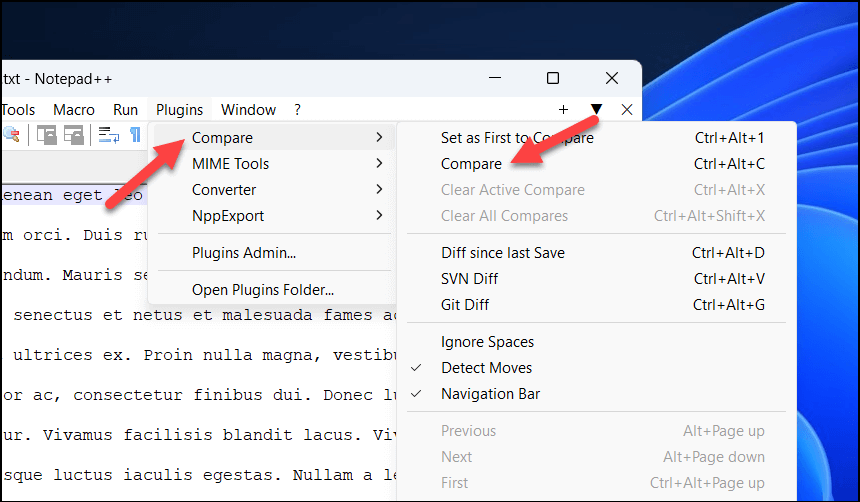
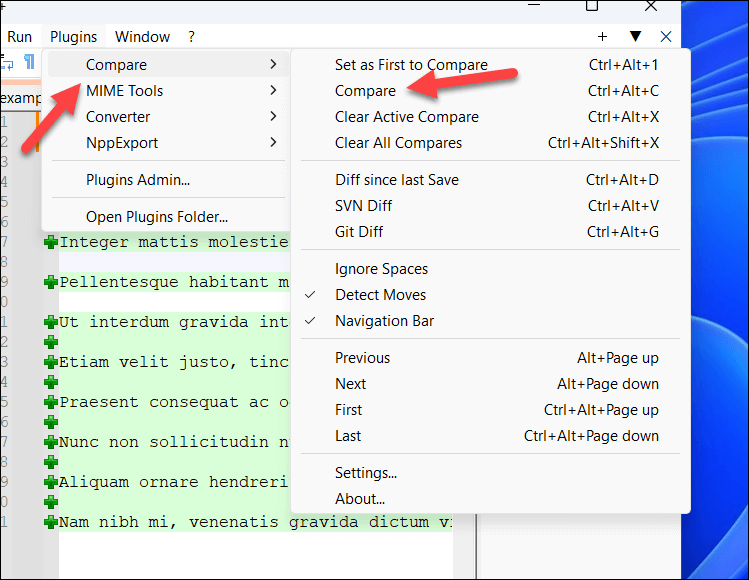
- Once both files are open in Notepad++, go to the Plugins menu and select Compare > Compare.
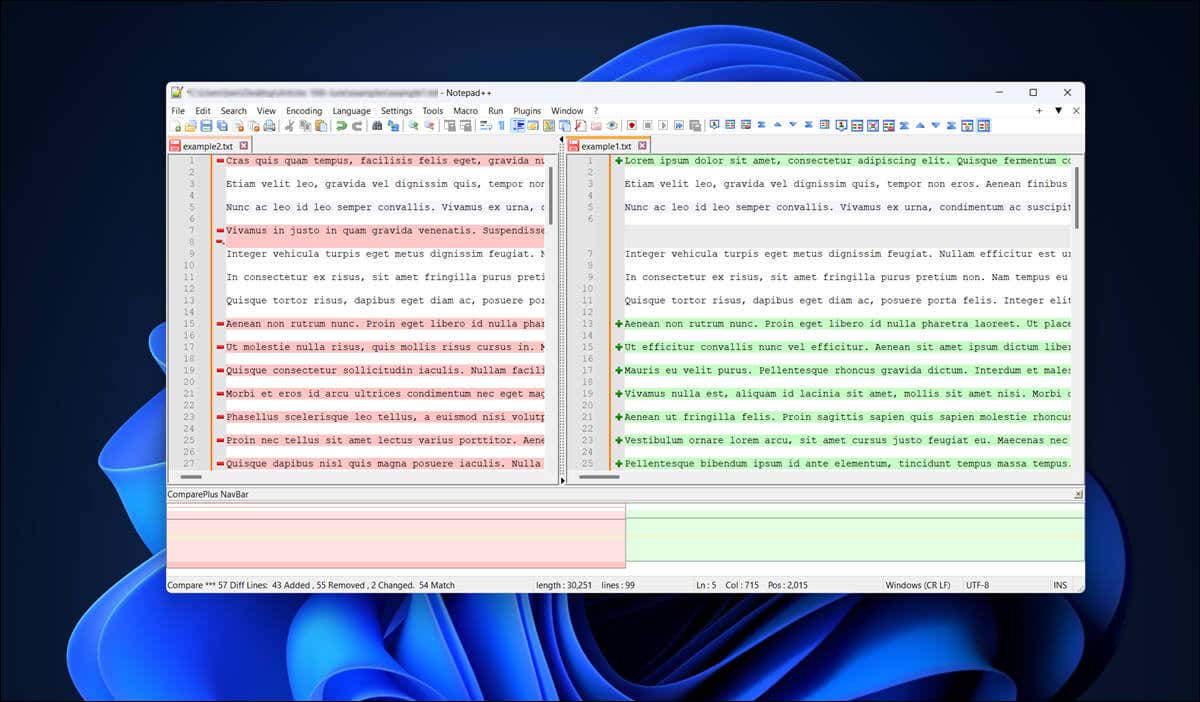
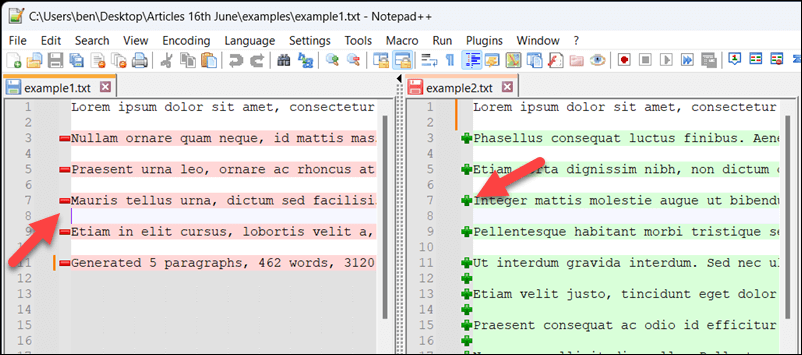
- This will display the two documents side by side, with differences in the text highlighted. From here, you can analyze the differences by reviewing the added, moved, or modified lines in each file.
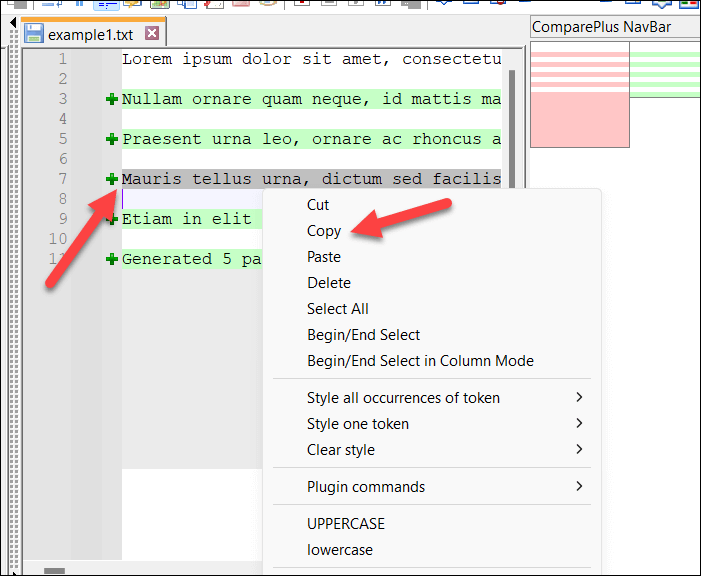
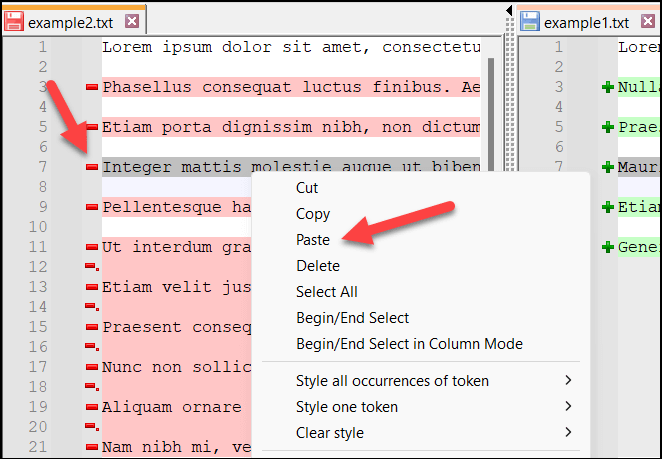
- If you want to merge any changes, select a line or section you want to copy in one document, right-click it, and select Copy.
- Move to the corresponding location in the other file, select the existing line (if you want to overwrite it) or place the blinking cursor in the correct place, then right-click and press Paste instead.
- Repeat this process for all the changes you wish to merge between the two files.
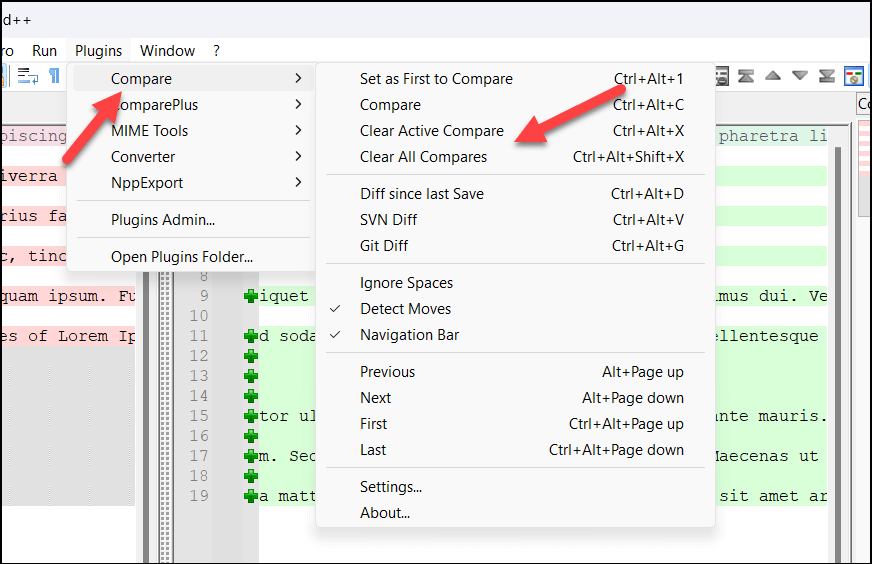
- If you want to stop comparing your files, press Plugins > Compare and select Clear Active Compare to close the window containing your blinking cursor and clear the active comparison. Otherwise, press Clear All Compares to clear all compared documents currently open in Notepad++.
Understanding Differences in Notepad++
Using the Compare plugin, Notepad++ displays variations in the text using a simple color-coded system and symbols to give you a clear overview of the changes.
In the comparison process, you’ll encounter three main types of differences: added lines, deleted lines, and changed sections in lines.
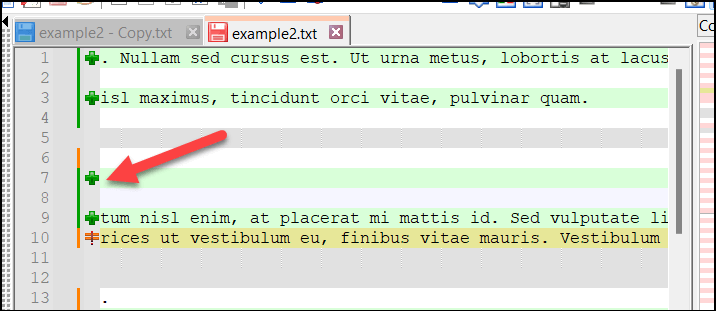
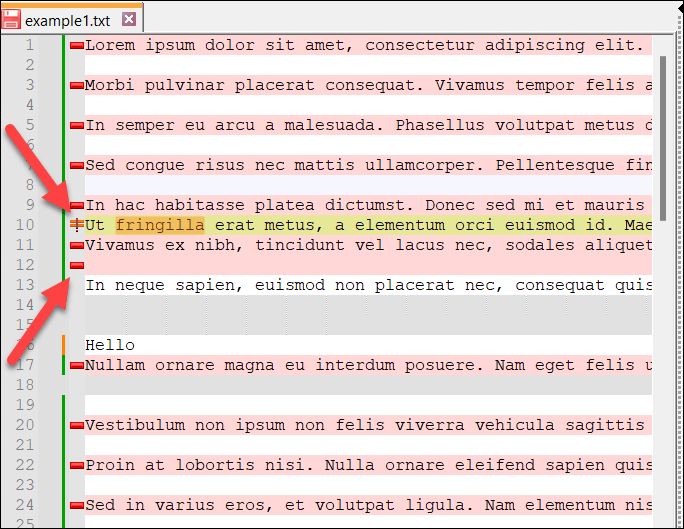
Added lines are represented with a green color and a “+” symbol, while deleted lines appear in red color with a “-“ symbol.
Changed sections within lines have a “≠” symbol and are also highlighted in red or green for deletion or addition, respectively.
Line numbers also play a crucial role in helping you navigate through the differences. The line numbers for both versions are displayed side by side, enabling you to keep track of the changes as you move through the files.
Customizing the Compare Plugin in Notepad++
You can customize the Compare plugin in Notepad++ to better suit your requirements. For instance, if you’re struggling with the colors in use, you can switch to alternatives.
You can also set other settings, such as text wrapping and file priority, in the Settings menu. To customize the Compare plugin in Notepad++, follow these steps.
- Launch Notepad++ and open two files you’d like to compare by pressing File > Open.
- To compare the files, press Plugins > Compare > Compare. This will allow you to immediately see any changes you make to your settings.
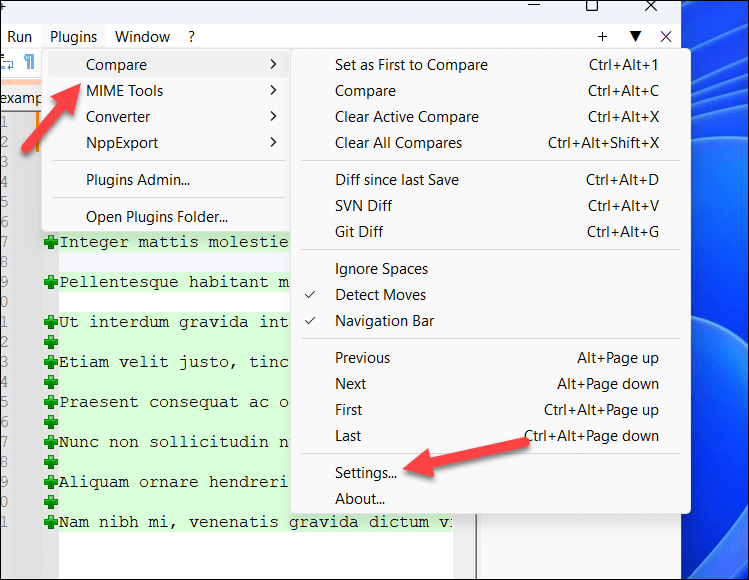
- Once the comparison has started, open the Plugins menu again and press Compare > Settings.
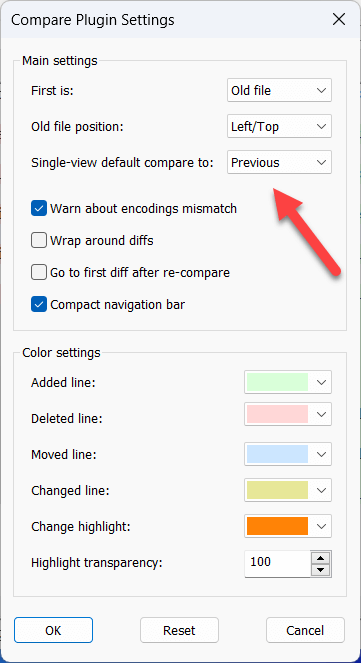
- In the Settings window, you can adjust various features and options regarding the comparison process. For example, you can set the file positioning using the First is option, or automatically go to the first difference in the file by enabling the Go to first diff after re-compare option.
- If you want to adjust the color settings, select one of the color tabs in the Color settings section and choose an alternative. You can also set the transparency levels using the Highlight transparency value (from 0 to 100).
- To reset any changes you’ve made, press Reset. Otherwise, press OK to save your settings.
Using Notepad++
Thanks to the steps above, you can quickly compare two files in Notepad++ using the Compare plugin. Notepad++ is an excellent alternative for opening large text files if your default text editor (like the original Notepad) struggles with them.
Notepad++ proves that you shouldn’t settle for the default applications on Windows. There are plenty of good alternative applications you can try out next.


