Have you encountered an NSIS (Nullsoft Scriptable Install System) error while installing an app on your Windows PC? There’s a great chance your installer is faulty. Other items can cause this issue and prevent you from running your app installer. This guide will show you how to get around this error preventing you from installing your app on your Windows 11 or Windows 10 PC. Let’s find out the possible solutions to this problem.
Some reasons you can’t use your installer and get an error are that your installer’s file name or your folder name has special characters, a virus or malware has infected your PC, your user account has a problem, and more.
Remove Special Characters From Your Installer’s File Name
One reason you get an NSIS error is that your setup file’s name has special characters in it. This sometimes causes issues with running your installer, preventing you from installing your app.
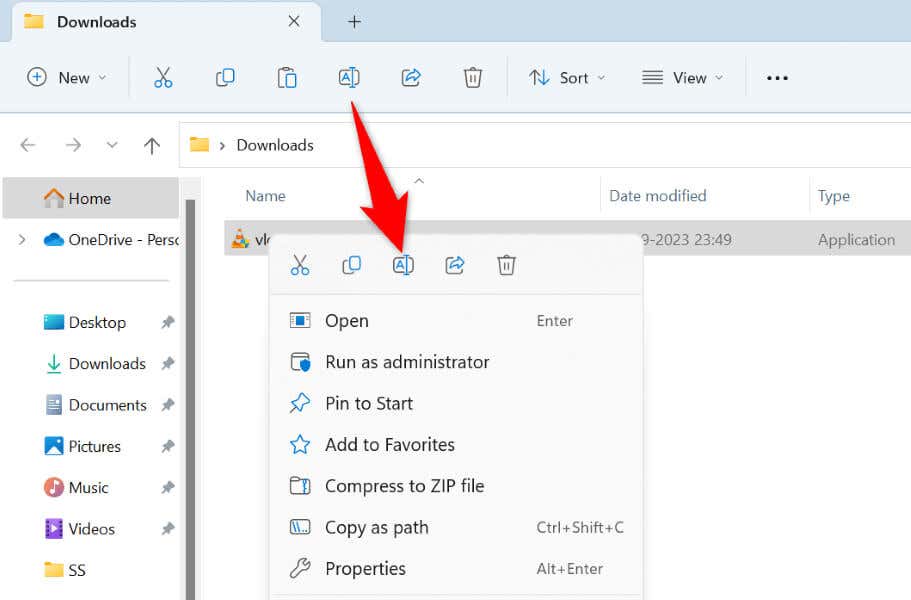
You can fix that by renaming your installer and removing all the special characters from the file name. Do that by right-clicking your installer, choosing Rename, and removing the special characters from the name.
Then, run the installer, and the wizard will launch as expected.
Fix an Error Launching Installer by Moving the File to Another Folder
Another reason you have an NSIS error is that your installer’s parent directory name has special characters. In this case, you can rename your folder or simply move the installer to another folder on your PC and run the file.
Doing that ensures Windows doesn’t encounter special characters while running your app installer.
Run Your App Installer as an Admin
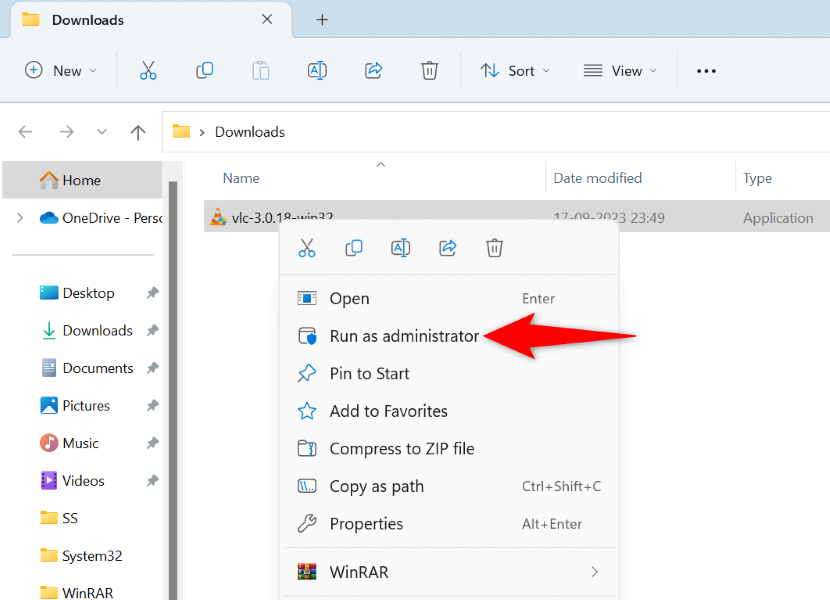
Sometimes, your installer doesn’t work as expected because the wizard doesn’t have the required permissions. This happens when you run the file as a regular user, not an admin user. You can fix that by launching your installer with admin rights.
To do that on your Windows 11 or Windows 10 PC, right-click your app installer and choose Run as administrator. Select Yes in the User Account Control prompt.
Your installer is now open with admin privileges, allowing you to install your app without problems.
Redownload Your App Installer
If you still get an NSIS error while running your app installer, your downloaded file may be corrupted. This usually happens when your installer’s download gets interrupted, making the file corrupted. Another reason is that the installer was corrupted on the site you downloaded it from.
You can fix that by redownloading your installer and ensuring the download doesn’t get interrupted. You can also try downloading the installer from another trusted site, so you know the file itself isn’t corrupted.
Run an Antivirus Scan on Your Windows PC
If your redownloaded installer displays the same NSIS error, your PC may be infected with a virus or malware. Such a threat may be causing your operating system to malfunction, leading to various issues.
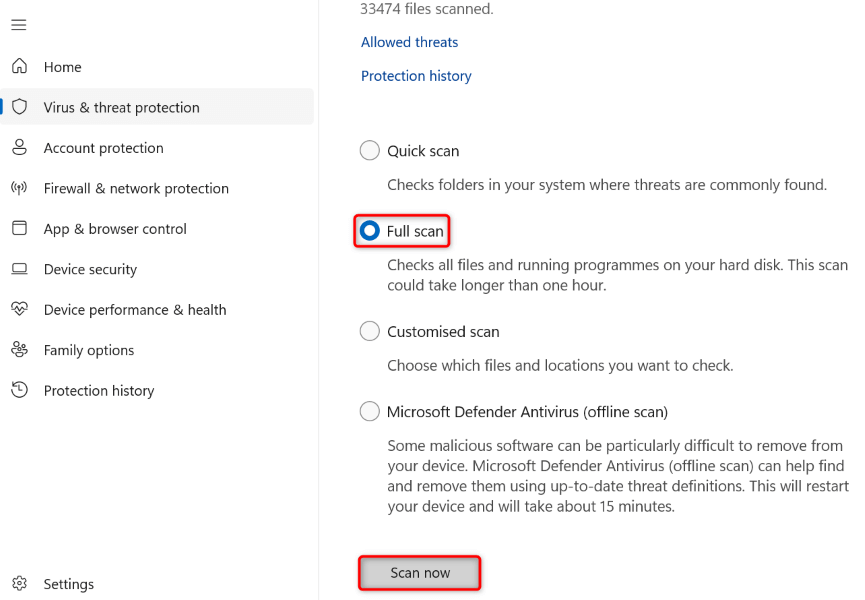
In this case, run a full virus scan on your PC and ensure your system is free of viruses and malware. You can use the built-in Microsoft Defender Antivirus on your Windows PC.
- Open the Start menu by pressing the Windows key, find Windows Security, and launch the app.
- Select Virus & threat protection in the app.
- Choose Scan options on the following screen.
- Select Full scan and choose Scan now.
- Restart your computer after running your virus scan.
Run the App Installer From a Command Prompt Window
If you’ve been launching your installer by double-clicking the installer file, try launching the file from a Command Prompt window (command line) and see if that works. This is another way to launch your apps on your PC.
- Open your PC’s Start menu, find Command Prompt, and select Run as administrator.
- Choose Yes in the User Account Control prompt.
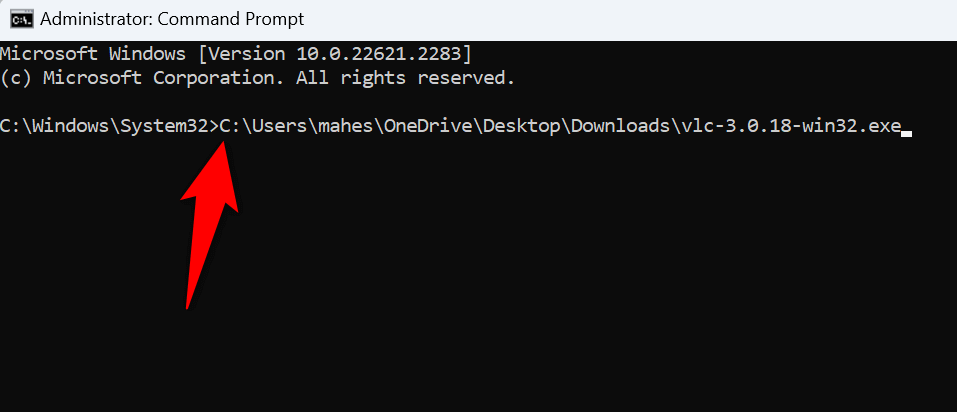
- Enter your installer’s full path on the CMD window and press Enter. Make sure to enclose the path with double quotes if the path contains spaces.
- Your installer will open. At this point, you can close the Command Prompt window.
Install Your App Using Another Account on Your PC
If your NSIS error persists, your current user account may have issues. Such issues can prevent you from installing apps and performing other tasks. In this case, use another account on your PC to run your installer and install your app.
Ensure you have a secondary user account on your PC to log into and run the installer. If you don’t, it’s easy to create a new user account on your Windows PC.
- Access your PC’s Start menu, select your profile icon, and choose Sign out.
- Choose your secondary account on the list and log in to the account.
- Launch your installer from the secondary account to install your app.
Find and Remove the App That’s Causing an NSIS Error
If your NSIS error appears even when you aren’t trying to run an installer, an app installed on your PC may be causing the issue. Malfunctioning apps can trigger this error to appear on your PC.
You can fix that by finding the culprit app and removing that app from your Windows PC.
Step 1: Use Task Manager to Find the Faulty App
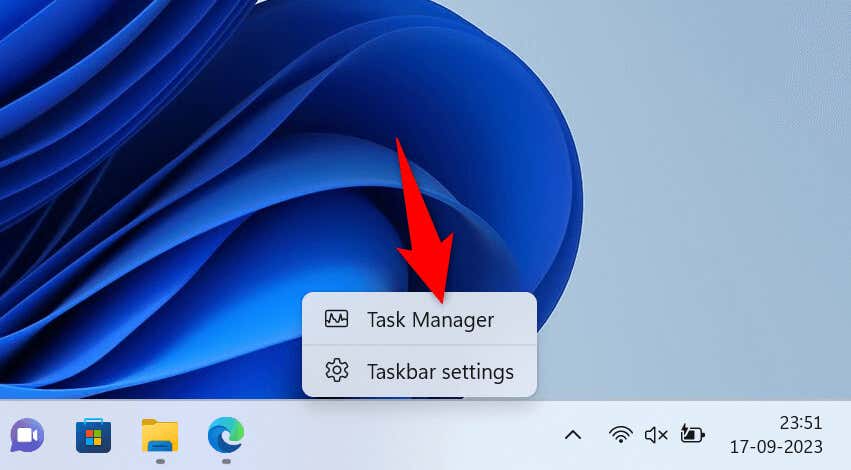
- Right-click your Windows taskbar and select Task Manager.
- Access the Processes tab, right-click your NSIS error on the list, and choose Open file location.
- You’ll see the app triggering the NSIS error on your PC.
Step 2: Remove the Faulty App From Your PC
Now that you know what the faulty app is, remove that app from your PC.
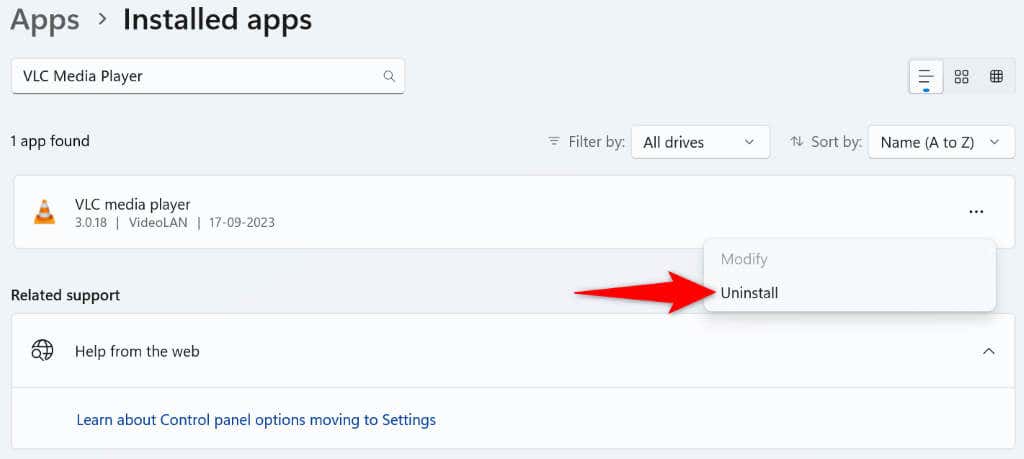
On a Windows 11 PC, head into Settings > Apps > Installed apps. Here, select the three dots next to your app, choose Uninstall, and select Uninstall in the prompt.
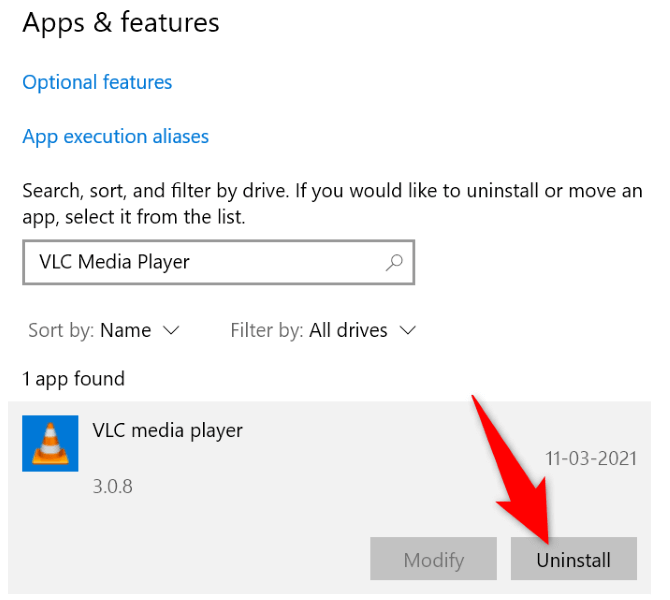
If you’re on a Windows 10 PC, navigate to Settings > Apps. Select your faulty app on the list, choose Uninstall, and select Uninstall in the prompt.
After removing your app, restart your PC, and your issue should be fixed.
Troubleshooting the NSIS Error Using Various Ways on Your Windows 11 or 10 PC
There are many ways to get around an NSIS error that usually appears while running an app installer. You can fix the issues with your installer or PC to resolve the error and start your app’s installation process.


