Are you trying to fix issues with your Microsoft Windows PC only to be encountered with a DISM error 50? There are various ways to resolve this error on your computer. Many items can cause your PC to display this error, including Windows PE. We’ll show you what to do when this error pops up on your screen and how to continue troubleshooting your Windows 11 or Windows 10 system.
Some reasons you get a DISM error 50 are that your Windows registry has an unnecessary key, your user account is problematic, your installed apps are causing the problem, and more.
DISM Doesn’t Work With the /Online Option in Windows PE
The main reason you get a DISM error 50 is that your PC is in Windows Preinstallation Environment (Windows PE). Windows doesn’t allow you to use the DISM command with the /Online parameter in this mode.
You’ll have to come out of Windows PE, boot your PC as usual, and then run the DISM command to resolve your problem.
Remove the MiniNT Registry Key
If your PC isn’t in Windows PE, but you still get an error 50 while running the DISM tool, your Windows registry may still have a key that indicates to the command that your PC is in Windows PE.
In this case, remove that key from your registry, and your issue should be fixed.
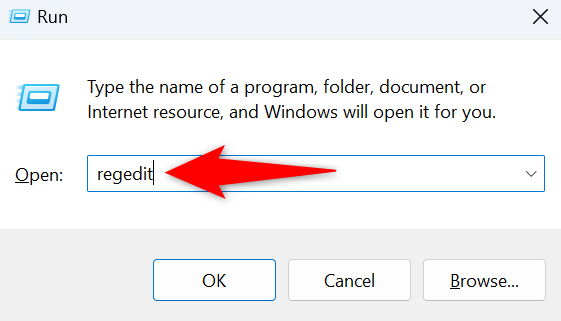
- Launch the Run dialog box using Windows + R.
- Type the following command in the box and press Enter: regedit
- Select Yes in the User Account Control prompt.
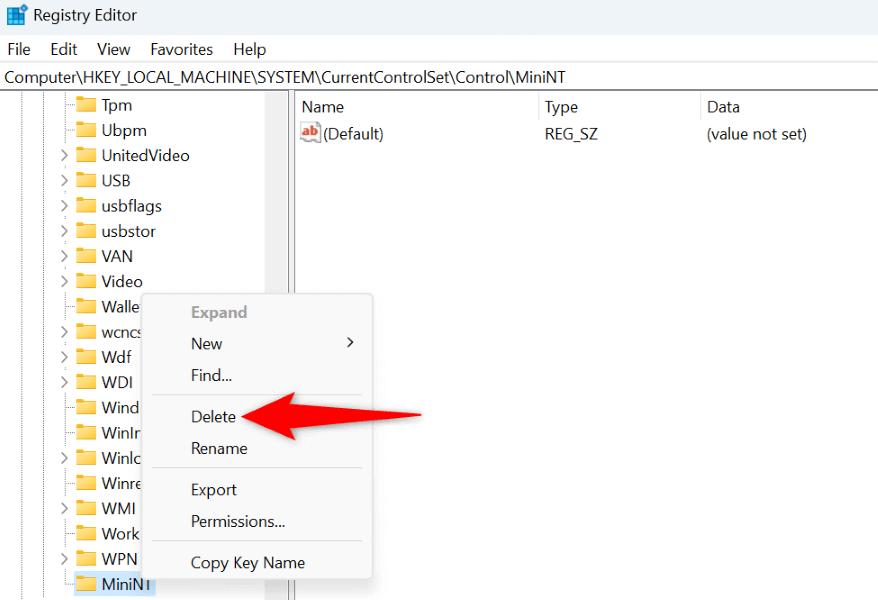
- Head to the following path in Registry Editor:
HKEY_LOCAL_MACHINE\SYSTEM\CurrentControlSet\Control - Right-click the MiniNT folder in the left sidebar and choose Delete.
- Select Yes in the prompt.
- Close Registry Editor and reboot your PC.
- Run your DISM command.
Use the DISM Command From Another User Account on Your PC
If you continue to get a DISM error 50, run your command from another user account on your PC. This is because your current account may have problems, preventing you from executing your command successfully.
You can create a new Windows user account if you don’t already have one, then log in to that account and run the DISM command.
- Open the Start menu.
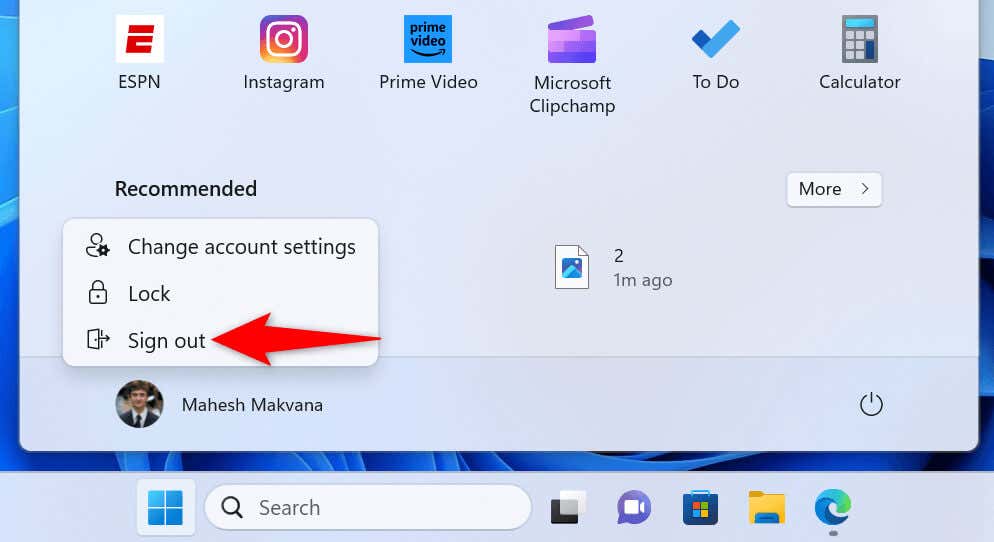
- Select your user account picture.
- Choose Sign out to log out of your current account.
- Select your secondary account on the list and log in to that account.
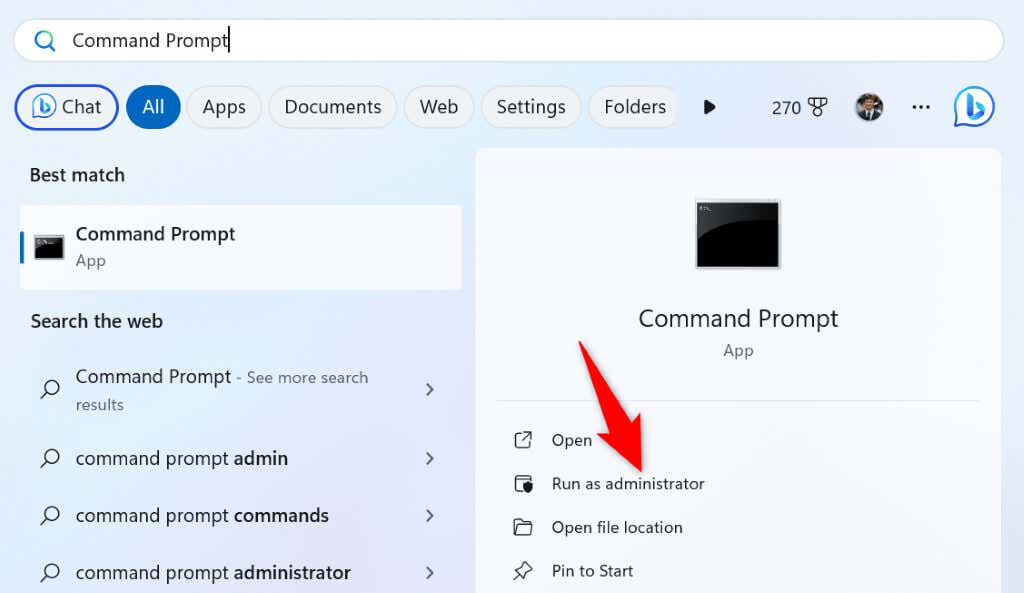
- Access the Start menu, find Command Prompt, and select Run as administrator.
- Choose Yes in the User Account Control prompt.
- Execute your DISM command from the open CMD window.
Clean Boot Your Windows PC and Run the DISM Command
If your issue persists even when you switch user accounts, an installed app on your PC may be causing the problem. In this case, clean boot your Windows PC and then run your DISM command.
Your PC only loads the necessary files when you clean boot your system, allowing you to find if a third-party app is causing the problem. We have a guide on that topic, so check that out to learn how to perform the procedure.
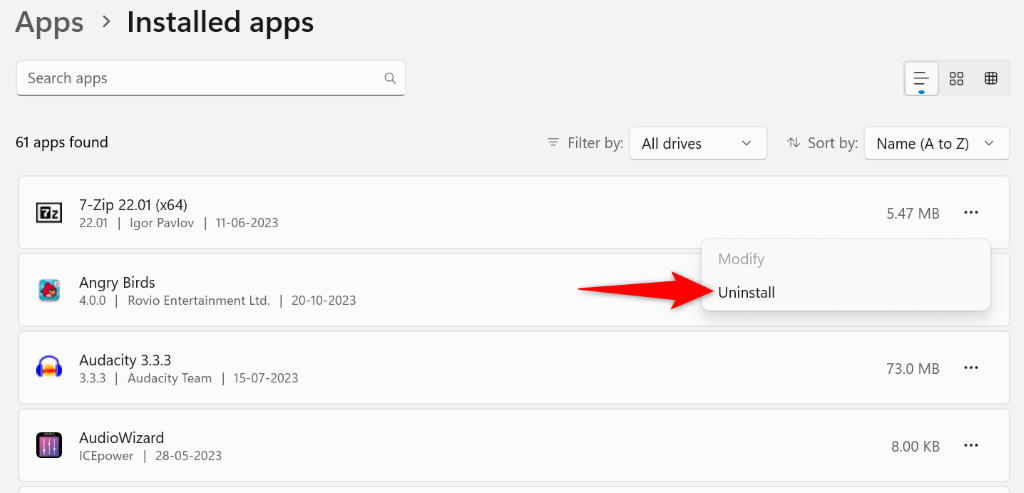
If your command runs fine when you’ve clean-booted your system, an installed app on your PC is causing the problem. In this case, remove that app from your Windows 11 system by heading to Settings > Apps > Installed apps, selecting the three dots next to the app, choosing Uninstall, and selecting Uninstall in the prompt.
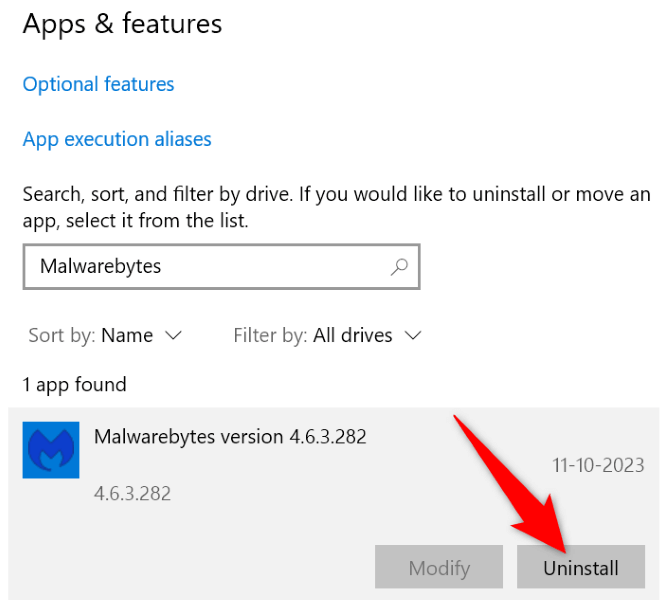
You can remove an app on a Windows 10 system by heading into Settings > Apps, selecting your app on the list, choosing Uninstall, and selecting Uninstall in the prompt.
Restart your PC after removing the malicious app, then run your DISM command.
Specify Your Operating System Drive in the DISM Command
One way to possibly make DISM run on your PC is to specify your Windows installation drive in the command. This can resolve the issue you’re experiencing with the command.
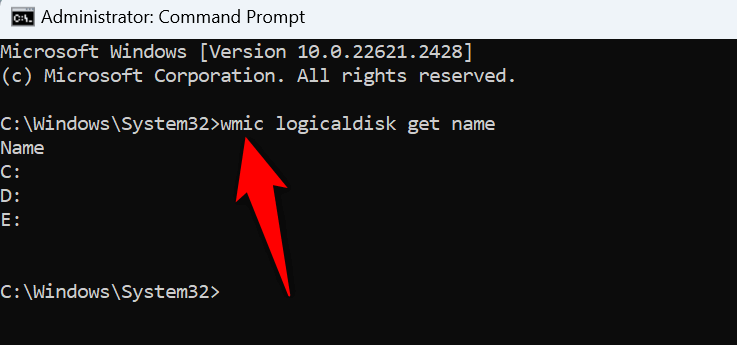
- Launch a Command Prompt window with admin rights on your PC.
- Enter the following command on the open window and press Enter: wmic logicaldisk get name
- Type the following command replacing C with your Windows drive, then press Enter: dir C:
- You’ll see a Windows folder, which indicates you’ve chosen the correct drive.
- Next up, run the following command replacing C with the drive where you’ve installed Windows.
DISM.exe /Image: C :\ /Cleanup-Image /Restorehealth - Then, run the following command to find and fix your system’s corrupted files. Again, make sure to replace C with your Windows installation drive.
sfc /scannow /offbootdir=C:\ /offwindir=C:\Windows
Reset BIOS Settings on Your Computer
If your error persists, your last solution is to reset your BIOS settings to the defaults. Doing so erases any customizations you may have made to your BIOS, like the order of the boot disks, and brings the options to their default values.
We have a guide on how to reset your BIOS settings, so check that out to learn how to perform the procedure. Then, turn on your PC, and your DISM command should run as expected.
Resolving a DISM Error 50 Isn’t As Difficult As You Might Think
DISM’s error 50 prevents you from fixing your Windows image, which prohibits you from repairing your system’s damaged files. There are various reasons that error occurs. Luckily, you can use the methods described above to resolve your problem and continue troubleshooting your PC’s other issues. Good luck!


