Plus a trick to remove single entries
When you launch the Microsoft Word program on your computer, you get quick access to several of its main features right on the home screen. One of these is the recently used files list for Microsoft Word. This option lets you quickly access the documents that you were recently working on, and clicking on any of these opens up the file in the program.
It’s a pretty quick way to get back to your work that you left unfinished the previous time. You actually save yourself from the hassle of manually finding the document wherever it’s saved on your computer. The software finds and displays that for you.
Although it’s a really useful feature, it may not be so for some users. If you’re someone who never uses this recently used files list in Word and you’d rather not have it there, you can actually disable it in the program. You can also remove specific documents from the list if you don’t want to disable it entirely.
Clear a Single Recently Used File In Microsoft Word
If it’s only a single or a few files that you’d like to remove from the recently used files list in MS Word, you can do it by right-clicking on the files and selecting an option. It removes your chosen files from the list and you can do it for as many files as you want.
- Launch the Microsoft Word program on your computer.
- When it opens, you’ll likely land on the home screen. On this screen, you’ll find the Recent section showing all of your recent files created in the program.
To remove a file from the list, right-click on the file and select Remove from list.
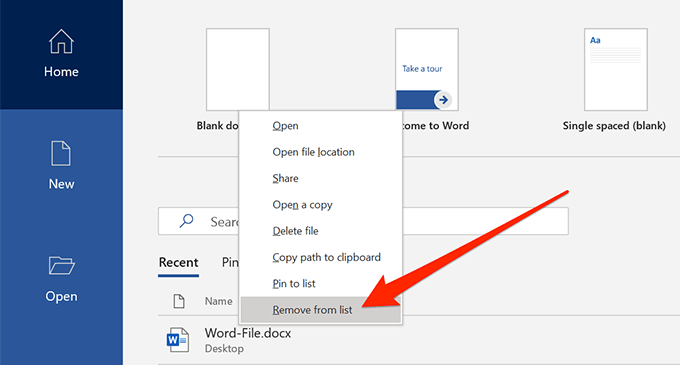
- The file will instantly be removed without any prompts.
The next file in the list will take up the removed file’s place.
Remove All The Recently Used Files In Microsoft Word
If you don’t want for any of your recent files to appear in the list, you can remove all the files from there by selecting a single option in Word. It’ll clear up the entire list and give you an empty section on the home screen.
These steps should work for the latest MS Word 2019/Office 365. If you’re an Office 2016 user, please skip to the next section.
- Open the MS Word software on your computer.
- Although the option to clear the entire recent list is built into Word, you’re not going to see it when you right-click on any file on the homescreen. You’ll first need to click on an option before the option is revealed.
Click on Open in the left sidebar of Word.
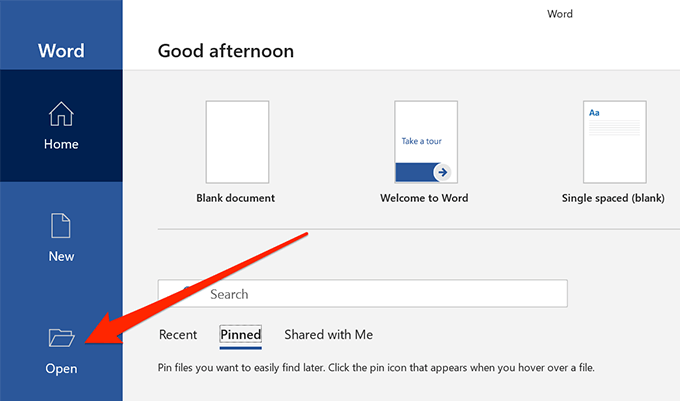
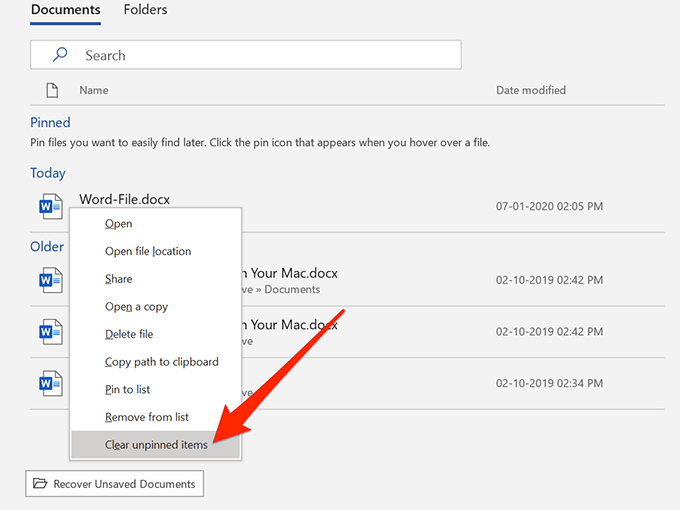
- Your recent files list will appear on the right-hand side pane. To clear all the entries from this list, right-click on any one of the documents in the list and select Clear unpinned items.
- A prompt will appear saying that all the items from the list will be removed. Click on the Yes button to continue.

You should find that your recent documents list is now empty.
Remove The Recently Used Documents In Word 2016
If you’re on Microsoft Word 2016, you can actually clear the entire recently used files list in Word without going to the Open menu.
While you’re on the home screen of the software, right-click on any of your recent documents and select Clear unpinned items. Hit Yes in the prompt that follows and your list will be cleared.
As you can see, there isn’t a huge difference between doing the task in Office 2019 and Office 2016 but it’s good to know exactly where the option is located in various versions of the software.
Disable The Recently Used Files Section In Microsoft Word
Recently used files section in Word may be helpful to many users, even with certain items removed from it. However, if you do not happen to use it at all and you find it taking unnecessary space on the Word’s home screen, you can actually get it removed from there.
The recent files section can be completely disabled and there’s a built-in option in the software to do it. Also, if you ever decide to get it back, you can do so by reversing the change you made to the settings.
- Open Microsoft Word on your computer.
- On the home screen, look for the option that says Options, usually located at the lower-left corner, and click on it to open it.
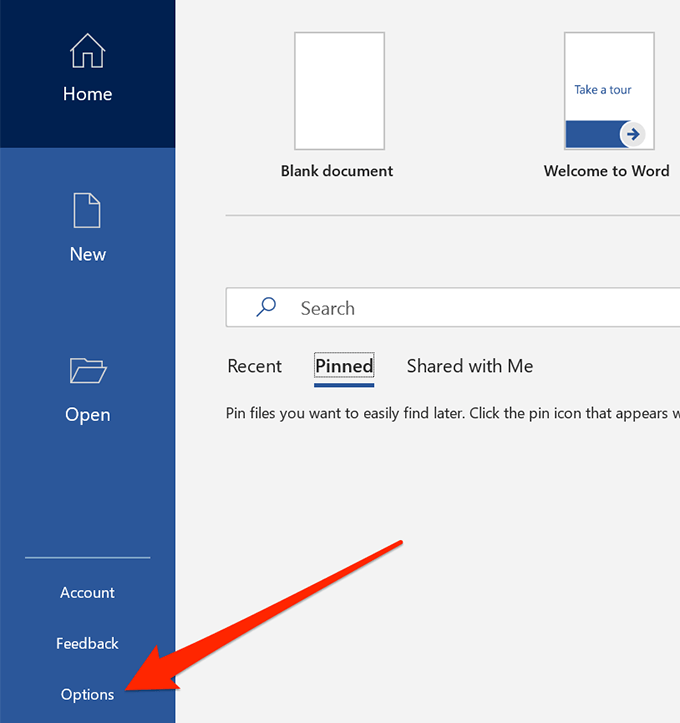
- A box will open on your screen letting you manage several settings for Word. You need to find the option that says Advanced in the left sidebar and click on it. The option you’re looking for is located there.
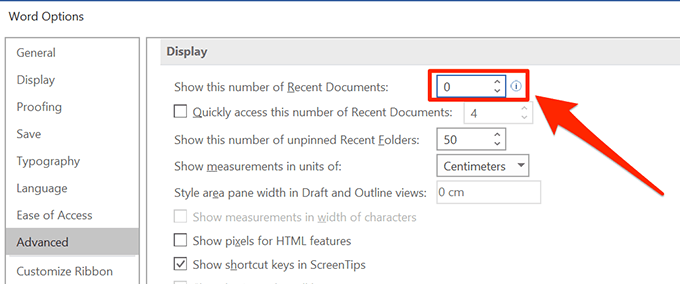
- When it opens, scroll down until you find the section that says Display. There’ll be an entry named Show this number of Recent Documents and then a number specified next to it. What you want to do is decrease the number from whatever it is right now to 0 (zero). You can also directly type 0 in the field.
- Click on the OK button at the bottom to save the changes.
- The next time you launch the program, you’ll find that there are no entries at all in the list.
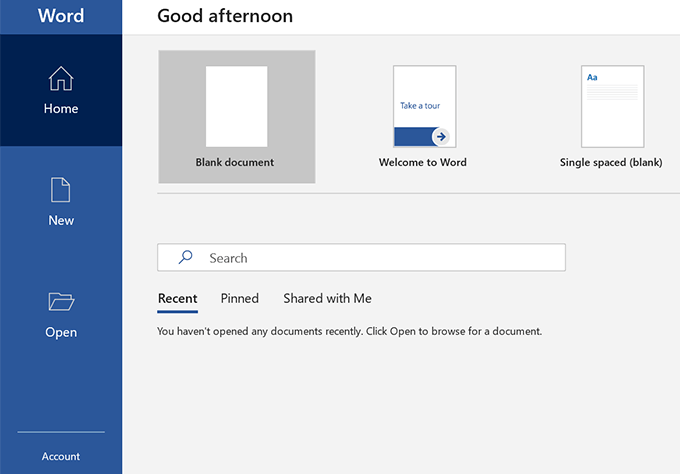
What you actually did above was set the number of recent documents to zero and Word displayed zero (empty) entries on its home screen.
How To Bring Back The Recently Used Files List In Word
If you ever need to bring the recent documents list back, you can do so by opening the same Options panel and then clicking on Advanced.
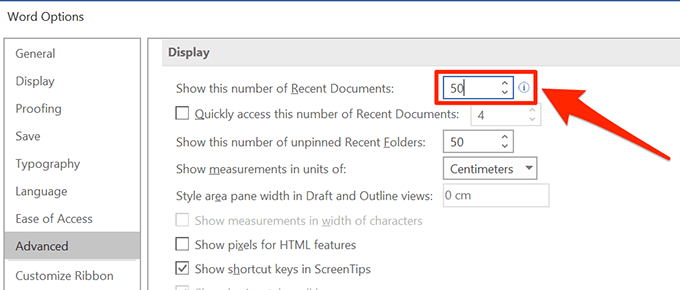
Then enter the number of recent documents you want to see in the Display section’s first option and hit OK. Your list should be back.


