6 different methods to try and fix the issue
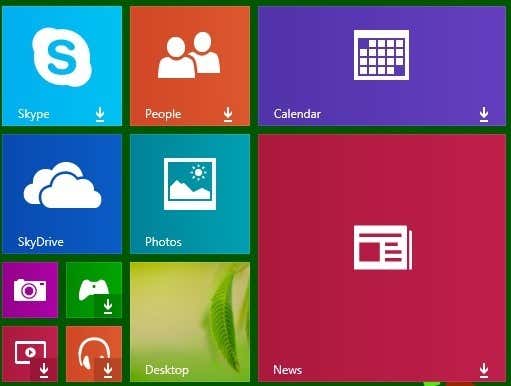
Recently, I had a client come in with a Windows 10 PC that had live tiles that were not updating. Upon connecting up his computer, I was surprised to see that not only were the live tiles not updating, they had these strange little down arrows on them and nothing else. Before I connected the computer, I suspected that the issue could have simply been that the Internet was not working properly and therefore the tiles were not updating.
However, the Internet was working fine and yet the tiles were not. After playing around with a lot of stuff and asking quite a few questions, we were able to figure out what was causing the issue. In this article, I’ll walk you through all the different methods you can try to get your live tiles working again in Windows 8 or Windows 10.
Method 1 – Reinstall Store Apps
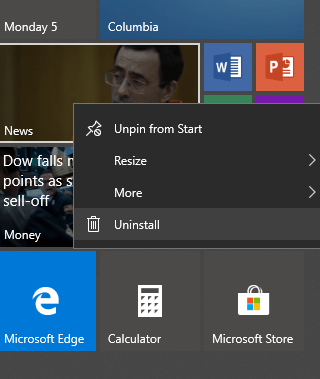
The first thing you can try is to uninstall and reinstall the apps that are not updating. You can uninstall a Store app by simply right-clicking on it and choosing Uninstall.
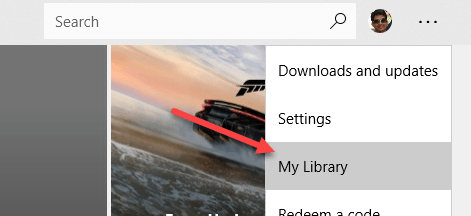
Then just go back to the Windows Store, click on the three dots at the top right and then click on My Library.
Now you will see a list of all the apps that you had previously installed. Click on the little download arrow next to the app(s) you want to reinstall.
Method 2 – Run Apps Troubleshooter
You can also download the App Troubleshooter from Microsoft, which can fix common issues with apps and the Windows Store.
https://support.microsoft.com/en-us/help/4027498/windows-10-run-the-troubleshooter-for-apps
When running the troubleshooter, it seems to want you to use a Microsoft account, but I’m not exactly sure why. It gives a kind of warning, but you can continue on and it does detect the problems and automatically tries to repair them.
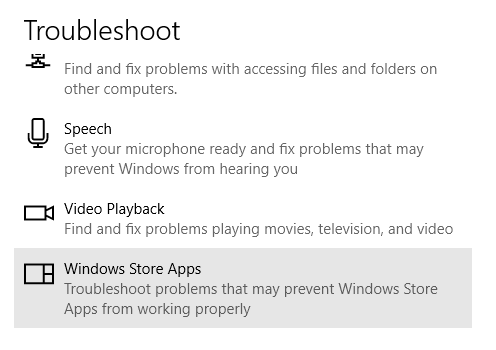
You can also click on Start, type in troubleshoot, and press Enter. Then click on Windows Store Apps, which is currently located all the way at the bottom.
Method 3 – Restore Windows 10
The next thing you can try is to restore to the most recent restore point that was working properly. In the case of my client, this fixed the problem because he had installed some third-party anti-virus program (Avast) that was not compatible with Windows 10.
When we did the restore, everything was working fine again. The nice thing about Windows 10 is that it automatically creates a restore point whenever you install new software, so you can always get back to the point before the installation. If you started having the live tile not updating issue after a installing some software, it would be well worth trying a restore or uninstalling the program.
However, note that uninstalling may not fix the issue because some programs do not remove everything from the registry. Restoring from a restore point will remove anything that had been added to the registry by the program. You can read my previous post if you want to learn more about System Restore.
Method 4 – Disk Cleanup
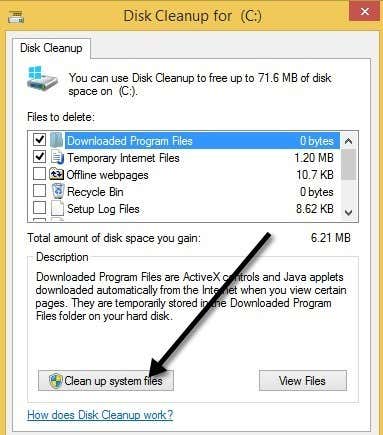
Another thing you can try is to clean up the system files, which can clear out the app cache. Click on Start and type in disk cleanup. Then click on Free up disk space by deleting unnecessary files.
Once the dialog pops up, go ahead and click on the Clean up system files button.
It’ll do some calculations on how much disk space can be freed, after which you can press OK and it’ll ask you if you want to permanently delete the files.
Method 5 – Create New User Account
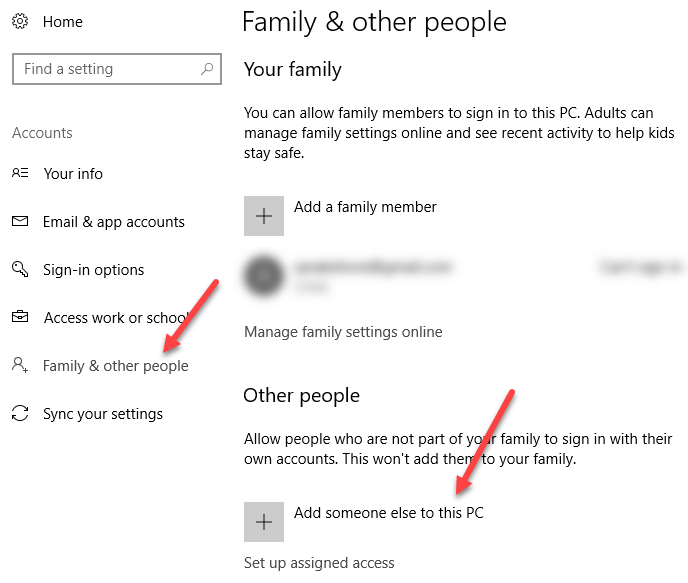
This issue is also sometimes connected to a particular user account. If you log off and log on as another user and don’t have the live update problem, then your best option is to delete that user account and create a new one. You can add a new account in Windows 10 by opening the Settings app and clicking on Accounts.
Click on Family & other people and then click on Add someone else to this PC. This will take you to the page where you can create a new user account. Of course, you’ll have to transfer your data to the new account. If you’re using a local user account in Windows 10, you could also just try logging in with your Microsoft account and vice versa. Switching between local and Microsoft account might fix the issue.
If switching between the accounts does not work, then creating a new account might be your only option. It’s not a great option as you’ll have to setup all your apps again, transfer files, etc.
Method 6 – Reset PC
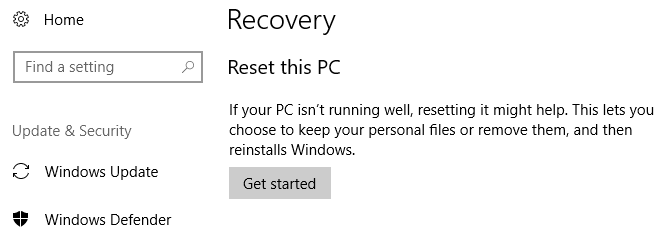
If nothing else above has worked, you might have to reset your PC. This is definitely a last resort as it will reset all your PC settings. All your data and built-in apps will remain, but you’ll have to reinstall any third-party apps.
Go to Settings, click on Update & Security and then click on Recovery.
Hopefully, one of the above solutions will fix your problem. It’s also a good idea to install any of the latest Windows updates as one of them could include a fix for issues like this. Enjoy!


