Via keyboard, built-in tools, or third-party apps
If you’re trying to do something on your PC that requires changing the screen orientation, you can use the Windows 10 screen rotation feature to do it. It lets you change your orientation from landscape to portrait and portrait to landscape – however you want it to be set up.
There are many reasons as to why you may want to rotate the screen in Windows 10. Maybe you want to use your second monitor in the portrait mode for previews. Or maybe you have an app that only looks good in a certain orientation?
How To Rotate the Screen in Windows 10 Using a Keyboard Shortcut
One of the many good things about Windows computers is that you have keyboard shortcuts to do pretty much everything on your computer. From opening apps to shutting down your computer, you have a time-saving shortcut to do it on your machine.
There’s a keyboard shortcut to rotate the screen in Windows 10 as well and you can use it to quickly turn the orientation of your current screen. It comes built with the video card utility that’s installed by default on your PC.
- While you’re on any screen, press Ctrl + Alt + any Arrow key and it’ll rotate your screen. The direction it rotates the screen to depends on what arrow key you used.

Keep in mind that this keyboard shortcut may not be available on all the computers out there. It should work on most computers that use Intel graphics. Also, the shortcut can be customized if you want from the Intel utility installed on your PC.
Using Built-in Tools to Rotate the Screen in Windows 10
The keyboard shortcut to do Windows 10 screen rotation may not work for all of you out there and there doesn’t seem to be an exact reason for it. However, if you’re one of those users, you might want to use an alternate method to get the task done on your machine.
A good way to rotate the screen in Windows 10 when the shortcut doesn’t work is to use a built-in option in the Settings app. It lets you quickly change the orientation of your screen to whatever you want with the click of a few options.
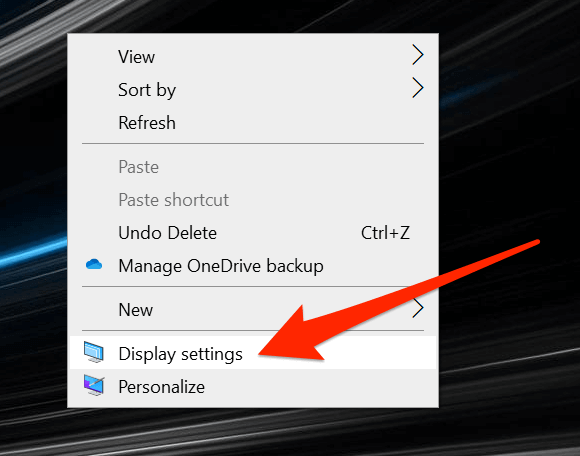
- Go to the desktop on your PC, right-click anywhere blank, and choose the option that says Display settings. It’ll directly take you to the screen you want to be at without launching the Settings app.
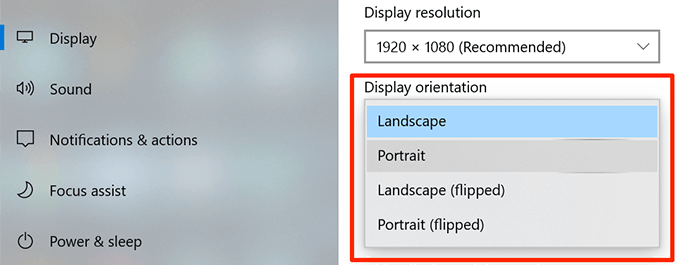
- Scroll down on the following screen and you’ll find an option that says Display orientation. Click on the option and choose a new orientation for your screen.
- It’ll apply the new orientation and let you preview it. If you think it’s good, you can click on Keep changes. Otherwise, click on Revert to go back to your previous orientation.

- In case you can’t click on the Revert button as the screen is rotated and you’re having trouble bringing your mouse cursor there, you can leave it as is and it’ll automatically revert back the changes.
Rotate Screen In Windows 10 With Intel Graphics Command Center
If your computer uses an Intel video or graphics card, you can actually use the company’s very own tool to rotate your screen in Windows 10. On most computers, the tool comes preinstalled and all you basically need to do is run it and change an option in there.
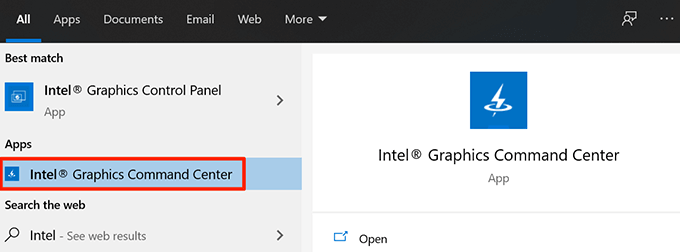
- Use the Cortana search to search for and open Intel Graphics Command Center. You may see another similar utility but don’t open it as it doesn’t have the screen rotation feature in it.
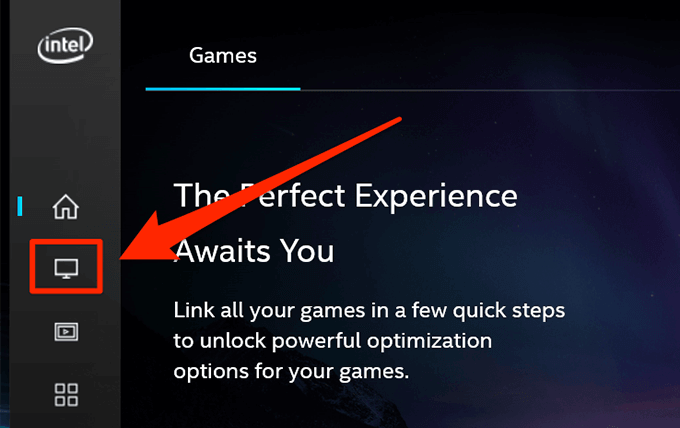
- When it opens, you’ll find several icons in the left sidebar. Click on the one that looks like a display and it’ll open your display settings for you.
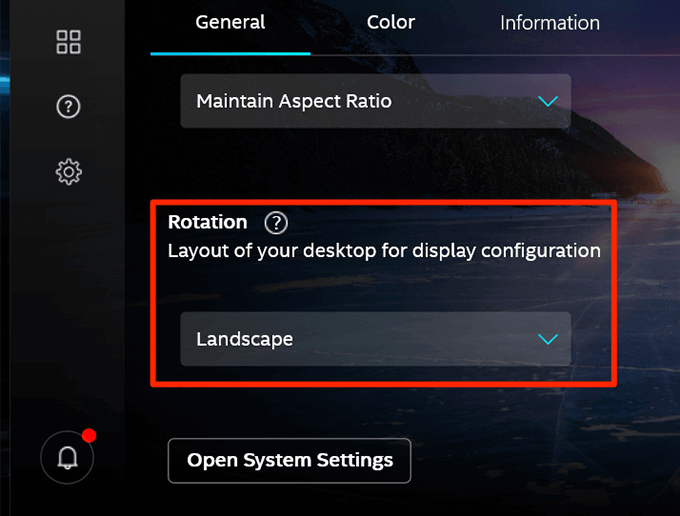
- Make sure you’re in the General tab on the display settings screen. Then scroll down and find the option that says Rotation. Use the dropdown menu to select a new orientation for your screen.
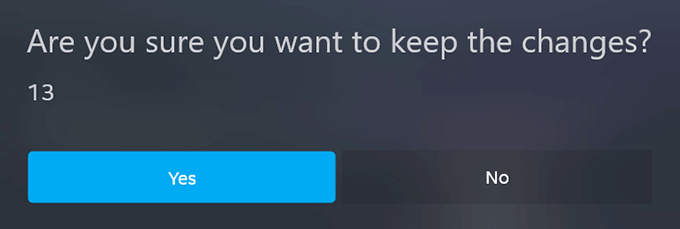
- You’ll instantly see the preview of your rotated screen. Click on Yes if you want to keep it or wait a few seconds and it’ll undo the changes.
Use a Third-Party App To Rotate Screen In Windows 10
As it is clearly seen in the above methods, there are a number of screens you need to go through before your screen actually rotates. If that’s too much for you to do and you’d prefer a simpler option, a third-party app might be a better solution for you.
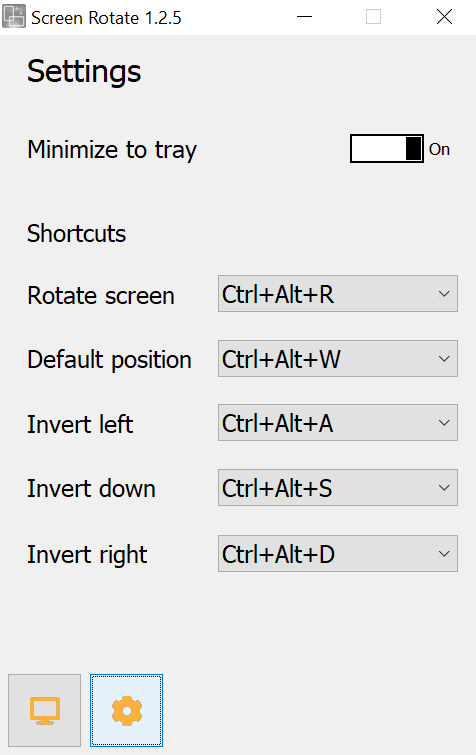
There’s a free app called Screen Rotate on the Microsoft Store that lets you do Windows 10 screen rotation with the click of an option. It also has keyboard shortcuts to make things even easier for you.
- Download, install, and launch Screen Rotate on your PC.
- Select your display from the dropdown menu. Then click on any of the available rotation options to rotate your screen.
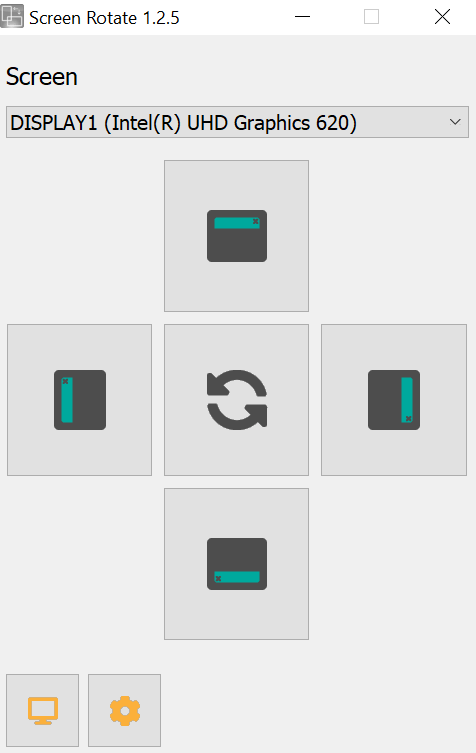
- Click on the settings icon at the bottom to view the available shortcuts.
How To Disable Screen Rotation In Windows 10
In addition to traditional computers, Windows 10 also runs on tablets and such other touch-enabled devices. On these devices, it automatically rotates the screen as you change the physical orientation of your device. It is to ensure that you can always view your screen in the correct orientation.
If you don’t like this behavior of the system, you can actually disable it. Disabling screen rotation will prevent your screen from being rotated no matter what physical orientation your device is in.
- Click on the Action Center at the bottom-right corner of your screen and enable the option that says Rotation lock.
- You can also find the option by launching the Settings app, clicking on System, and choosing Display.
Windows 10 screen rotation is certainly a useful feature for many users. Let us know where you use the feature and what method works the best for you. We await your response in the comments below.


