The Xbox Game Bar is a great feature in Windows 11 that lets gamers quickly access game-related features from the desktop. You can use its widgets to record game clips, take screenshots, chat with your gamer friends, and monitor performance.
Although useful, Xbox Game Bar can slow down your PC. If you notice that the performance of your computer is affected or you’re not using the feature at all, you should consider disabling or uninstalling it. In this blog post, we’ll discuss how you can disable or uninstall Xbox Game Bar without affecting other programs on your computer and gain more control over your PC.
What Is the Xbox Game Bar?
The Xbox Game Bar is a customizable gaming overlay with several features. You won’t need to leave the game to start recording gameplay or to start a live stream. It will even allow you to play Spotify in-game and enjoy good music during those long gaming sessions.
However, many users prefer to use alternatives or separate tools for streaming, recording, or chatting. That said, the Xbox Game Bar is not easy to uninstall, and even if you disable it, it’ll continue running in the background. This can cause PC issues and crashes.
Why Are You Not Allowed to Uninstall Xbox Game Bar?
The Xbox Game Bar is an app built into the Windows system. That’s why if you try to uninstall it through Add or Remove Programs, you’ll notice its uninstall button is grayed out. As a system application, it cannot be quickly deleted.
Luckily you can disable the Xbox Game Bar and even stop it from working in the background. You can also uninstall it, but it will take more time and effort than a simple click.
Uninstall Xbox Game Bar With PowerShell
PowerShell is your best option for completely removing the Xbox Game Bar app from your Windows PC. But before you start uninstalling the Game Bar with it, create a system restore point in case something goes wrong.
Then follow these steps to uninstall the Xbox Game Bar with PowerShell:
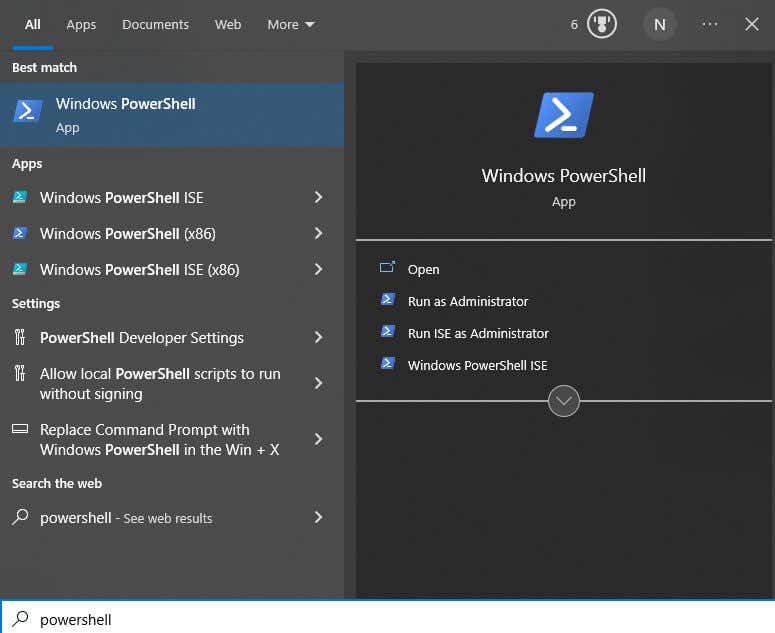
- Go to the Windows search bar and type “PowerShell” to find it.
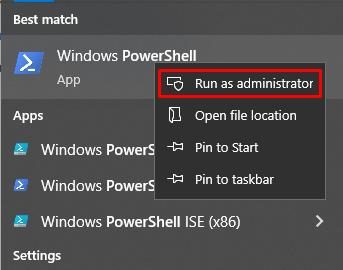
- Right-click on the app and select Run as administrator to open PowerShell.
- Windows PowerShell command bar will open, type the following command:
dism /Online /Get-ProvisionedAppxPackages | Select-String PackageName | Select-String xbox and hit enter.
- This command will show your system’s packages. To delete the Xbox game bar you can do it by DISM (Deployment Image Service and Management) or cmdlet commands.
Using the DISM Command
Here’s how to use the DISM method. Just type the following commands, pressing Enter after each one:
Dism /Online /Get-ProvisionedAppxPackages | ‘
Select-String PackageName | ‘
Select-String xbox | ‘
ForEach-Object {$_.Line.Split(‘:’)[1].Trim()} | ‘
ForEach-Object { dism /Online /Remove-ProvisionedApxPackage /PackageName:$_}
Using the Cmdlet Command
Here’s how to use the cmdlet option:
Get-ProvisionedAppxPackage -Online | ‘
Where-Object { $_.PackageName -match “xbox”} | ‘
ForEach-Object { Remove-ProvisionedAppexPackage -Online -PackageName$_.PackageName}
If you want to remove the Xbox Game Bar for all users, use these commands instead:
Get-ProvisionedAppxPackage -Online | ‘
Where-Object { $_.PackageName -match “xbox”} | ‘
ForEach-Object { Remove-ProvisionedAppexPackage -Online -AllUsers -PackageName$_.PackageName }
To check if the Xbox packages were successfully removed, type this in the command prompt: dism /Online /Get-ProvisionedAppxPackages | Select-String PackageName | Select-String xbox
If PowerShell doesn’t display any results, you have successfully removed the Xbox Game Bar from your Windows 11 or 10 device.
Uninstall the Xbox Game Bar with Third Party Programs
If PowerShell is too complicated and you don’t want to mess with it, you can use uninstaller apps to remove Xbox Game Bar from your PC. These apps are designed to remove system-bound apps that your Windows system won’t allow you to uninstall. There are plenty of such apps on the market, and they all work similarly.
You’ll have to:
- Find an uninstaller app in the Microsoft Store to download and install on your PC.
- Launch it and find the Xbox Game Bar.
- Click Remove or Uninstall, depending on the app you choose.
- Restart your computer to implement the change.
If you don’t want to permanently remove the Xbox Game Bar from your device, you don’t have to. In that case, continue reading to learn how to correctly disable it.
Disable Xbox Game Bar with Registry Editor
If PowerShell is too complicated and you don’t want to mess with it, you can disable it instead.
You can use the Registry Editor to remove the Xbox Game Bar. Remember that you won’t uninstall the Xbox Game Bar with this method; you will only disable it. Here’s what you need to do:
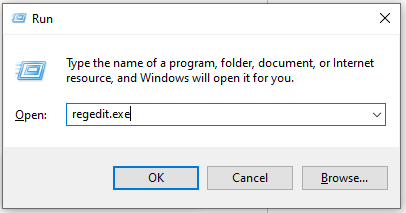
- Press the Windows key + R keyboard shortcut to open the Run dialog. Next, type regedit.exe to open the Registry Editor. You can also use the search function and type Registry Editor to find it and run it as administrator.
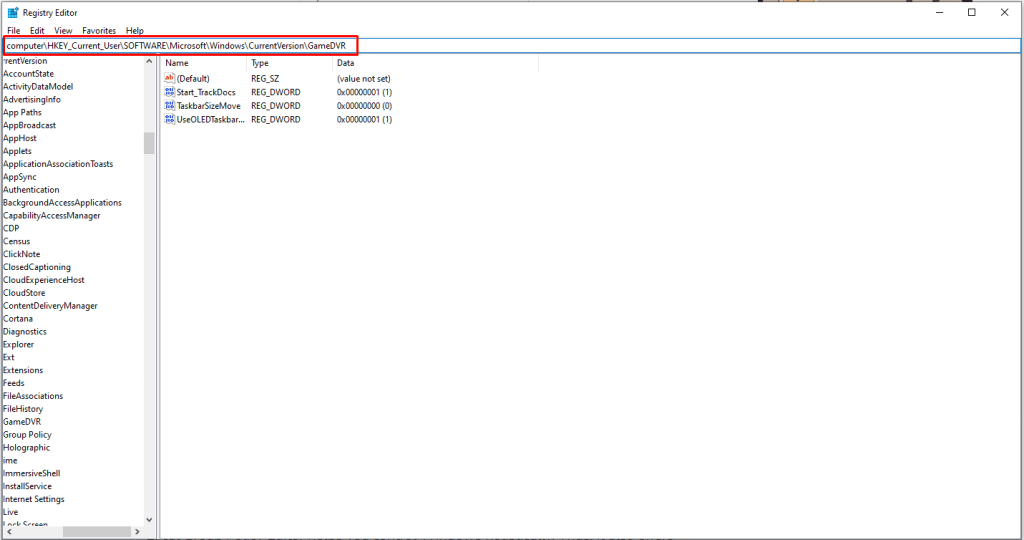
- Type the following line in the top address bar: computer\HKEY_Current_User\SOFTWARE\Microsoft\Windows\CurrentVersion\GameDVR. Hit enter to go to the address. You can also manually navigate to this section.
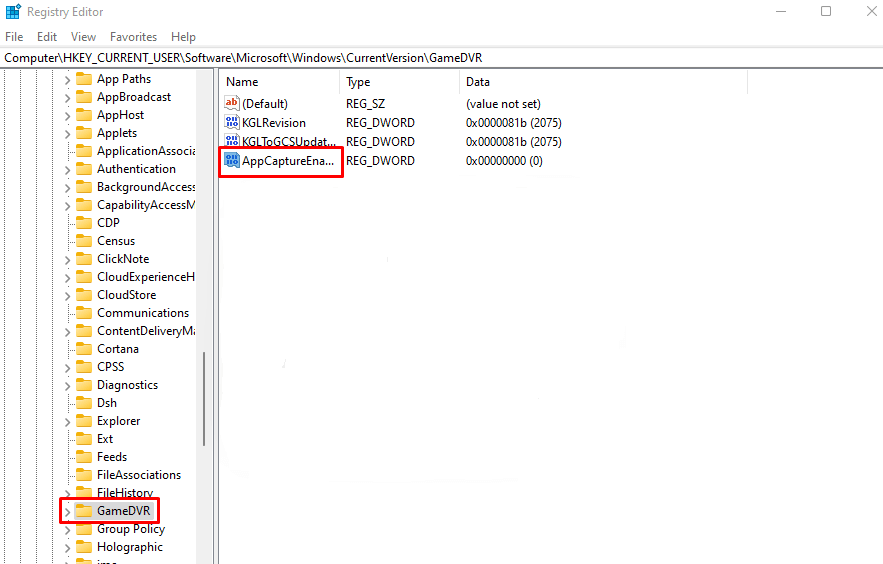
- Find the GameDVR folder on the left side menu and select it. Then double-click the AppCaptureEnabled option on the right panel.
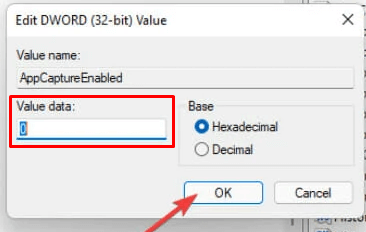
- When the prompt opens, type 0 under Value data and press OK.
You’ll have to reboot your PC to implement these changes. And that’s all there is to it. You successfully disabled Xbox Game Bar from your PC. This method works on both Windows 11 and Windows 10.
How to Disable Xbox Game Bar on Windows 10
Disabling the Xbox Game Bar on Windows 10 is not enough. It’ll keep running in the background and affect your computer’s performance. You’ll have to disable both the Xbox Bar and its background access. Here’s how:
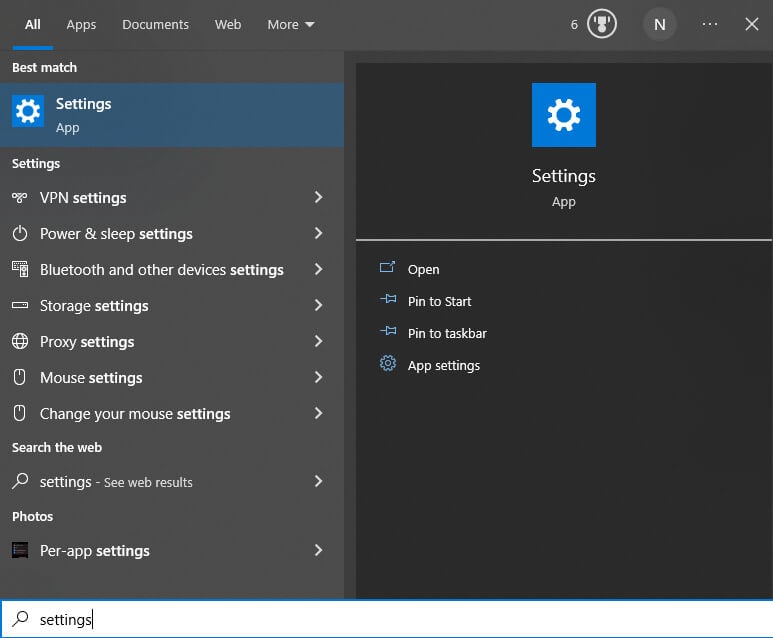
- Go to Windows Settings by pressing the Windows key + i on your keyboard. Alternatively, type Settings in the search bar in the Start menu.
- Type Xbox Game Bar in the search box at the top of the window and hit enter.
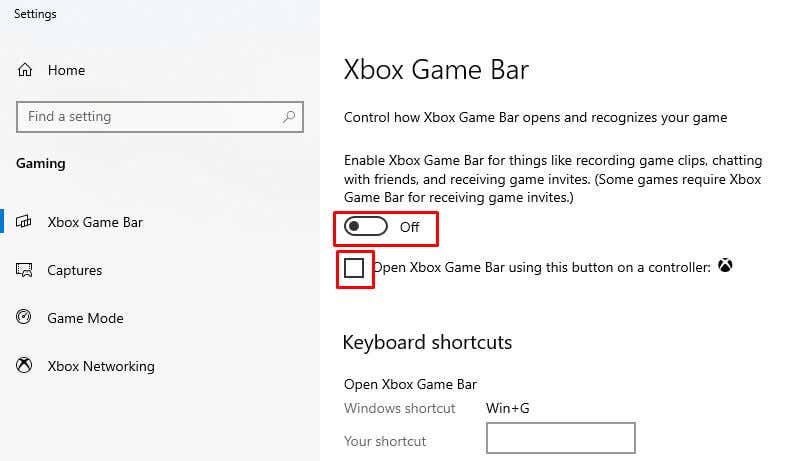
- This will open the Xbox Game Bar settings, where you can toggle it off.
- Find Open Xbox Game Bar using this button on a controller option and uncheck the box next to it.
Now, you can rest assured that the Game Bar won’t hamper your work.
How to Disable Xbox Game Bar on Windows 11
Disabling Xbox Game Bar is pretty straightforward on Windows 11 devices, but there are some differences from Windows 10. So if you’re a Windows 11 user, follow these steps:
- Open the Settings menu.
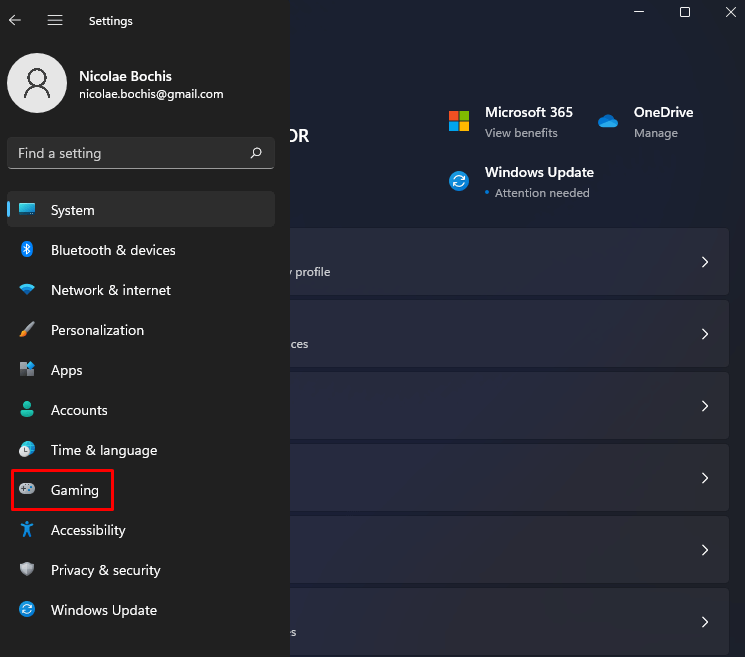
- Go to Gaming located in the left column.
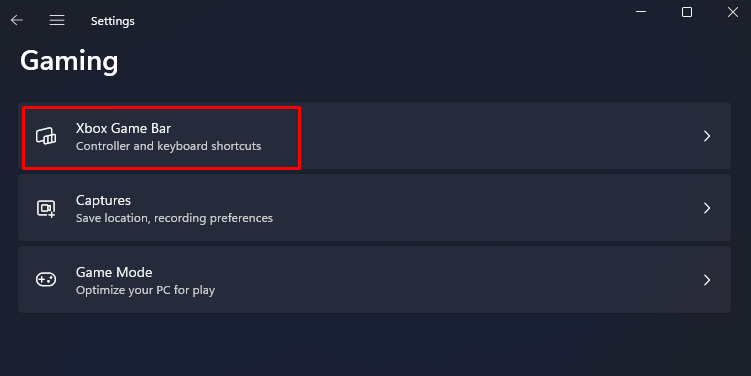
- Select Xbox Game Bar.
- Toggle the switch to turn it off.
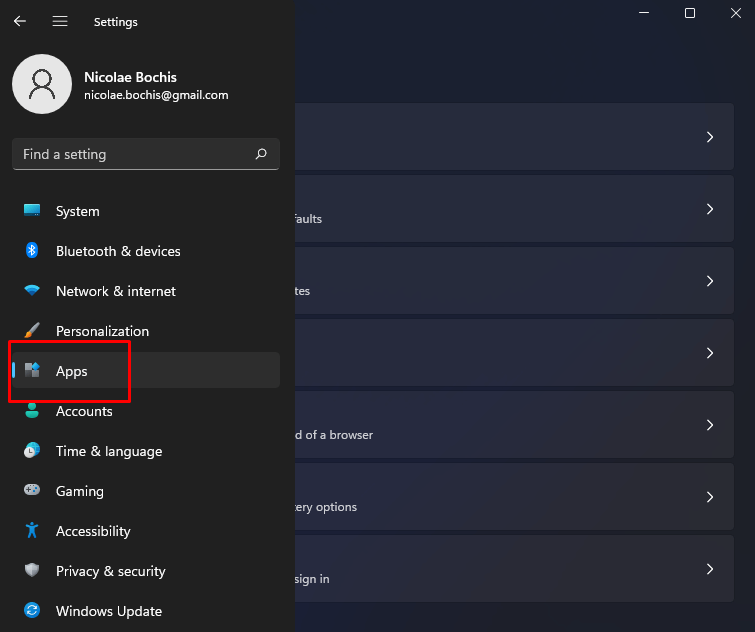
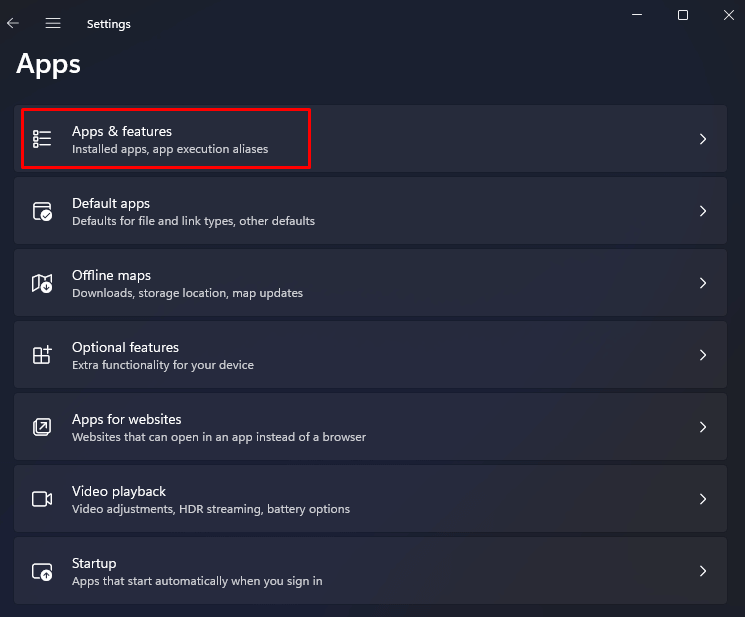
- On the left panel, find Apps.
- Select the Apps & Features option.
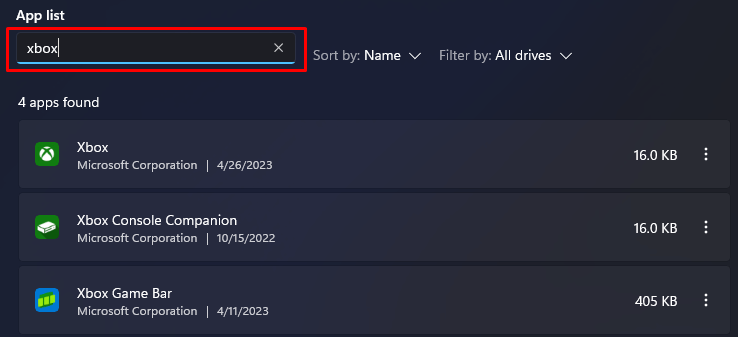
- In the apps list field, type Xbox to find the Game Bar.
- Click the three dots menu next to it, and select the Advanced option.
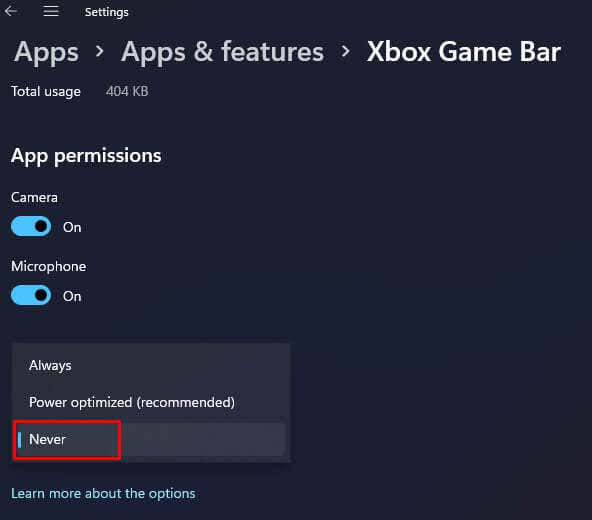
- Scroll down until you find Background apps permissions, and select Never from the drop-down menu.
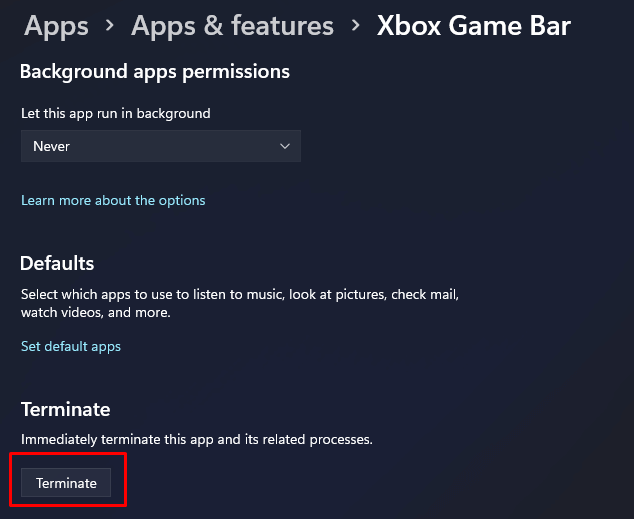
- Scroll down to find Terminate. This will stop the app from running in the background.
Congrats! You successfully disabled Xbox Game Bar on your Windows 11 PC.
All in all, disabling or uninstalling the Xbox app on Windows 11 is easy. Remember to create a restore point before uninstalling the game bar. Other than this, you don’t have to worry about anything.


