Razer Synapse software updates are like a tune-up for your Razer gear. They bring new features, increase performance, and patch software and firmware-related hiccups. Keeping Razer devices in peak form hinges on these updates.
By default, Razer Synapse keeps itself up-to-date automatically. But what if auto-updates are disabled, or you want to be sure you’re on the latest version?
In that case, you have three approaches to update Razer Synapse: through the Windows system tray, the Razer Synapse user interface, and the Razer Gaming Software utility.
This tutorial walks you through all possible ways to update Razer’s latest unified cloud-based hardware configuration tool—Razer Synapse 3—on Microsoft Windows 10 and 11.
Update Razer Synapse via Windows System Tray
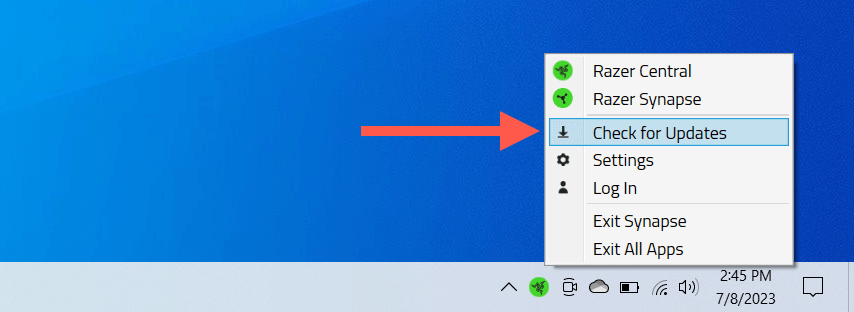
Razer Synapse is always running in the Windows background, so the fastest way to update it is through the system tray. To do that:
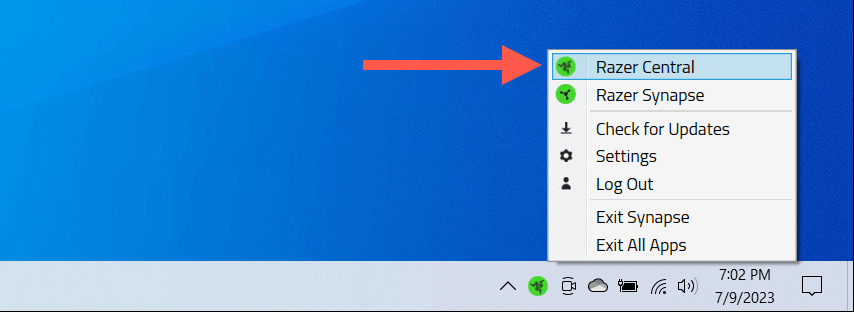
- Locate and right-click the Razer icon on the system tray and select Check for Updates.
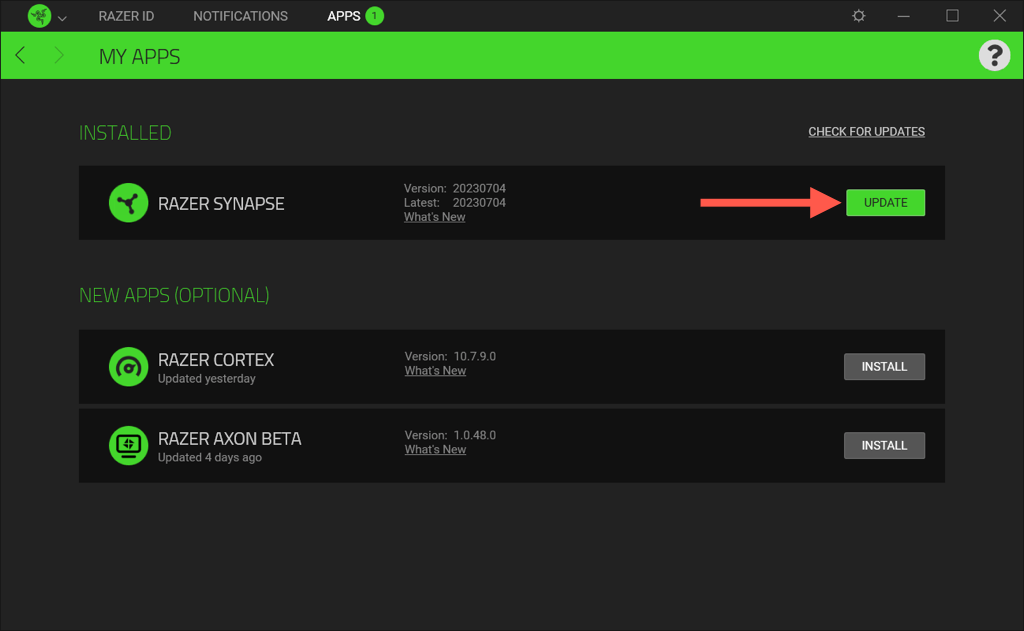
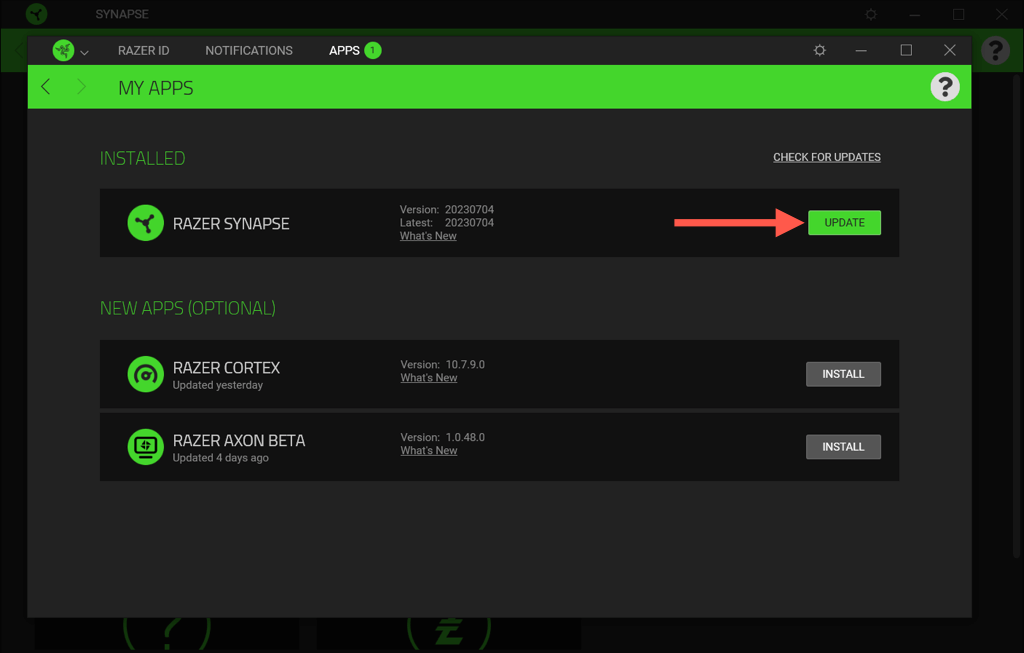
- Select Update if there’s an available update for Razer Synapse.
Note: You can update other Razer applications—Chroma RGB, Cortex, Axon, etc.—on your computer from the same screen.
Update Razer Synapse via Application Interface
Another method to update Razer Synapse is through the application’s user interface. Here’s how:
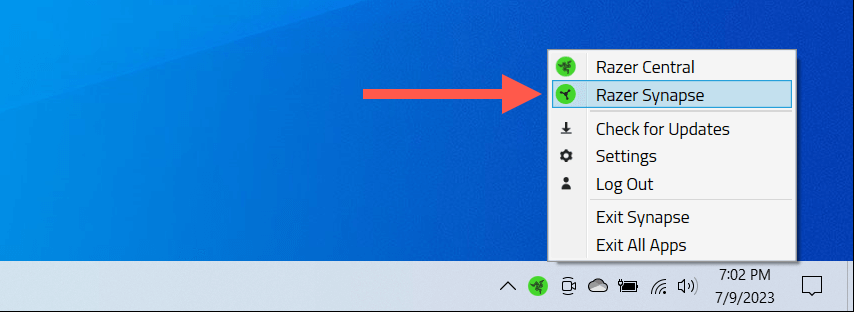
- Open Razer Synapse through the Start menu or system tray.
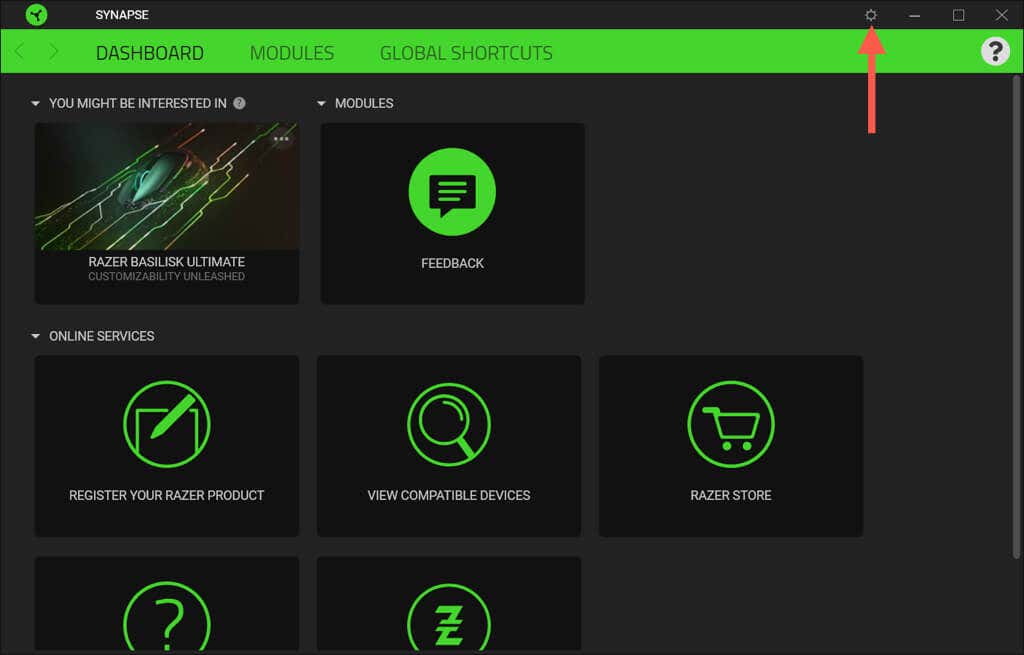
- Select the Gear icon on the window’s top right.
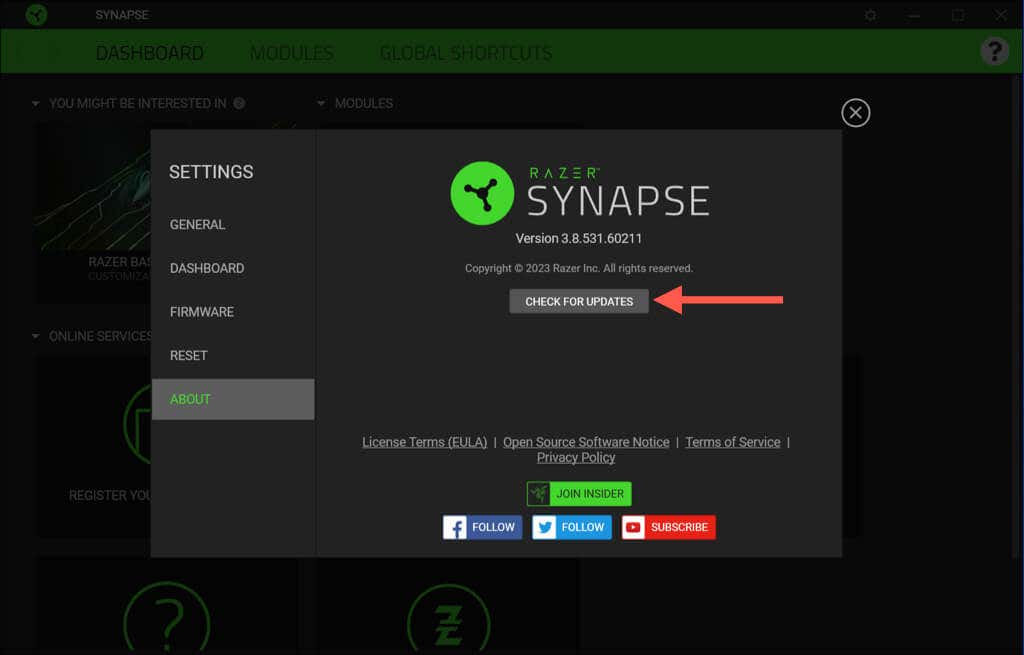
- Select About > Check For Updates.
- Select Update next to Razer Synapse..
Update Razer Synapse via Razer Gaming Software
If problems with the Razer Synapse installation prevent you from updating it normally, use the Razer Gaming Software utility to perform the update. It’s accessible via Windows’s Apps and Features/Installed Apps console. Just:
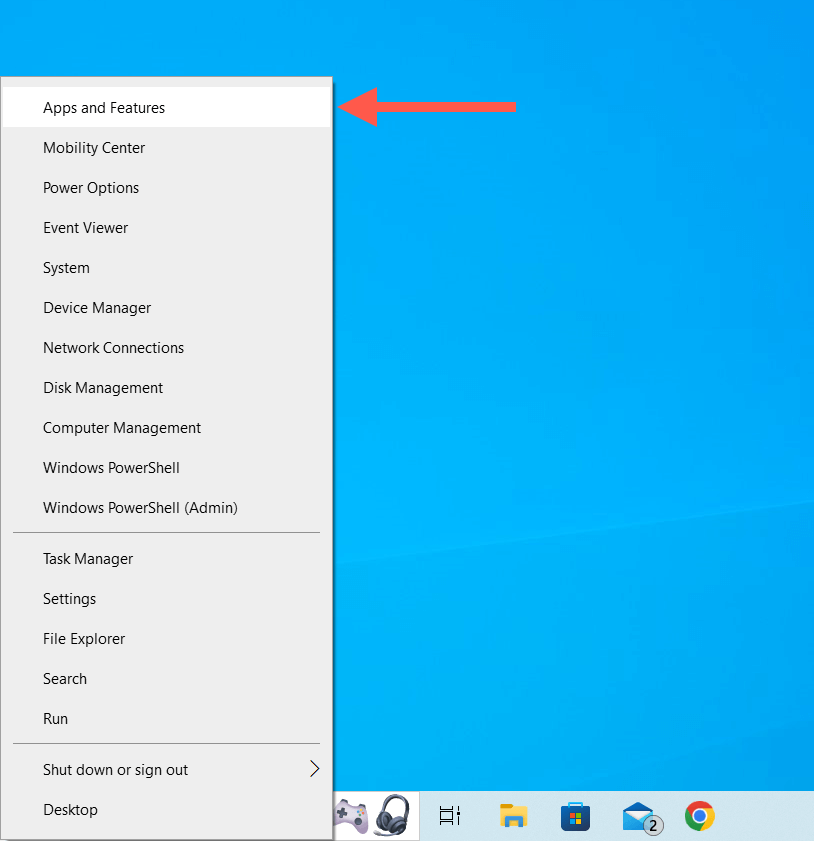
- Right-click the Start button and select Apps and Features/Installed apps.
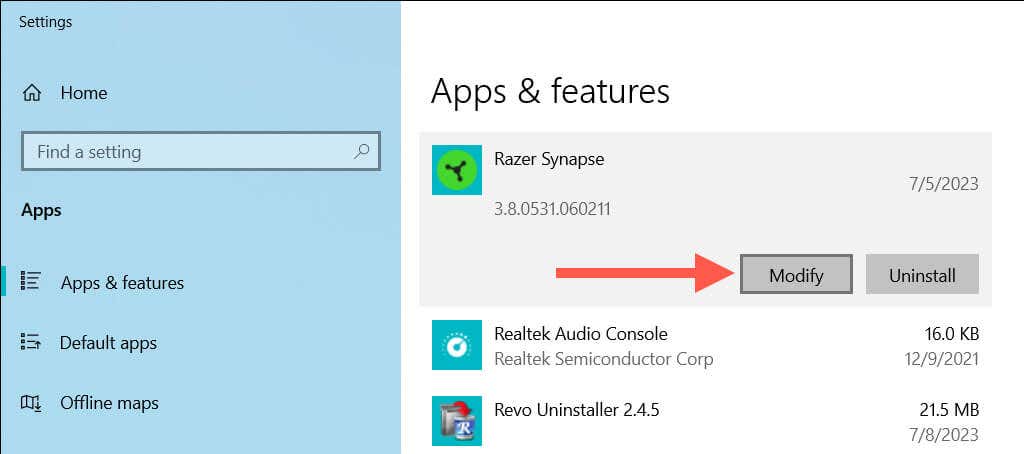
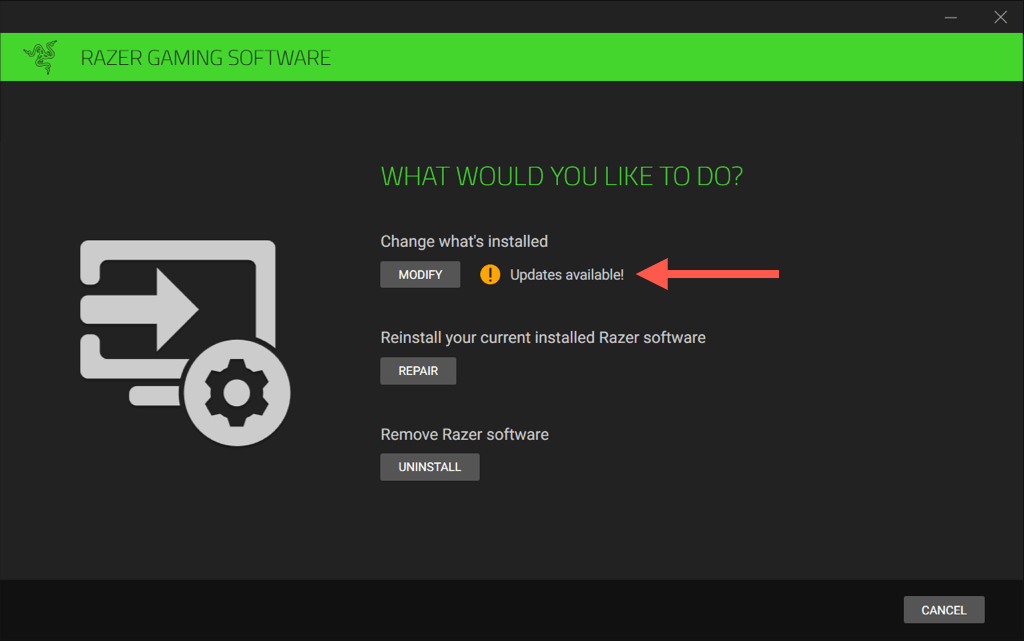
- Select Razer Synapse and choose Modify.
- On the Razer Gaming Software window that shows up, select Modify.
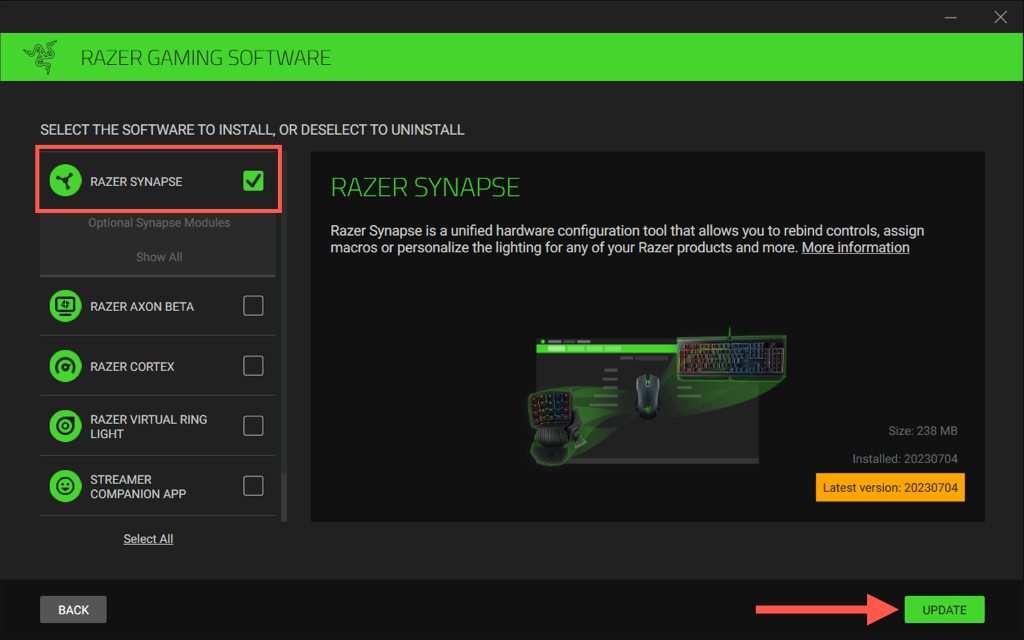
- Check the box next to Razer Synapse and choose Update.
Enable Automatic Razer Synapse Updates
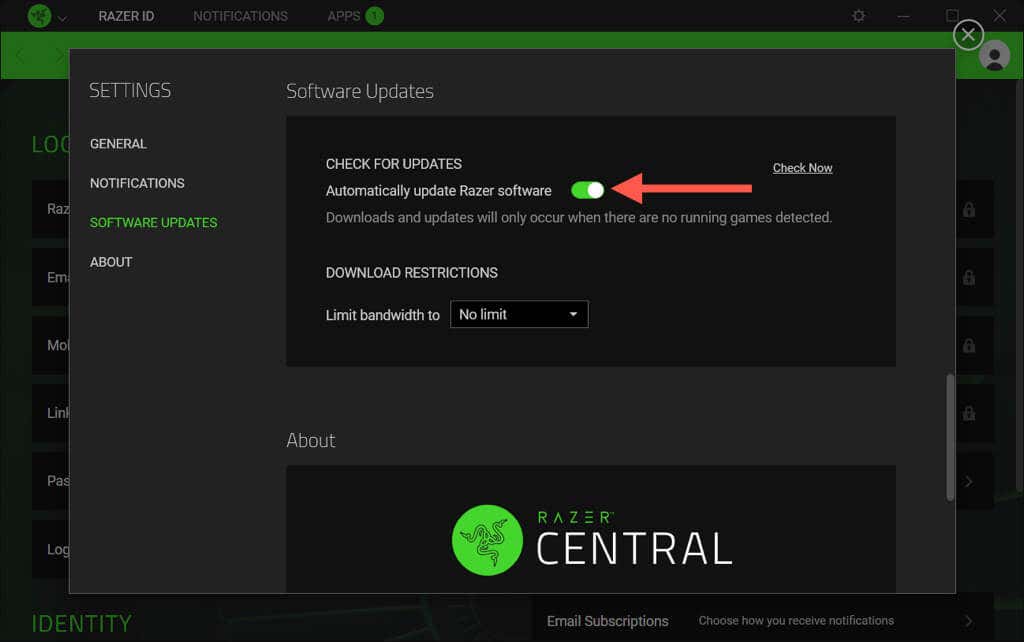
Automatic Razer Synapse updates are active by default. If they aren’t and you want to re-enable them:
- Open Razer Central via the Windows system tray.
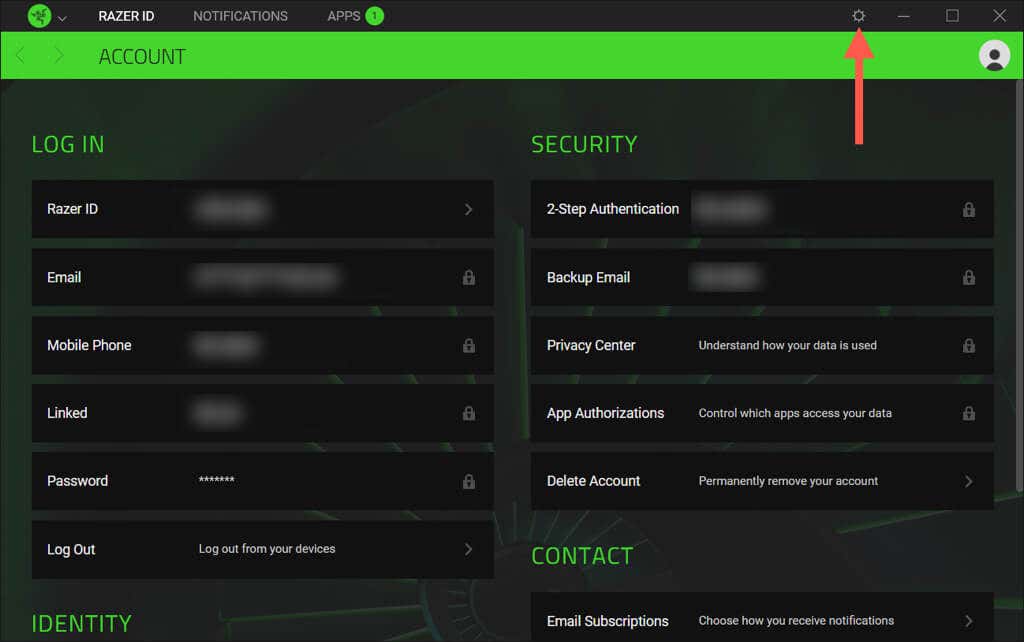
- Select the Gear icon on the top right of the window.
- Scroll down to the Software Updates section and enable the switch next to Automatically update Razer software.
Can You Update Razer Synapse on the Mac?
At the time of writing, Razer Synapse 3 is not available for macOS operating systems. However, if you’re using the older Razer Synapse 2 app on a Mac and want to confirm its got all incremental updates installed:
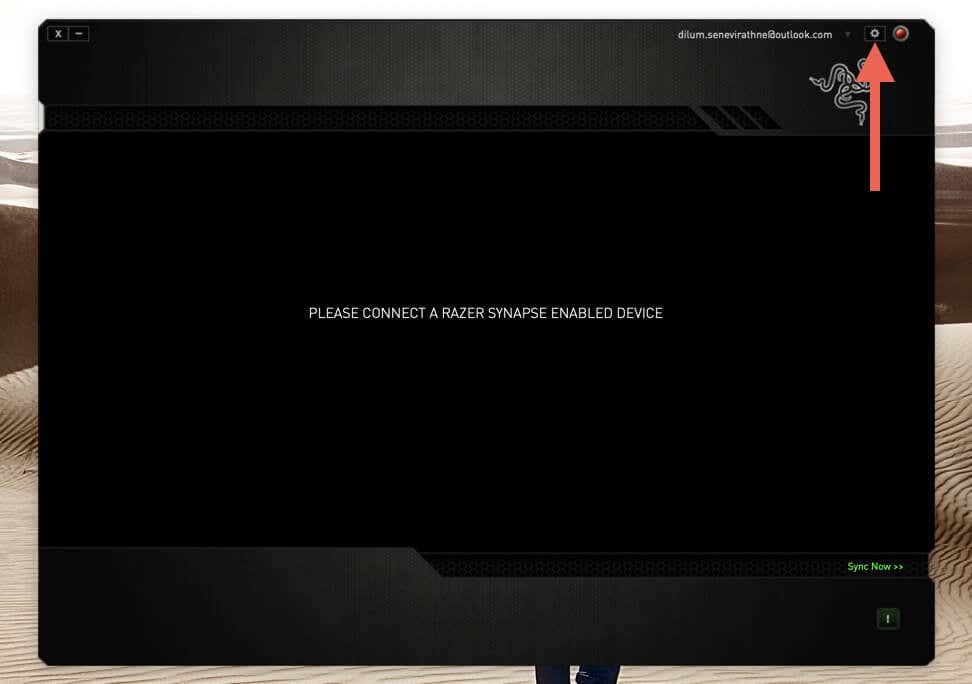
- Select the Razer Synapse icon on the menu bar and choose Open Razer Synapse.
- Select the Gear icon on the top right of the Razer Synapse window.
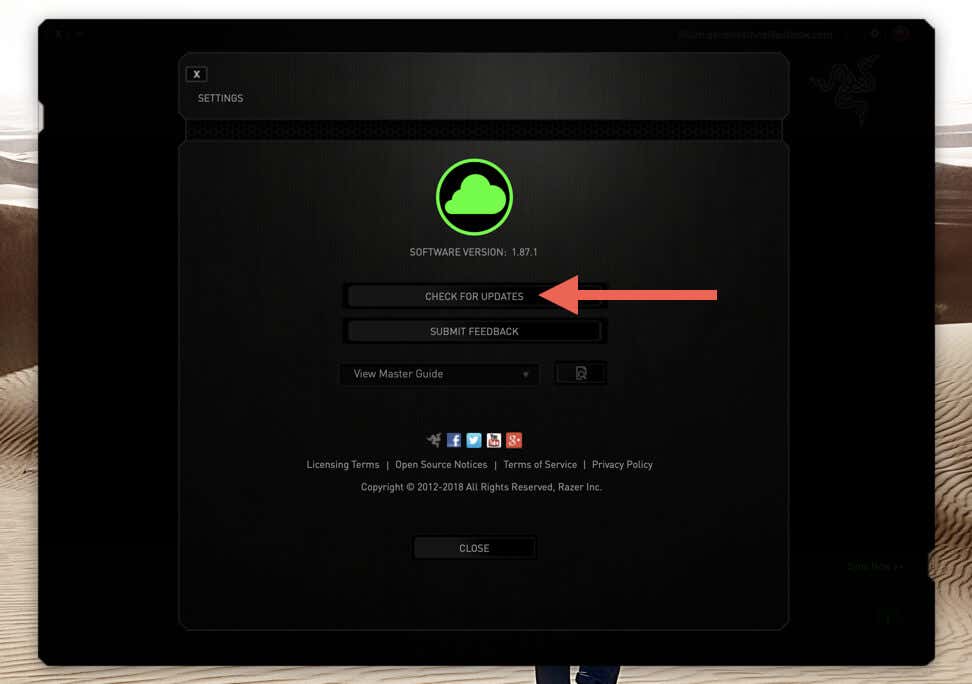
- Select Check for Updates.
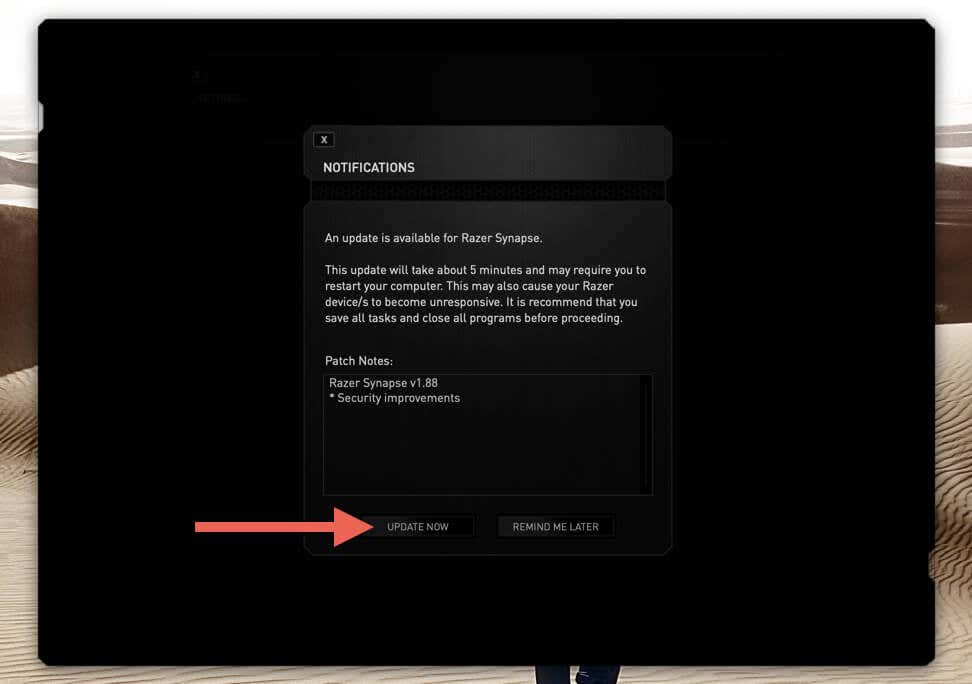
- Select Update Now if there’s a pending update.
Razer Synapse Is Now Up-to-Date
Staying current with Razer Synapse updates is a small but critical step to unlocking the full potential of your Razer devices. Even with automatic updates turned on, it’s good practice to occasionally double-check if the application is up-to-date.


