Experiencing constant crashing issues with your Windows 11 PC can be incredibly frustrating! You just want to do your jobs without interruption, but instead, you’re faced with a computer that keeps freezing, rebooting, or presenting that dreaded blue screen.
We’ll walk you through the steps to troubleshoot the problem if Windows 11 keeps crashing and how to fix the issue. Of course, these tips apply to Windows 10 too!
Is Windows 11 the Problem?
Before embarking on your troubleshooting journey, take the time to figure out if your Windows 11 operating system is the real culprit behind the crashing issue. Pay close attention to each crash. Are there specific apps or tasks that provoke the system to fail? Also, note patterns or correlations that can help identify the root cause.
If the crashes appear exclusive to a particular app, you may be dealing with a software-related issue rather than an operating system problem. In this case, the first action should be to uninstall the problematic app. To do this, use the Start button, search for and select Add or Remove Programs, locate the app in question, and select Uninstall from its three-dot menu.
Once the uninstallation process is complete, see if your computer crashes again. If not, reinstall the app from the Microsoft Store, another storefront (e.g., Steam), or the software vendor’s website, then wait to see if the crashing issue returns.
While exploring the possibility of Windows 11 causing the crashes is essential, don’t overlook the hardware and peripheral devices as the culprits. For instance, a faulty USB device or an incompatible graphics card can lead to system instability. Disconnect any non-essential peripherals to see if the issue continues. If the crashing stops, reconnect the devices individually to identify the problematic hardware. Once identified, consider updating the device driver or replacing the hardware if it is incompatible or faulty.
Tip: An old hard drive or SSD is a common cause of crashes. So using disk health analysis tools should be part of your investigation.
Malware and other security threats can also cause system crashes. To rule out this possibility, run a thorough antivirus scan using Windows Defender or a trusted third-party antivirus solution. To perform a full scan with Windows Defender, open the Windows Security app, click on Virus & Threat Protection, and under Scan Options, choose Full Scan.
If malicious software is detected, follow the on-screen instructions to quarantine or remove the threat.
Restart Windows
Sometimes, the easiest and most effective solution to fix Windows 11 crashing is simply restarting the system. While it may seem too easy, a quick reboot can often resolve temporary glitches or conflicts that lead to system instability.
Of course, if the type of crash you’re experiencing forces a restart anyway (such as a BSOD) rather than just components or applications within Windows 11, then you’ll need to move on to more advanced troubleshooting steps.
Tweaking BIOS Settings
The BIOS (or UEFI in most modern computers, if we’re being technical) is responsible for the fundamental communication between the operating system and computer hardware. Improper settings in your BIOS can lead to instability, incompatibility, and sometimes crashes. So it’s best to have a look around your BIOS to make sure everything is still OK:
- Shut down your computer and turn it on again, or initiate a restart.
- Access the BIOS setup menu by pressing the designated key (usually Del, F2, or F10) during the initial boot process. Check your motherboard manual or the startup messages on your computer’s screen for more details.
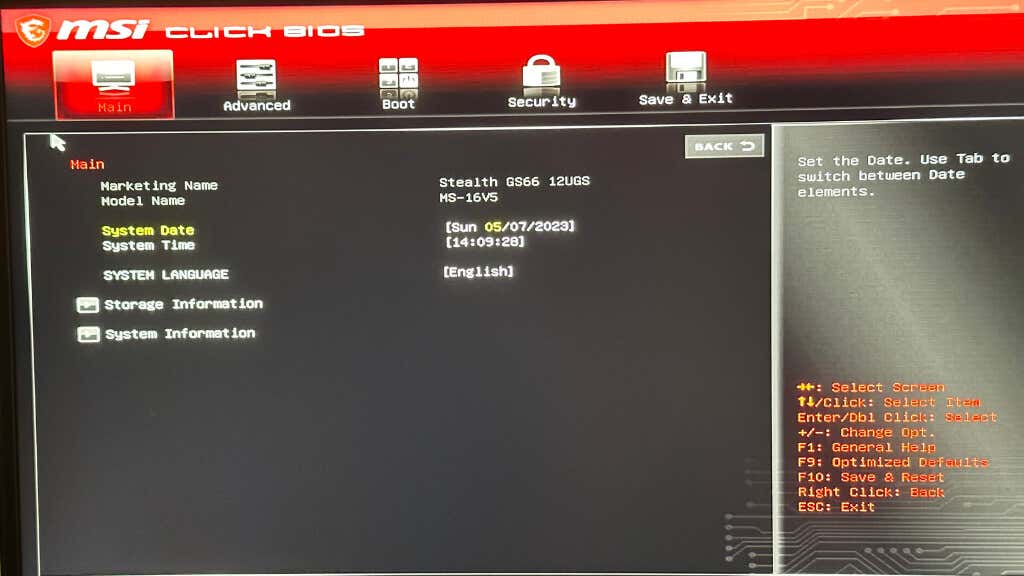
- Navigate to the settings related to CPU and memory, such as clock speeds, voltages, and timings. Ensure these settings align with your hardware’s specifications. If you’re unsure, select the default or “Auto” settings.
- Check for power management settings, like enabling or disabling specific power-saving features, and adjust them accordingly. Some power-saving features may conflict with Windows 11, causing instability. Again, it’s usually safest to reset these settings to their automatic or default states.
- Look for any settings related to virtualization, such as Intel VT-x or AMD-V, and enable or disable them based on your system requirements. Incompatibilities with virtualization features can cause crashes in Windows 11.
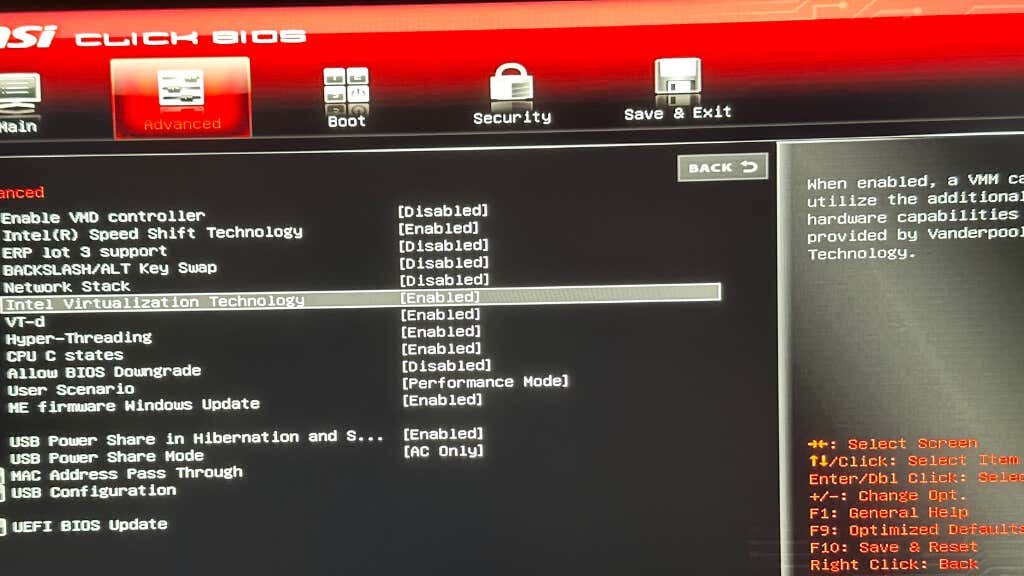
- Look for anything related to overclocking your CPU or RAM. Check if CPU voltages have been manually modified. An overclocked system may be very unstable, and if you’ve received the computer from someone else, they may have forgotten to restore the default settings.
- Save your changes and exit the BIOS setup menu, allowing your PC to reboot.
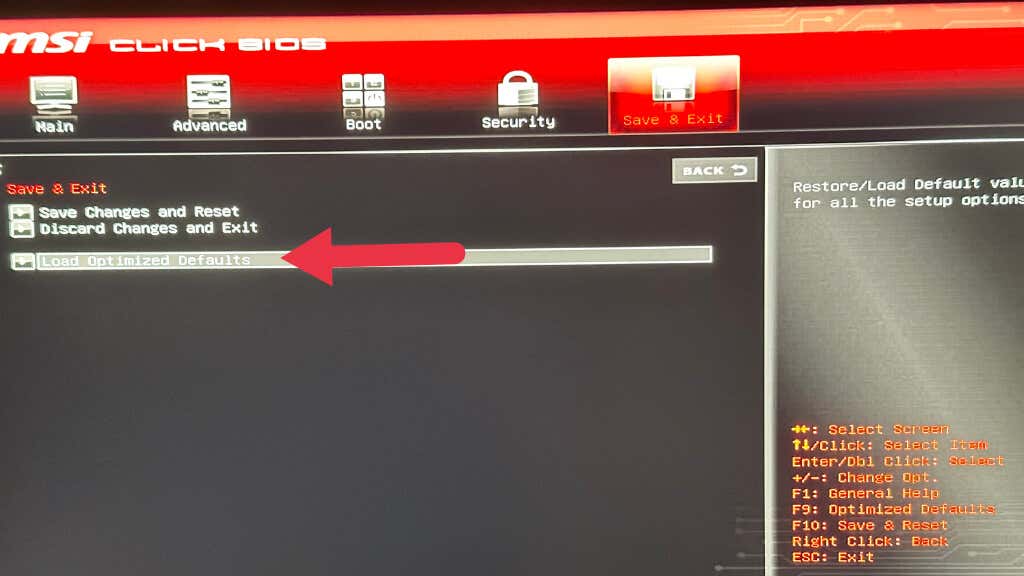
Don’t fiddle with any settings you don’t understand. Changing settings to “auto” or failing that “default” is the safest way to proceed if you want maximum stability. If you don’t want to comb through countless menus of BIOS settings, you can always use the “restart and restore default settings” or similarly-worded option on the BIOS exit menu.
The Importance of Windows 11 Updates
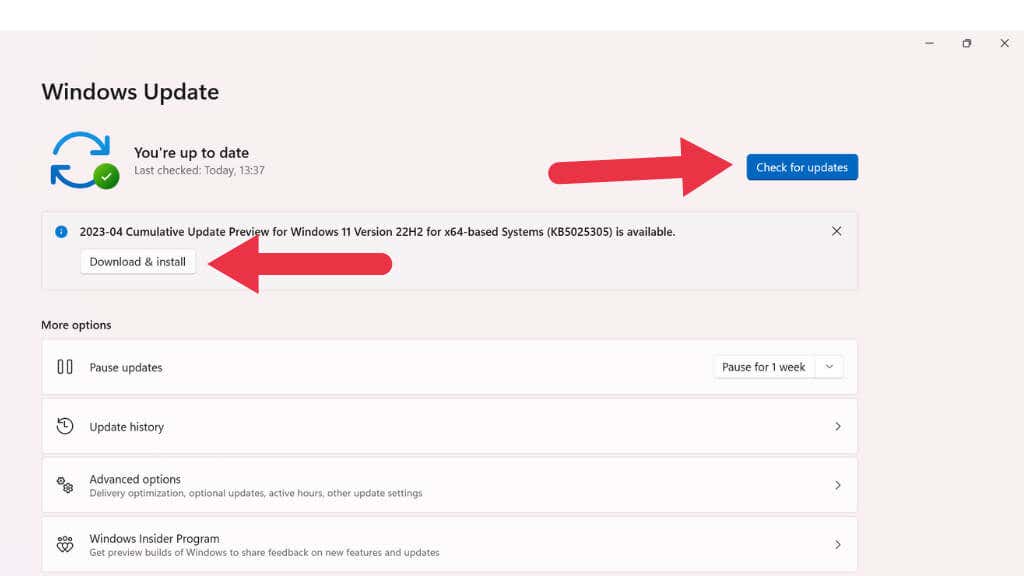
Checking for updates is one of the first steps in fixing a crashing Windows 11 PC. Microsoft regularly releases updates to improve performance and patch security vulnerabilities. To check for updates, right-click the Start button, select Settings, then Windows Update, and finally, Check for updates.
If updates are available, install them and restart your computer.
Outdated Drivers Can Cause Crashes
Outdated device drivers can be a leading cause of crashes. To update your drivers, open “Device Manager” by right-clicking the Start button and selecting it from the list. Next, expand the categories, right-click each device, and choose “Update driver.” Alternatively, visit the manufacturer’s website for your hardware components and download the latest drivers.
Identifying and Resolving Incompatible Programs
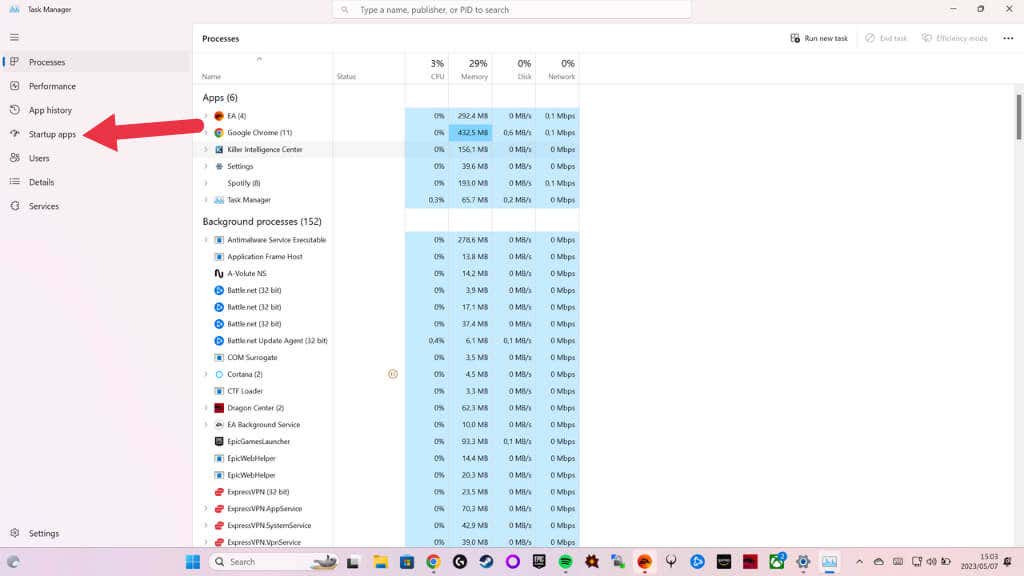
Software conflicts can lead to crashes and freezes. To check if this is the issue, do a clean boot to start Windows with only essential Microsoft services running.
Press Ctrl + Shift + Esc to open the Task Manager.
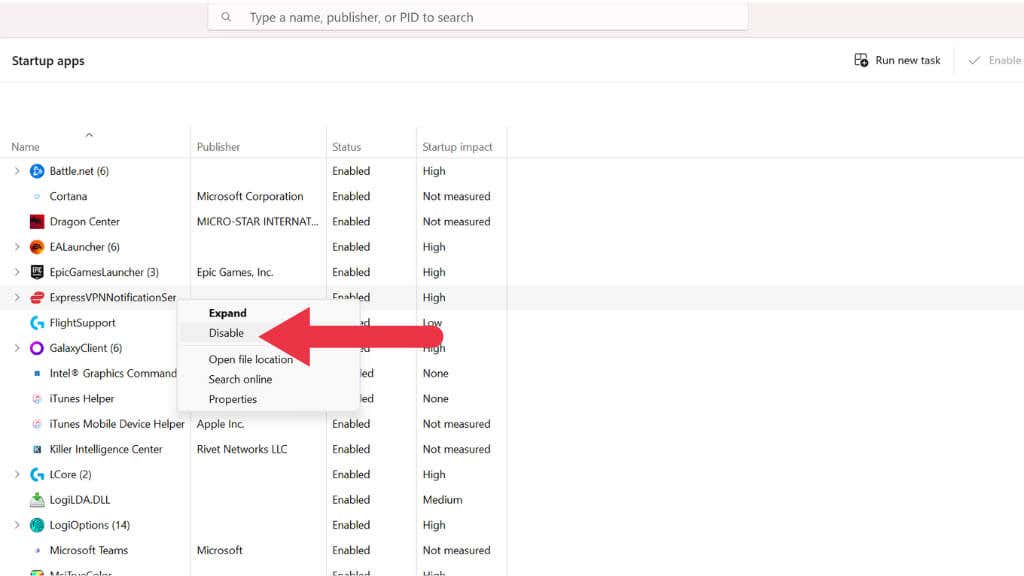
Go to the Startup tab, and disable all non-Microsoft services by right-clicking on the app and selecting Disable.
Restart your PC and observe if the issue continues. If the crashing stops, enable the disabled services individually until you identify the problematic software. Uninstall or update the conflicting program to resolve the issue.
Memory Matters: Testing and Troubleshooting RAM Issues
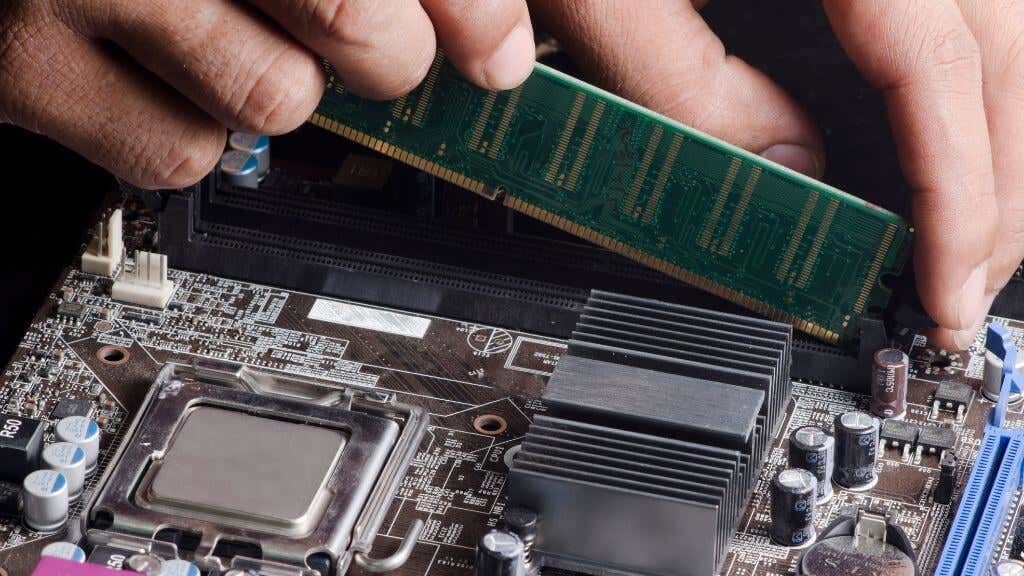
Faulty or incompatible RAM can cause system crashes. To diagnose this, run the built-in Windows Memory Diagnostic tool. Type “Windows Memory Diagnostic” into the Start menu search bar, and select Restart now and check for problems. Your PC will reboot and run the memory test. If issues are detected, consider replacing or upgrading your RAM. Also, if your RAM was overclocked or its default settings were modified, remember to undo those changes before running the memory test.
Overheating: Ensuring Your PC Stays Cool
Overheating can result in system crashes. Ensure your PC’s fans and cooling system function properly, and clean any dust build-up. Check your CPU and GPU temperatures using a monitoring tool, and if they’re consistently high, consider upgrading your cooling solution. Sometimes you may have a faulty cooler or the thermal paste between the cooler and CPU or GPU is no longer working correctly and must be replaced.
Rolling Back to a Stable State
If the crashes started after a recent change, try a System Restore to return your PC to a previous stable state. Type System Restore into the Start menu search bar, follow the prompts, and select a restore point from before the issues began.
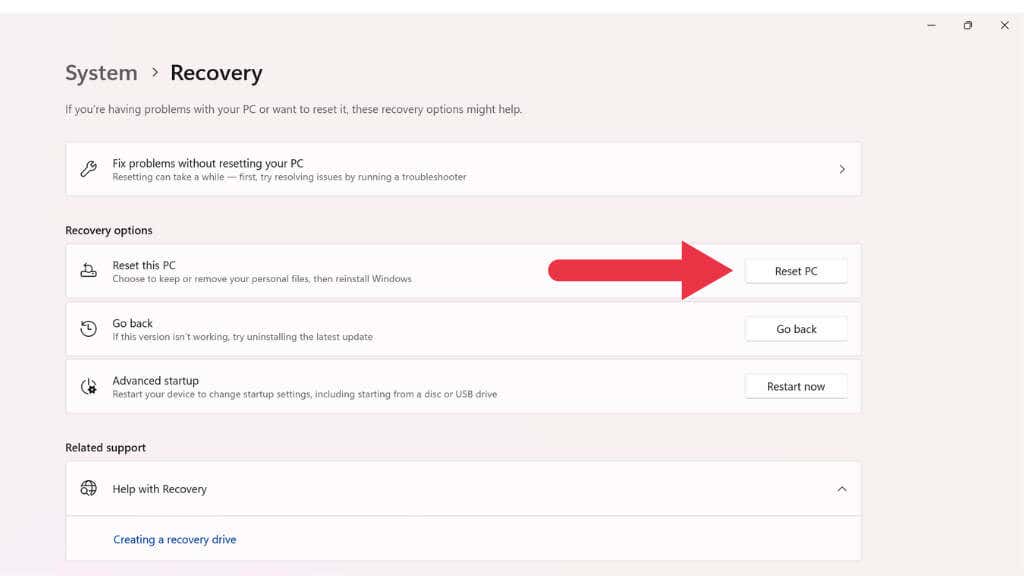
If that doesn’t work, consider resetting your PC by going to Settings > System > Recovery and selecting Reset this PC.
Note: The “reset” option in Windows 11 will take your Windows installation back to its factory default. Any applications pre-installed by your PC manufacturer will also be restored. You will be given the option to keep your files, but any software you installed yourself will be removed. We recommend making backups rather than relying on Windows 11 to preserve your files.
Checking and Restoring System Files: Harnessing the Power of SFC and DISM
System File Checker (SFC) is a built-in Windows utility that scans and repairs corrupted system files, which can often cause system crashes. To run an SFC scan, follow these steps:
- Type “Command Prompt” into the Start menu search bar.
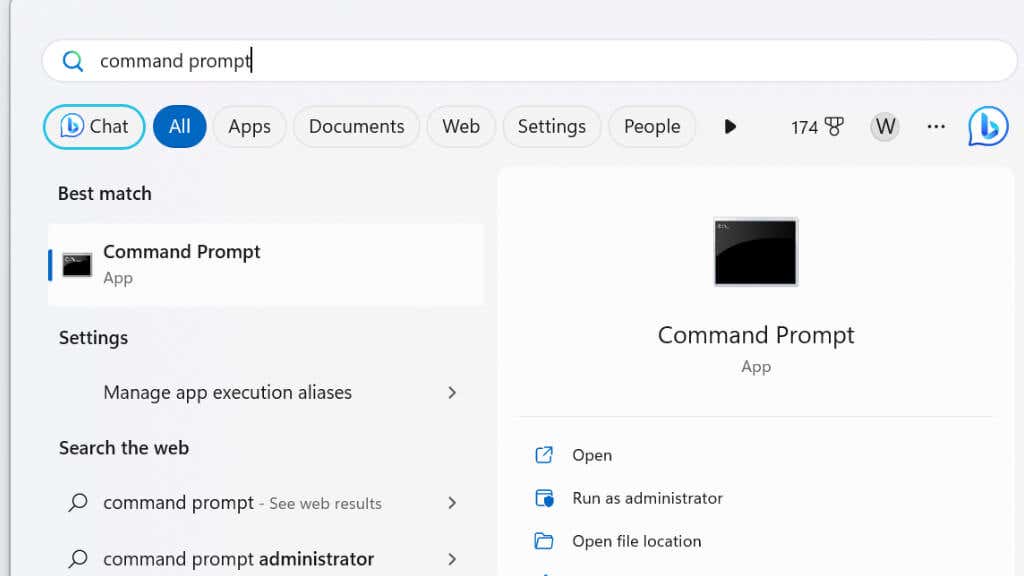
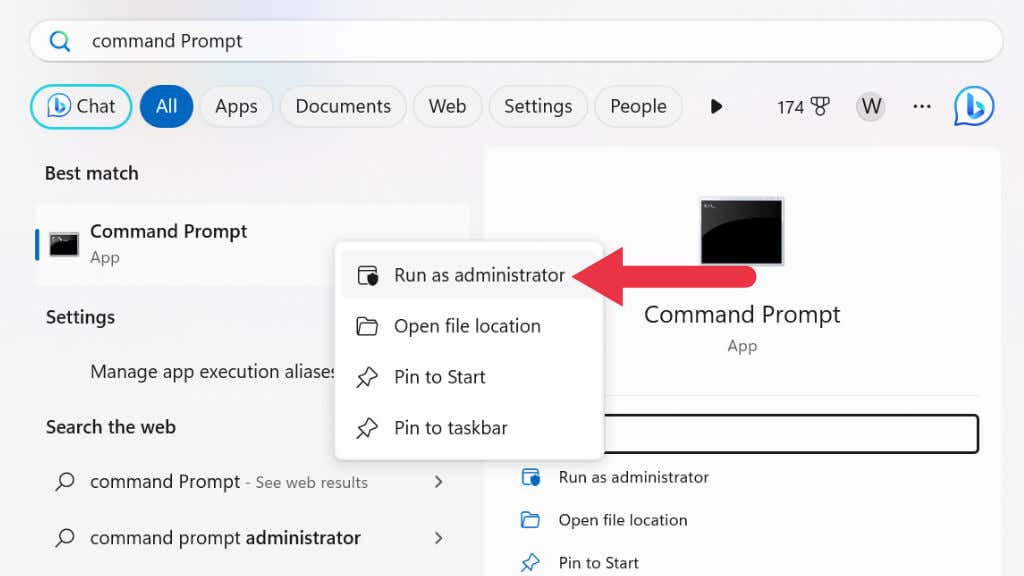
- Right-click on the Command Prompt result and select Run as administrator.
- In the Command Prompt window, type the following command and press Enter: sfc /scannow
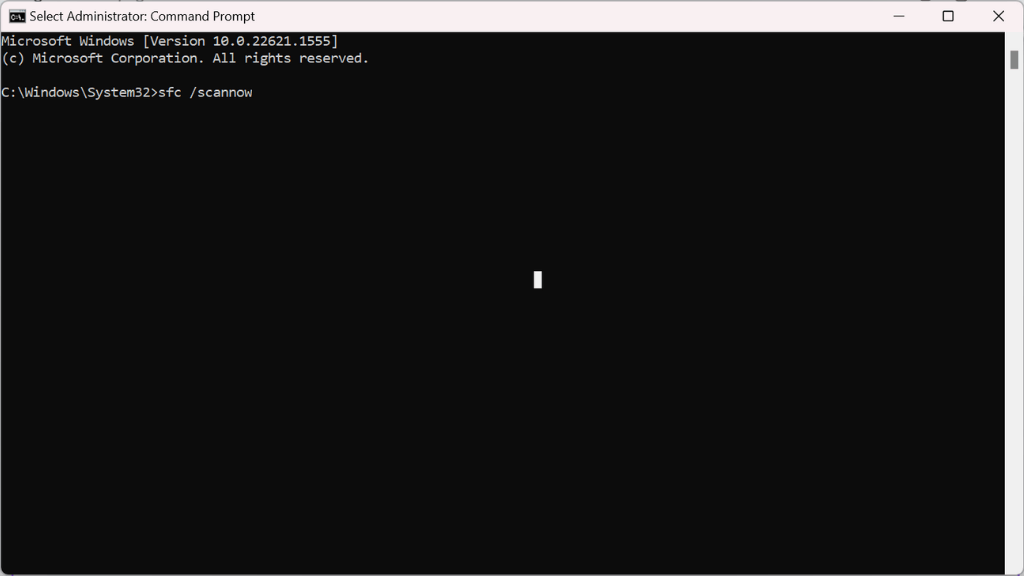
- The SFC scan will start, checking your system files for any corruption or damage. If there are errors, the program will try to repair them automatically. This process may take a while, so be patient!
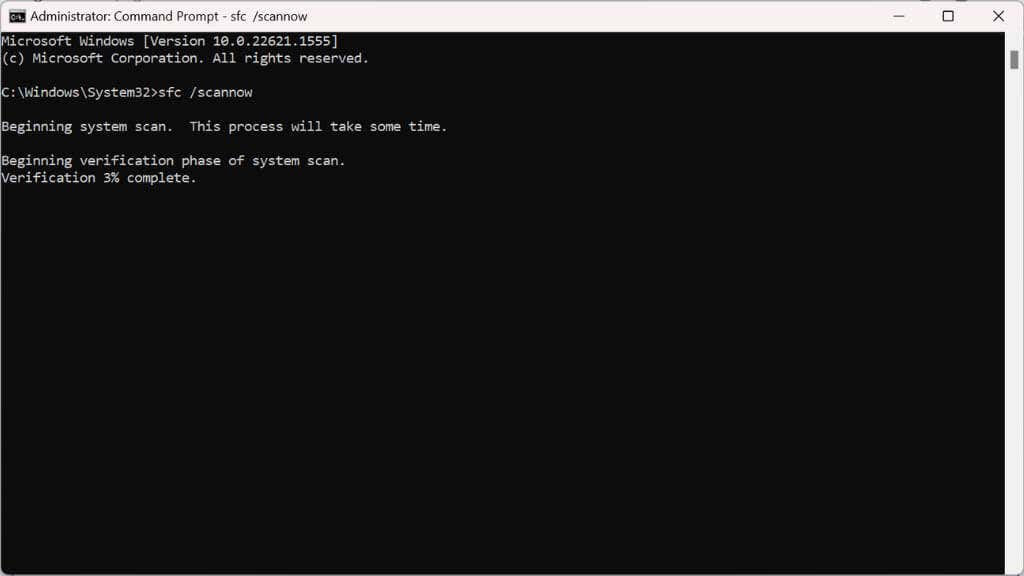
- Once the scan is complete, restart your computer to apply any changes.
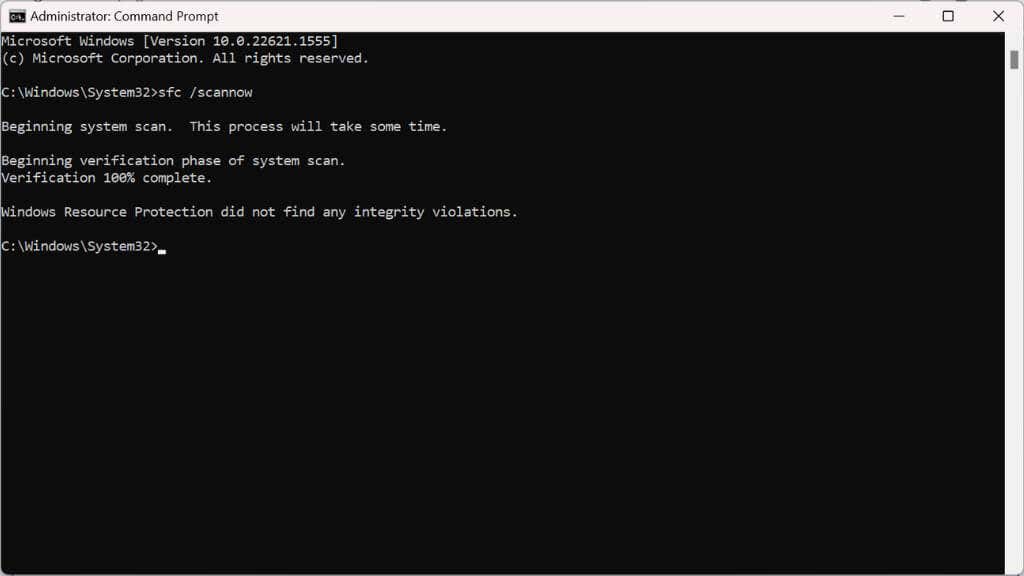
If the SFC scan fails to resolve the crashing issue or cannot repair certain files, you can use the Deployment Image Servicing and Management (DISM) tool. This can often fix issues that SFC can’t:
- Repeat steps 1 and 2 above.
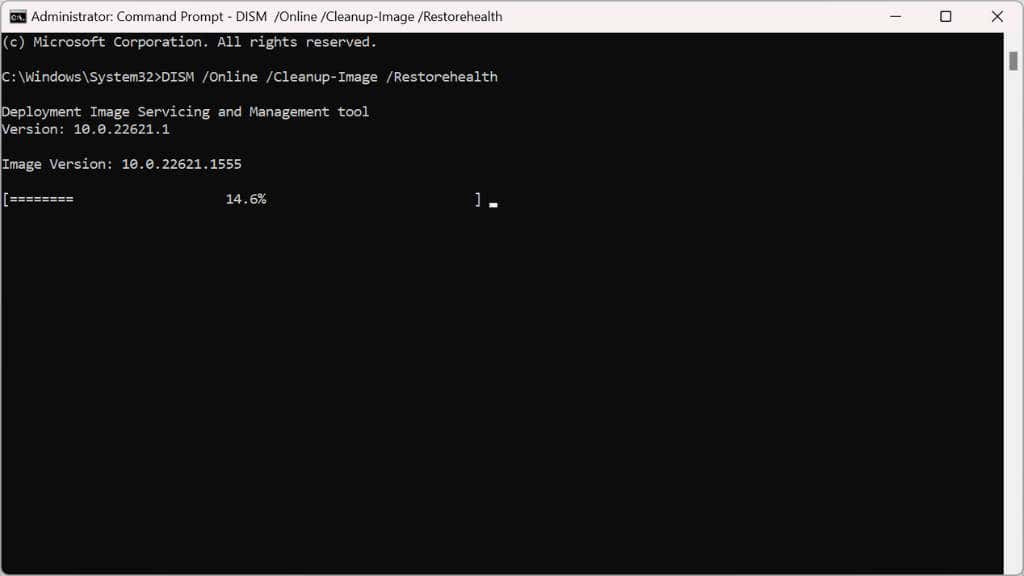
- In the Command Prompt window, type the following command and confirm it by pressing Enter: DISM /Online /Cleanup-Image /RestoreHealth
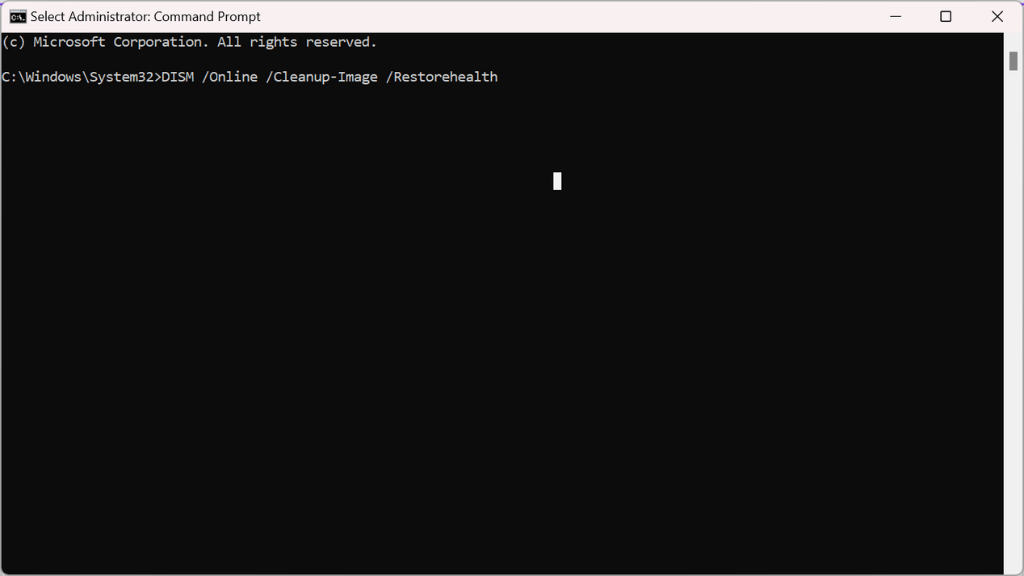
- Let DISM do its job. This process can take a significant amount of time compared to SFC, so be patient and don’t interrupt the operation.
- Once the DISM process is complete, restart your computer to apply any changes.
Reinstalling Windows 11
If all else fails, reinstalling Windows 11 can be a last resort. Back up your important files, create a bootable USB drive, and perform a clean installation. This will wipe your hard drive and provide a fresh start, eliminating lingering issues.


