The Teams Meeting add-in allows you to schedule Teams meetings in the Outlook desktop client. You might not find the Teams Meeting add-in in outdated or incompatible Outlook app versions. Glitches with Microsoft Teams, Outlook, or your computer can also cause the Teams Meeting add-in not to appear in Outlook.
The troubleshooting steps recommendations below should help restore the Teams Meeting add-in to Outlook.
1. Install the Microsoft Teams App
You might not find the Teams Meeting option in Outlook if the Microsoft Teams desktop client isn’t installed on your PC.
Sign in to an administrator account on your PC and install Microsoft Teams from the Microsoft Store or Microsoft website. Afterward, open Teams and sign in to the same Microsoft account linked to the Outlook app.
Open Outlook on your computer and check if the Teams Meeting option is now available in the Outlook Calendar tab. Update your PC’s Outlook app if the add-in is still missing or doesn’t work.
2. Reopen Microsoft Outlook and Teams
Restarting the Microsoft Outlook and Teams applications can restore the missing Teams Meeting add-in and fix other malfunctions.
- Press Ctrl + Shift + Esc to open the Windows Task Manager.
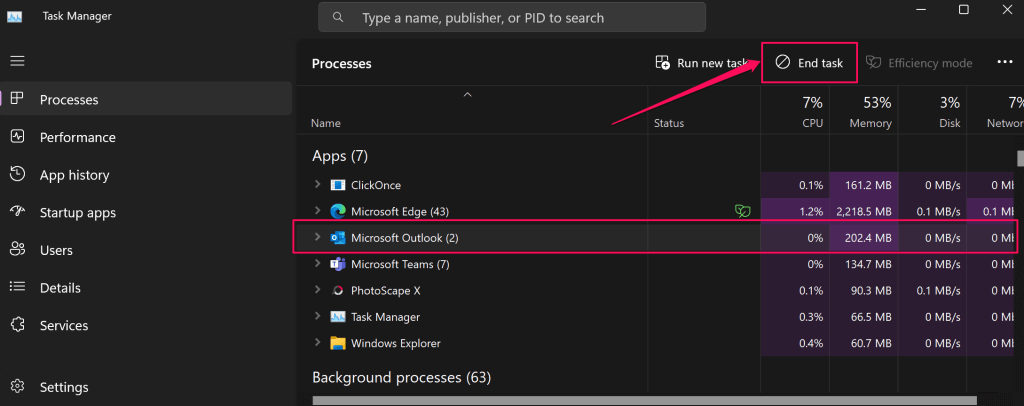
- Select Microsoft Outlook and select End task on the top menu.
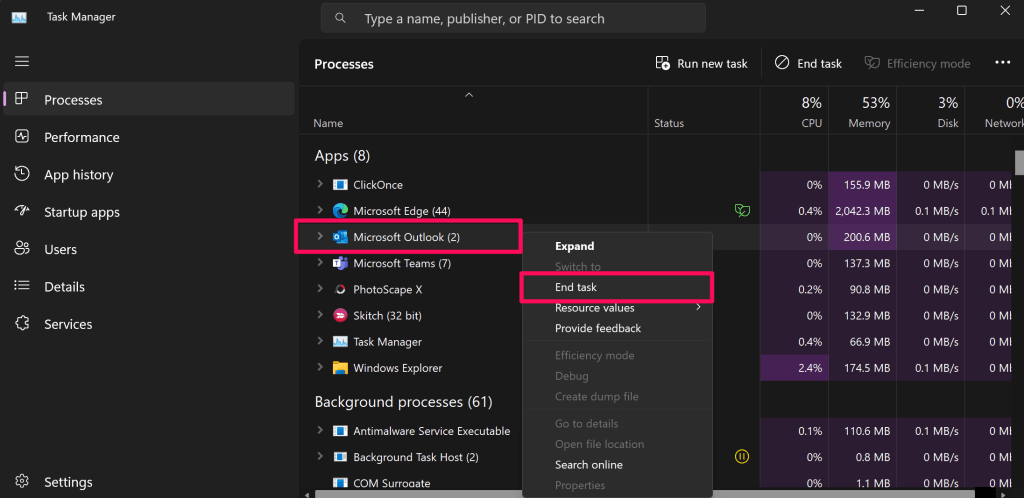
Alternatively, right-click Microsoft Outlook and select End task.
- Next, right-click Microsoft Teams and select End task.
- Wait a few seconds and reopen Microsoft Teams before Outlook. Afterward, restart Microsoft Outlook in normal user mode (not as administrator) and check if you can access the Teams Meeting add-in.
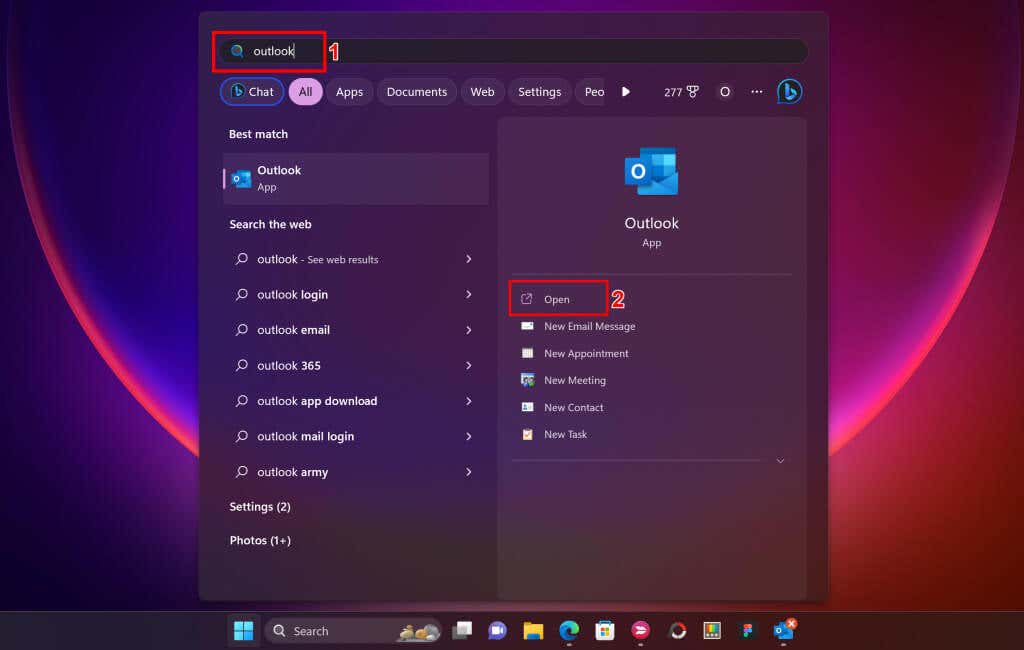
- Press the Windows key, type “outlook” in the search box, and select Open below the Outlook app.
3. Install a Compatible Outlook Version
The Teams Meetings add-in is available in Outlook 2013 and newer versions. If Teams Meeting isn’t showing in Outlook, verify the version of your Outlook client before troubleshooting further.
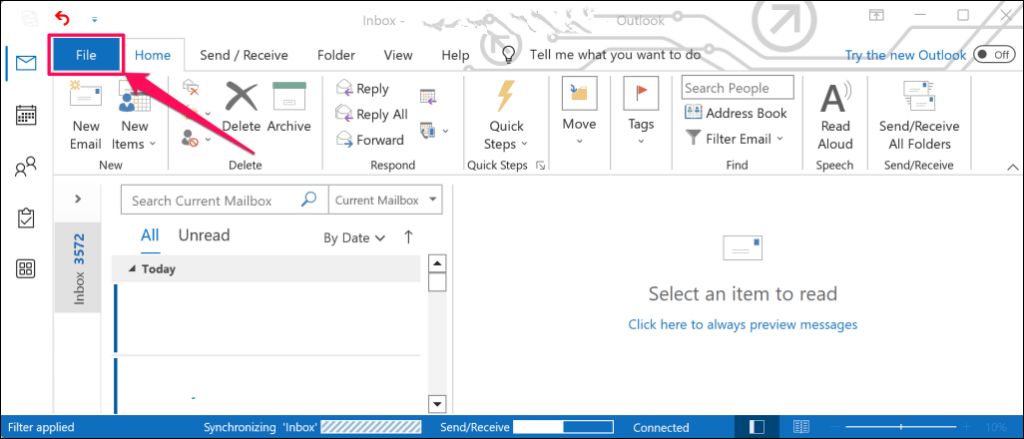
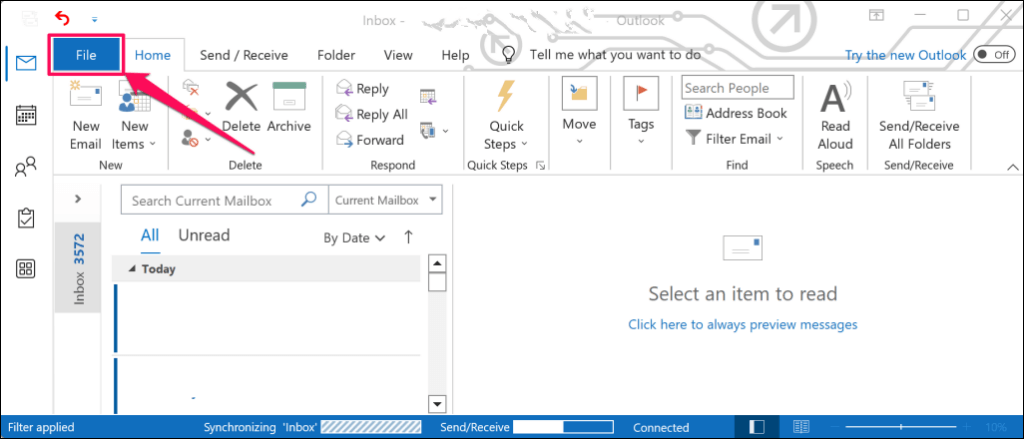
- Open Outlook and select File in the top-left corner.
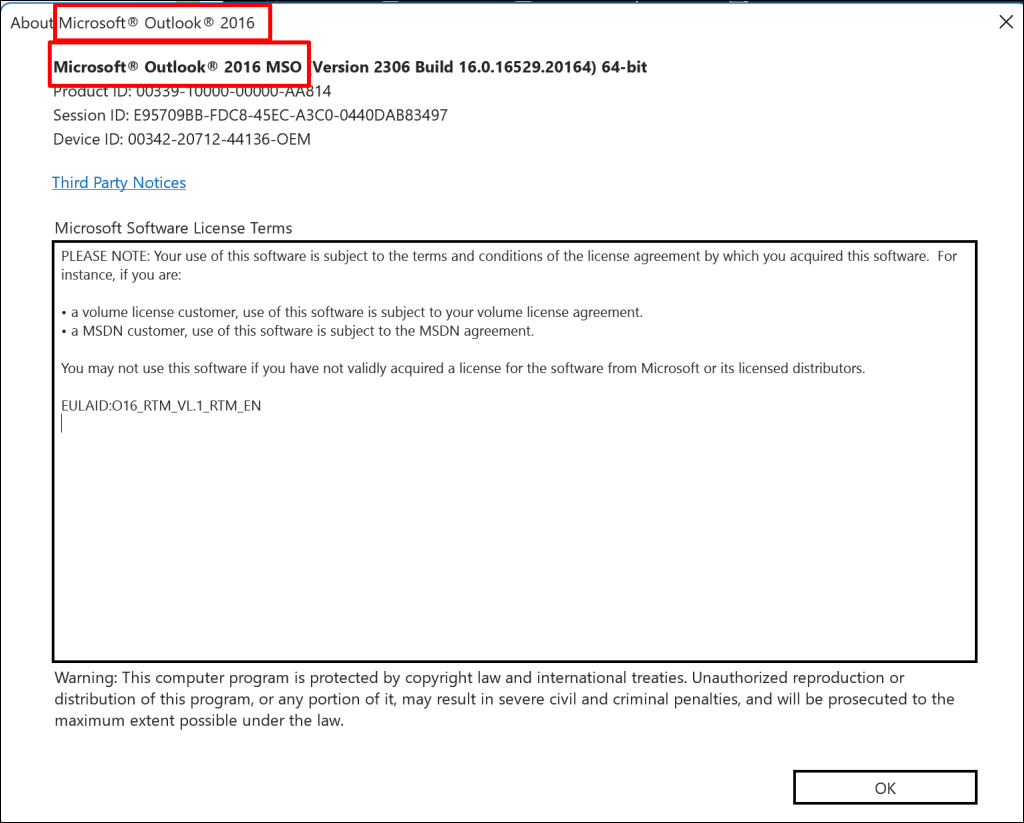
- Select Office Account on the sidebar and select About Outlook.
- Check the title bar of the pop-up window for your Outlook app version. If you have Outlook 2010 or older, install Outlook 2013 or newer versions.
4. Update Outlook
Installing the latest version of Outlook can restore missing features and fix other Outlook malfunctions. Connect your computer to the internet and follow these instructions.
- Open Outlook and select File in the top-left corner.
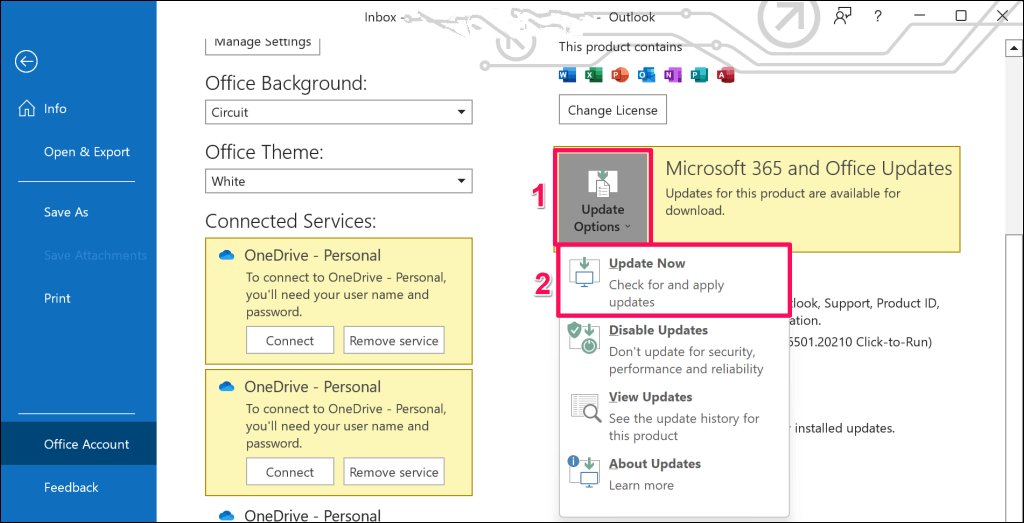
- Select Office Account in the bottom-right corner of the File menu.
- Open the “Update Options” drop-down menu and select Update Now.
- Wait while the Microsoft Office Click-to-Run agent checks for Outlook updates. Select Yes to download available updates.
- You’ll get a prompt to save your work and close Outlook to apply downloaded updates. Select Continue to proceed.
- Close the “Updates were installed” window, restart Outlook, and check if the “Teams Meeting” add-in appears in the Calendar tab.
5. Re-register the Teams Add-in DLL File
The “Microsoft.Teams.AddinLoader.dll” file helps the Teams Meeting add-in work smoothly in Outlook. Re-registering this Dynamic Link Library (DLL) file can restore the Teams Meeting add-in to your Outlook application.
It’s a lengthy but straightforward process. Close Microsoft Teams and Outlook and follow the steps below to re-register the “Microsoft.Teams.AddinLoader.dll” file.
- First, you need the path/location of the Microsoft.Teams.AddinLoader.dll file on your PC. Open the File Explorer (Windows key + E), select View on the top menu, choose Show, and select Hidden items.
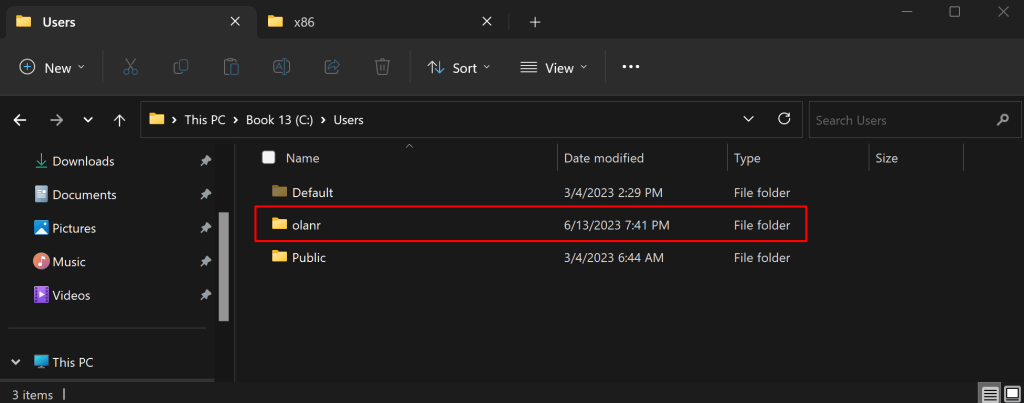
- Select This PC or Local Disc (C:) on the sidebar and open the Users folder.
- Open the folder named after the account you’re signed into.
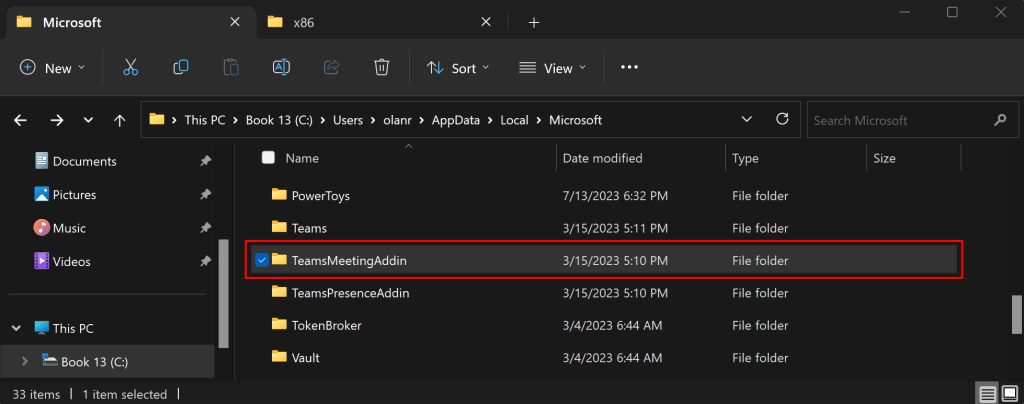
- Next, head to AppData > Local > Microsoft > TeamsMeetingAddin.
- Open the folder with numbers and decimal points.
- Open the x86 folder if you have a 32-bit PC or the x64 folder if your PC is 64-bit. See 4 Ways To Tell If You’re Using 32-Bit Or 64-Bit Windows.
- You should find the “Microsoft.Teams.AddinLoader.dll” file in this folder. Copy the file path in the File Explorer’s address bar.
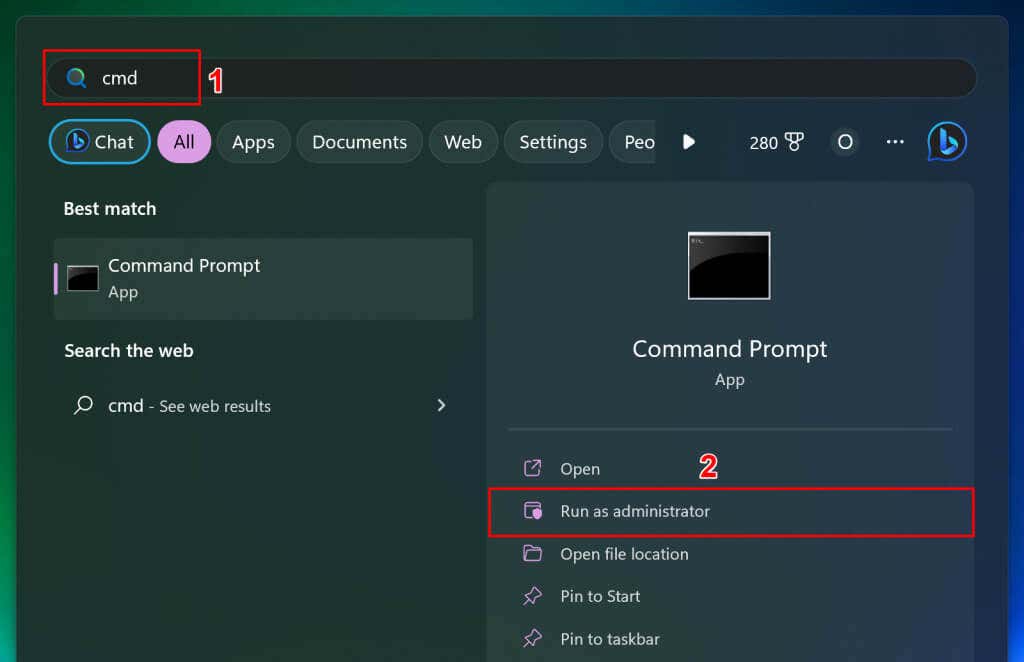
- Open the Start menu, type cmd in the search box, and select Run as administrator below the Command Prompt app.
- Type cd, press the Spacebar, paste the Microsoft.Teams.AddinLoader.dll file path (see step #7) and press Enter. The command should look like the one below.
cd C:\Users\username\AppData\Local\Microsoft\TeamsMeetingAddin\1.0.23034.3\x64
- Next, paste regsvr32 Microsoft.Teams.AddinLoader.dll on the following line and press Enter.
You should see a “DllRegisterServer in Microsoft.Teams.AddinLoader.dll succeeded.” message on your screen.
- Select OK, close the Command Prompt window, and check if the Teams Meeting option is now available in Outlook.
6. Run the Microsoft Support and Recovery Assistant
The Microsoft Support and Recovery Assistant (SaRA) is a utility that automatically diagnoses and fixes Office and Office 365 apps, Outlook, and Windows issues. SaRA can help register the Teams Meeting add-in in the Outlook app.
Save any open email message in Outlook, close the Outlook app, and follow the steps below.
- Download the Microsoft Support and Recovery Assistant setup file from Microsoft’s website and install it on your computer.
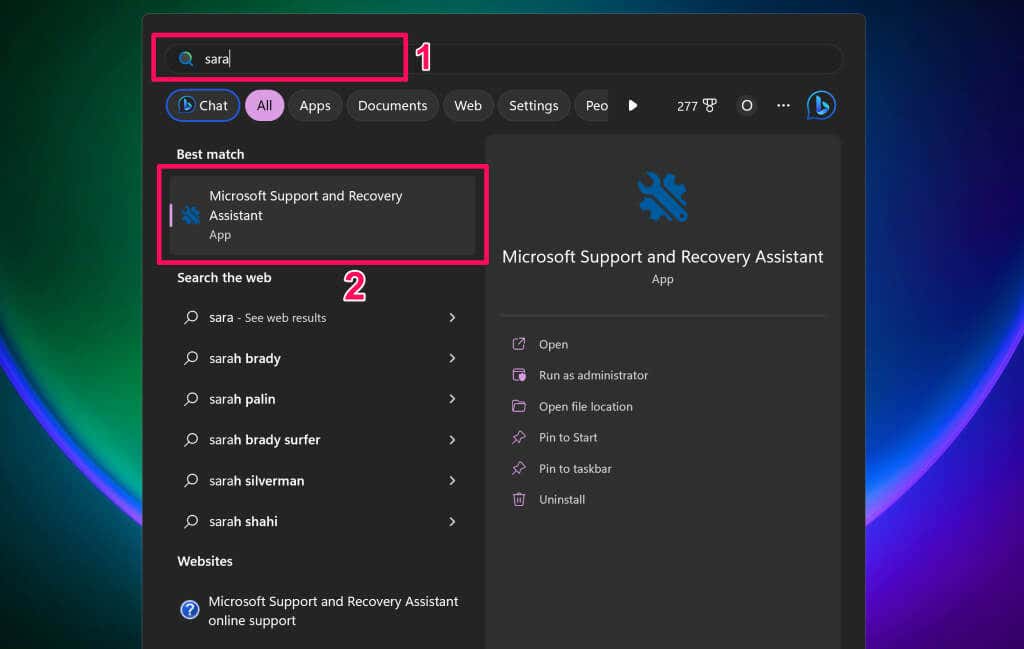
- Type “sara” in the Windows Search box and open the Microsoft Support and Recovery Assistant.
- Accept the tool’s terms (select I agree) to proceed.
- Choose Outlook on the product list and select Next to continue.
- Choose The Teams meeting option isn’t shown or the Teams Meeting add-in doesn’t load in Outlook and select Next.
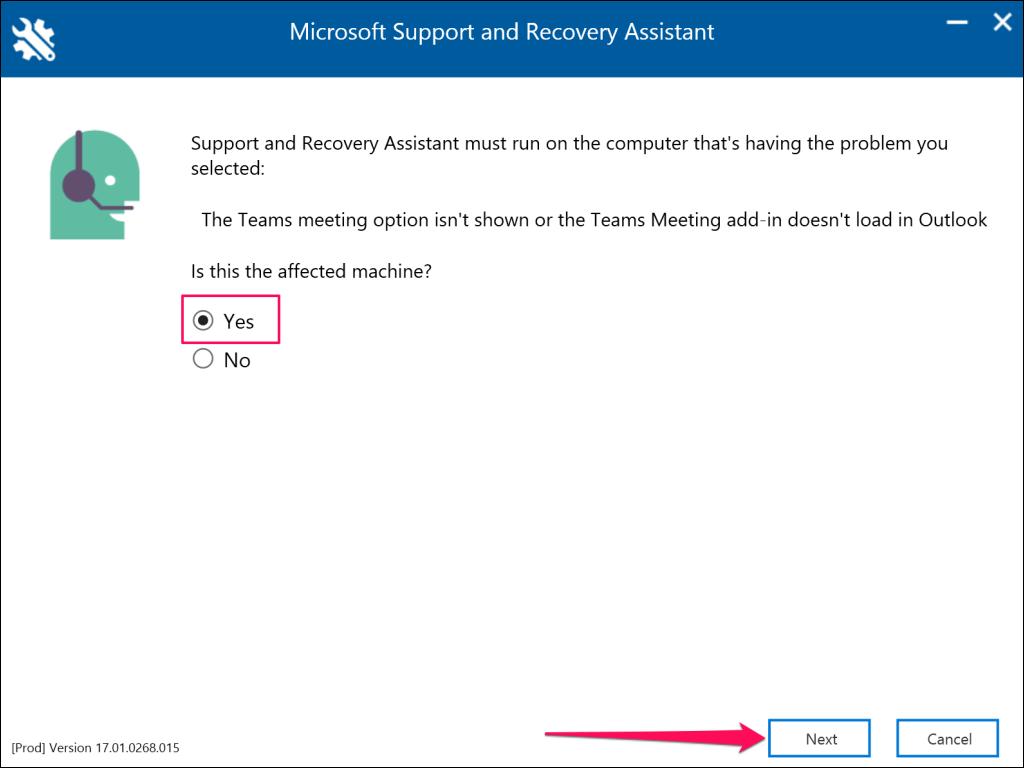
- Choose Yes when asked if you’re troubleshooting the affected machine and select Next to proceed.
- Wait while the Microsoft Support and Recovery Assistant checks your Outlook app. If Outlook is running on your PC, save open messages, and close the app before performing recommended troubleshooting steps.
- Launch Outlook when you see a “The Teams Meeting add-in for Outlook has been successfully registered” message. Return to the Microsoft Support and Recovery Assistant and select No if Outlook still doesn’t have the Teams Meeting add-in.
Follow the links on the next page for additional troubleshooting suggestions.
7. Enable the Teams Meeting Add-In
If you don’t see the Teams Meeting add-in, check that it is active, installed, and enabled in your Outlook app.
- Open Microsoft Outlook and select File in the top-left corner.
- Select Options on the sidebar.
- Open the Add-ins tab on the sidebar and locate Microsoft Teams Meeting Add-in for Microsoft Office. You should see the Teams Meetings option in Outlook if the add-in is in the “Active Application Add-ins” section.
Proceed to step #4 if the add-in is in the “Inactive Application Add-ins” or “Disabled Application Add-ins” section.
- Set the “Manage” drop-down menu to COM Add-ins and select the Go… button.
- Select the checkbox next to Microsoft Teams Meeting Add-in for Microsoft Office and select OK.
Restart Microsoft Outlook and check if the Teams Meeting add-in is now available in the Calendar tab.
8. Sign Out of Microsoft Teams
Microsoft recommends reconnecting your account to the Teams app if you have trouble using the Teams Meeting add-in in Outlook.
Close Outlook on your computer and follow the steps below.
- Open Microsoft Teams, select your profile icon in the top-right corner, and select Sign Out.
- Select Sign Out on the pop-up to proceed.
Reopen the Microsoft Teams app and sign in to your Microsoft account. Afterward, launch Outlook and check if the Teams Meeting add-in is visible in the Calendar tab.
9. Reboot Your Computer
Restart your computer if the issue persists after trying the troubleshooting steps above—close Outlook and other apps before rebooting your PC to avoid losing unsaved data.
Open the Start menu (press the Windows key), select the Power icon, and choose Restart.
Get in Touch With Microsoft Support
Contact Microsoft Support if none of these workarounds restore the Teams Meeting add-in to your Outlook app.


