Are you having issues with your Realtek audio drivers or the Realtek HD Audio Manager? Reinstalling the Realtek Audio Console might fix your issues and get your audio drivers functioning again.
In this troubleshooting guide, we’ll explain the Realtek Audio Console and how to download and install it on the Windows operating system.
What Is the Realtek Audio Console?
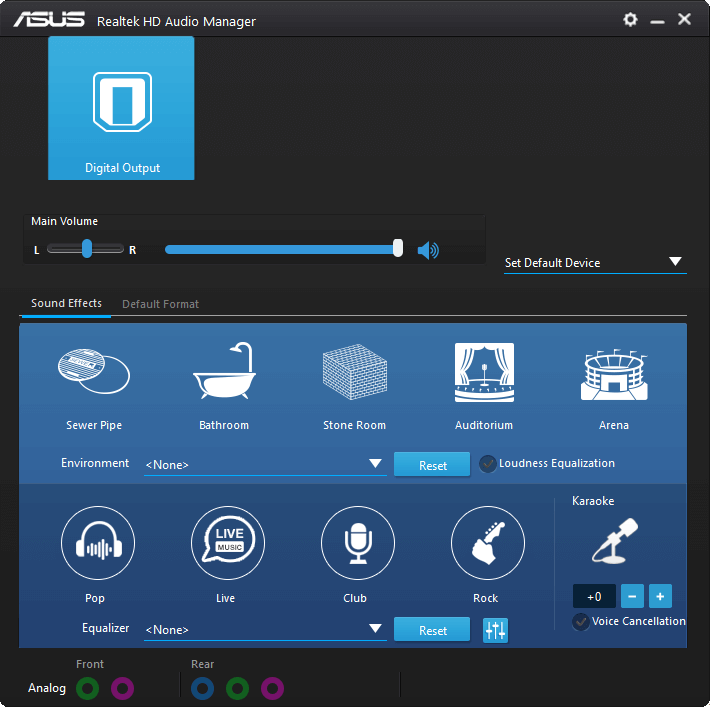
The Realtek Audio Console app (also known as Realtek Audio Control) is a more advanced version of the Realtek HD Audio Manager. It’s a software tool that lets you configure audio devices, including microphones, headsets, speakers, and more.
With Realtek Audio Console, you can change volume parameters and audio device settings for each peripheral that you have connected. You can add playback sound effects and use advanced features like headphone virtualization and equalizers.
Realtek Audio Console contains all the features of Realtek HD Audio Manager and some more advanced tools (and a better user interface).
How to Download Realtek Audio Console on Windows 10 and Windows 11
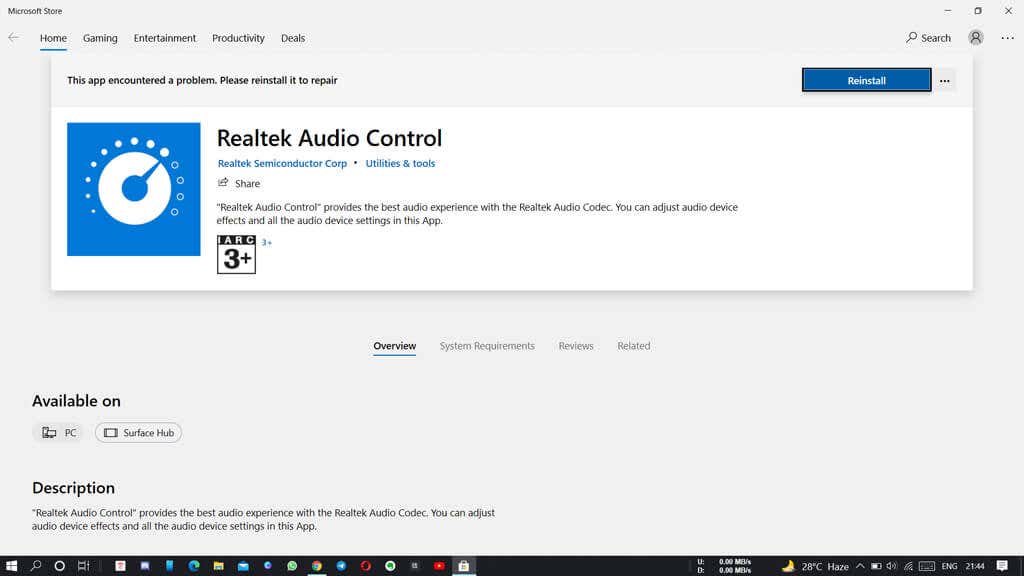
The Realtek Audio Console comes pre-installed on Windows PCs. If you uninstall it, or a random glitch causes it to disappear or stop working, you can reinstall it from the Microsoft Store:
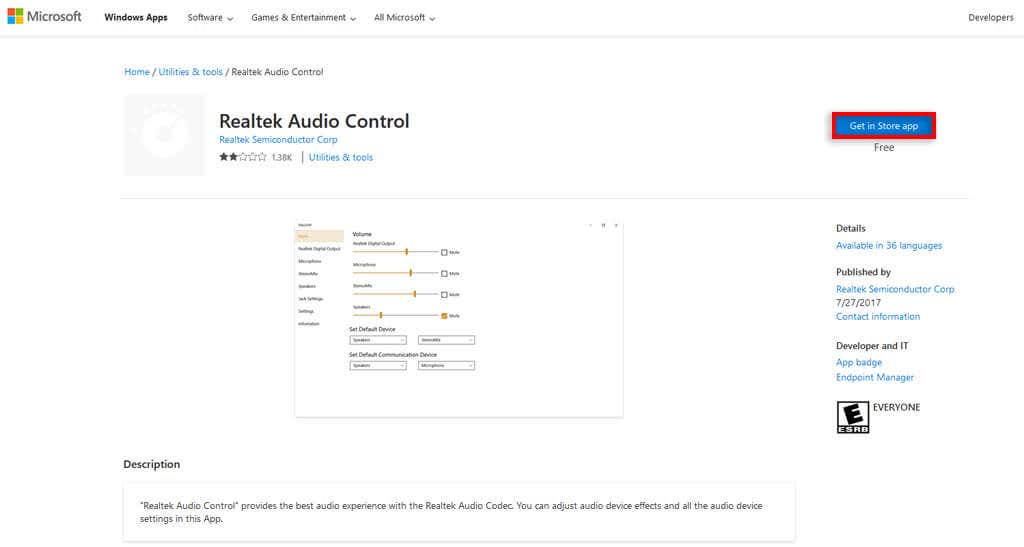
- Open the Realtek Audio Control download page from the Microsoft Store website (it isn’t possible to find it directly from the Microsoft Store app).
- Select Get in Store app.
- Select Open Microsoft Store in the pop-up window (if it appears).
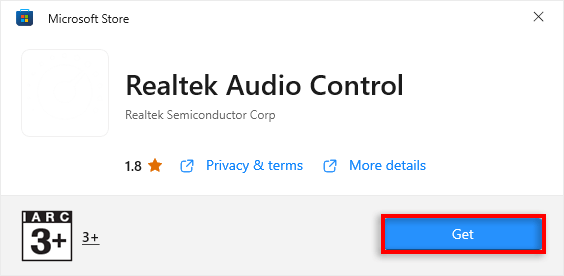
- When the Microsoft Store opens, select Get.
- Wait for the installation wizard to complete.
You can also download the Realtek Audio Console installation file from the official website:
- Open the official Realtek download page.
- Scroll down to the Windows section to find the latest driver version matching your operating system and hardware.
- The Realtek Audio Console download will be available in your downloads folder. Below, we’ll explain how to update your drivers manually using this file.
How to Update Realtek Audio Console
If your Realtek Audio Console software is malfunctioning, you might be able to fix it by installing the latest updates. The easiest way to update the Realtek audio codecs is by updating Windows.
To do so:
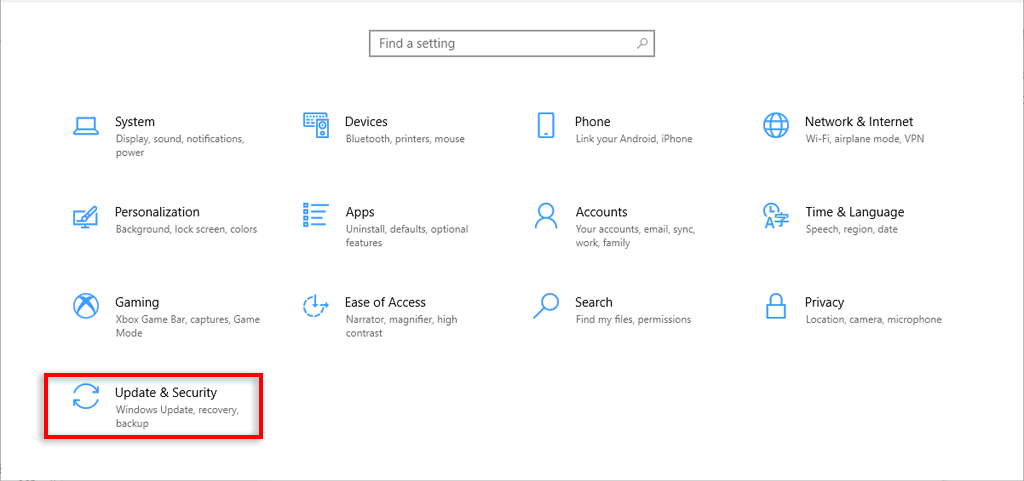
- Press Windows key + I to open Settings.
- Select Update & Security.
- Select Windows Update, then View optional updates.
- Scroll down and look for a Realtek driver software update. If there’s one available, tick the checkbox and select Download and install to get the latest version.
Otherwise, you can update your Realtek driver version manually:
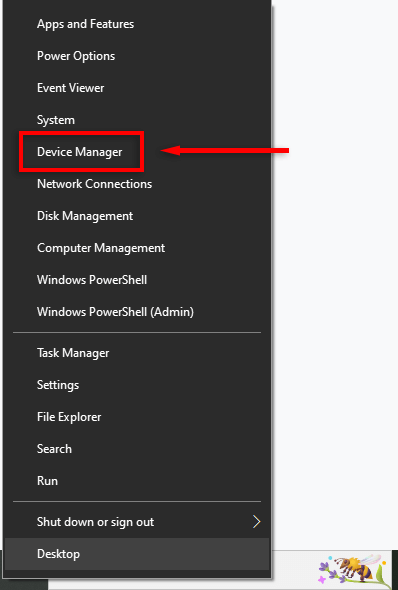
- Right-click the Taskbar and select Device Manager.
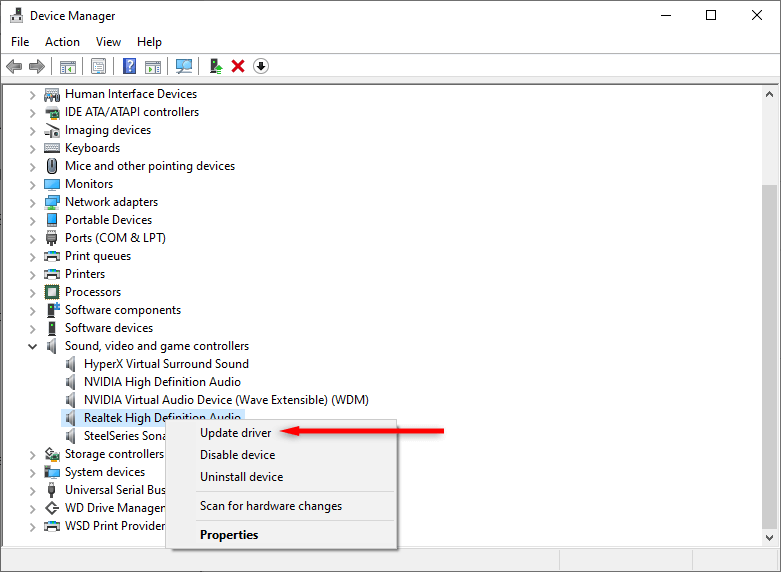
- Scroll down and expand Sound, video and game controllers.
- Right-click Realtek Audio and select Update driver.
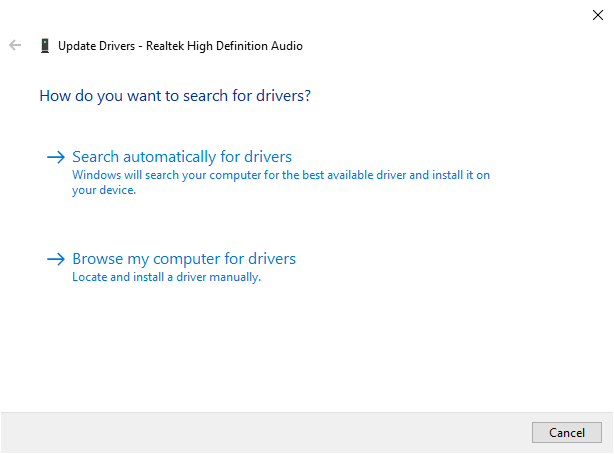
- Select Search automatically for drivers, then wait for the wizard to find and install the latest Realtek audio driver updates. If you downloaded the driver manually, select Browse computer for driver software and select the downloaded file.
How to Open the Realtek Audio Console
Once installed (or updated) you can use the Realtek Audio Console to full effect. Because it isn’t possible to find the program in the System Tray, you’ll have to navigate to its installation folder to open it.
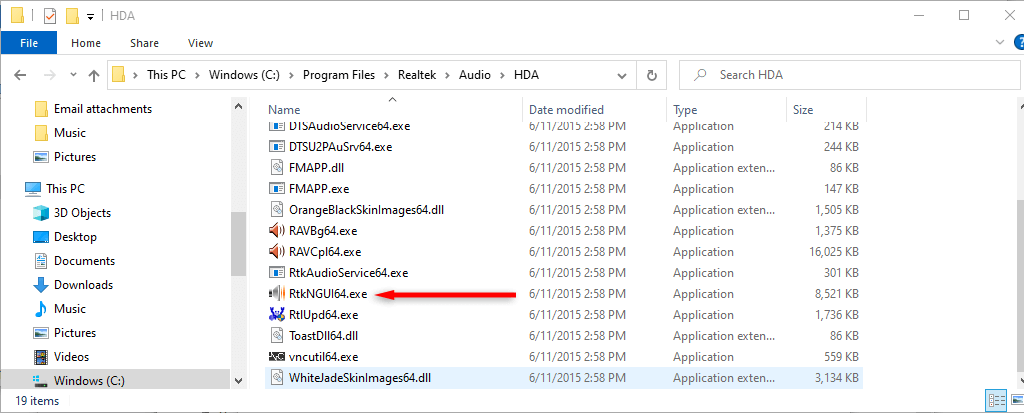
- Open File Explorer and navigate to C:\Program Files\Realtek\Audio\HDA\.
- Double-click RtkNGUI64 to open Realtek HD Audio Manager.
Pro tip: The easiest way to open the Realtek Audio Console is by creating a desktop shortcut to use in the future. To do so, right-click RtkNGUI64.exe and select Send to > Desktop (create shortcut).
Pump Up the Jam
There’s nothing worse than the sound on your PC suddenly cutting out. But hopefully, this tutorial has helped you get your sound card and Realtek High Definition Audio drivers working as they’re supposed to.


