Without resorting to the baseball bat
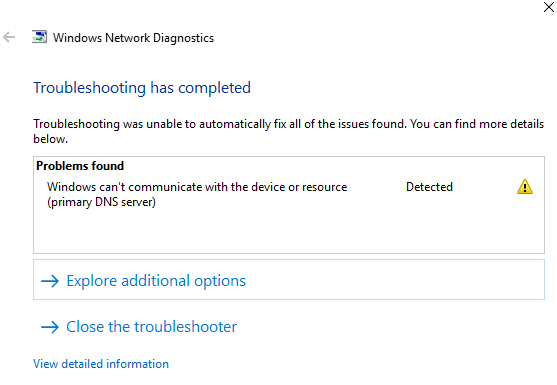
“Windows can’t communicate with the device or resource,” says the screen in front of you. Considering that all you were trying to do was go online, seeing this error message is frustrating.
But instead of giving in to frustration, you should find a way to fix the problem. Fortunately, getting the answer you need is easy!
Table of Contents
In this post, let’s go through the different solutions. This way, you’ll know what to do.
1. Change Adapter Settings
It’s possible that Windows cannot communicate with the device or resource because of your chosen adapter settings. If so, just do some quick modifications.
Launch Control Panel.

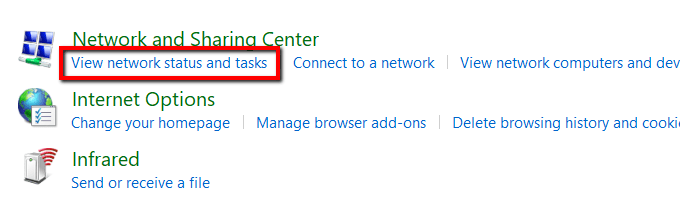
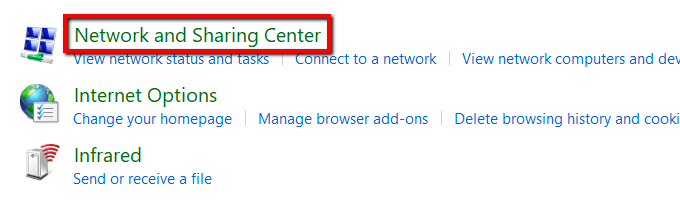
Go to Network and Internet.

Under Network and Sharing Center, select View network status and tasks.
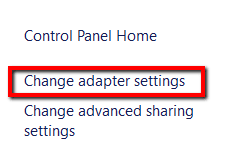
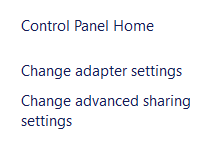
Open Change Adapter Settings.
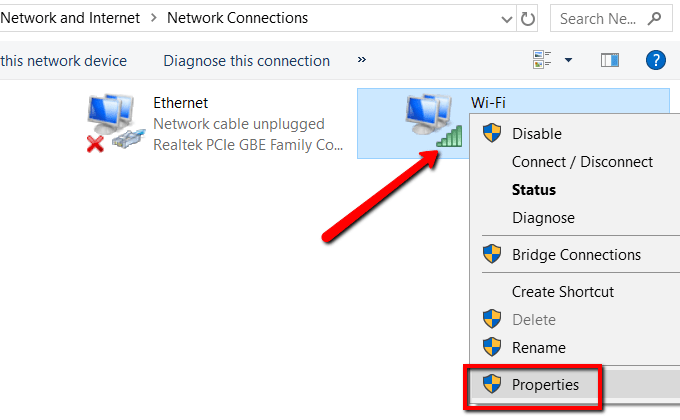
Choose your current network connection. Right-click on it and select Properties.

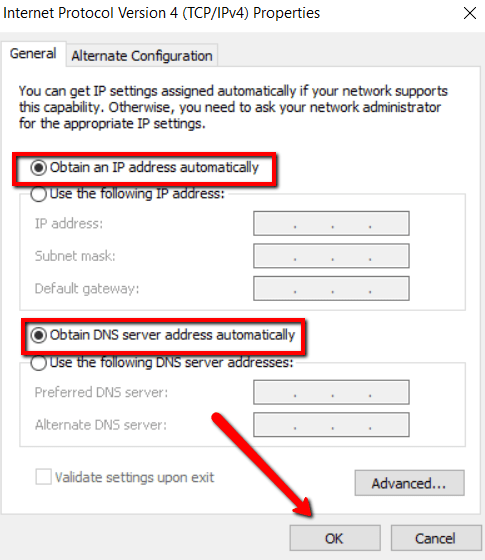
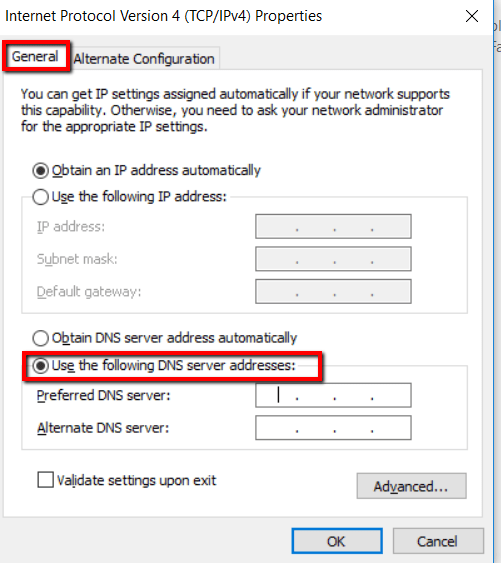
Tick the box that says Internet Protocol Version 4 (TCP/IPv4) and open Properties.

Under the Generaltab, choose the following options:
- Obtain an IP address automatically
- Obtain DNS server address automatically
Then hit OK.
2. Update your driver
Another cause of network connection problems are out-of-date network drivers. The solution? Update them via a manual update.
Go to the official website for your network. Search for drivers.
Make sure to find the latest and download then install.
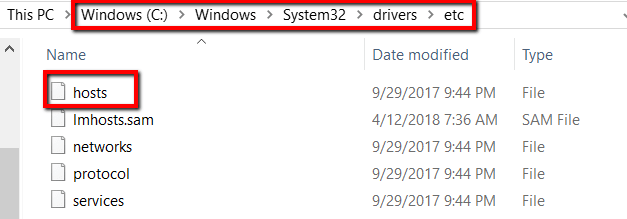
3. Edit the hosts File
Another cause of getting a “Windows can’t communicate with the device” error message is your hosts file. So it’s recommended to take it out of the picture.
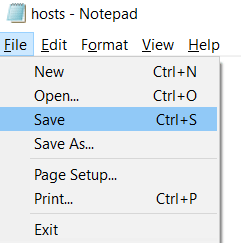
First, access your system’s folder. Open Windows (C:) > Windows > System32 > drivers > etc and find the hosts file.
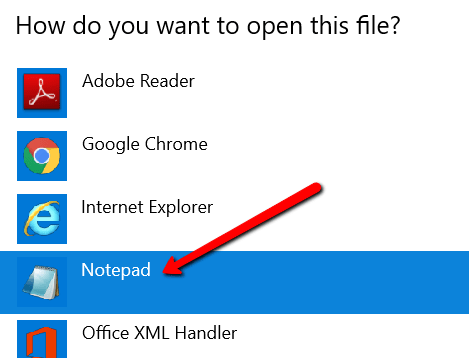
Open the file using Notepad.
Select everything in the file and delete it.
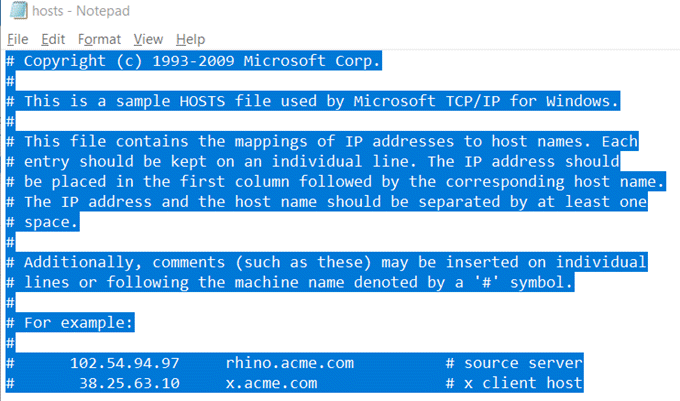

And hit Save. Remember to choose All Files for file type when saving.
4. Move to Public DNS
Another possible cause is a problem with your DNS. If so, the solution is to switch to Google’s Public DNS.
Open Control Panel. Go to Network and Internet.

Select Network and Sharing Center.
Choose Change adapter settings.
Select your network. Right-click on it and choose Properties.
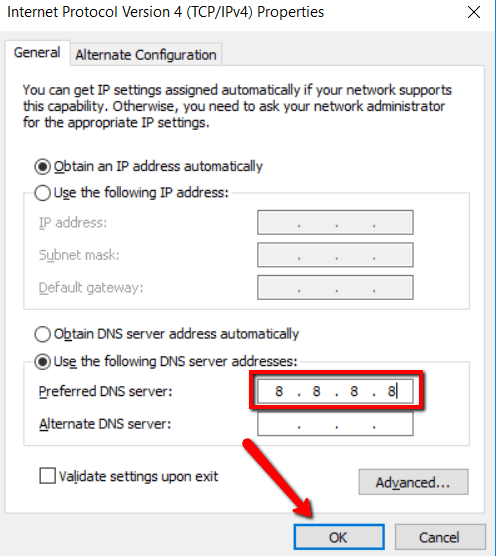
Under the Networking tab, choose Internet Protocol Version 4 (TCP/IPv4) and open Properties.

Under the General tab, choose Use the following DNS server addresses:
Set the Preferred DNS server: to 8.8.8.8 and hit OK.
5. Clear Your DNS Cache
If switching to Public DNS doesn’t do the trick, then it’s time to clear things up.
A corrupted DNS cache can also be the reason why you can’t communicate with primary DNS server. If so, you need to do some cleaning.
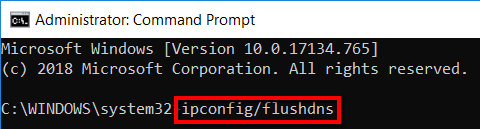
Start by launching the Command Prompt. And make sure to select Run as administrator.
Now, type the following command: ipconfig/flushdns and hit enter.
6. Scan for Malware
If you’ve tried numerous fixes above yet still can’t connect to a network, it’s possible that your PC may be infected by malware. If so, you should clean your system thoroughly.
If you spot any malware, have it removed immediately. Use Windows Defender for this.
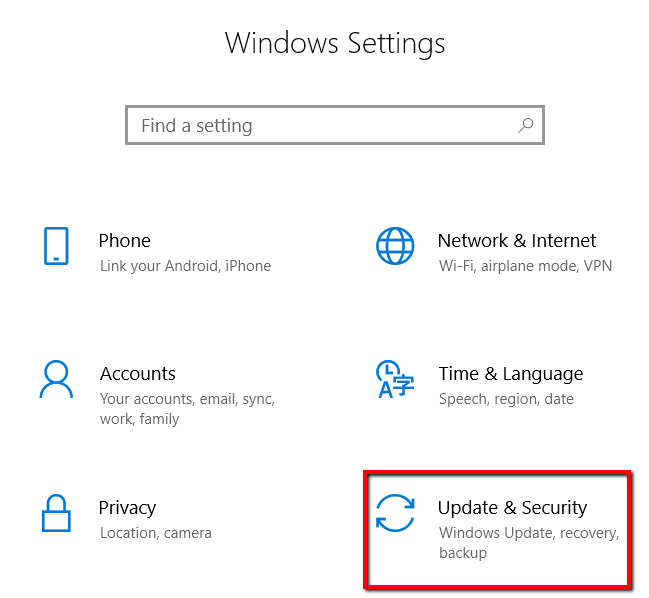
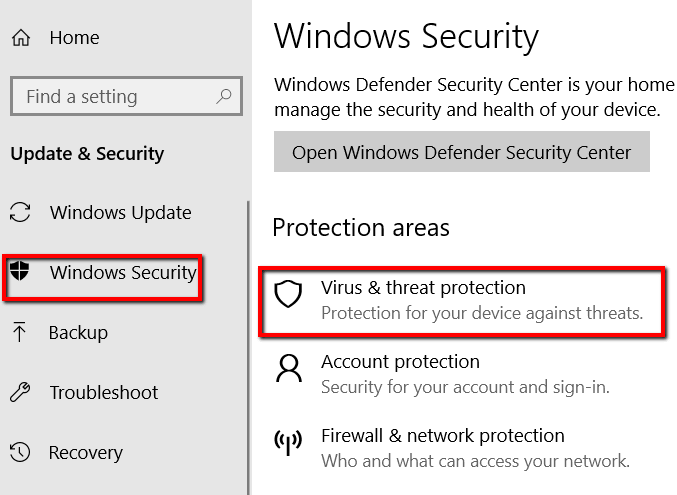
Begin by launching Settings.

Here, choose Update & Security.
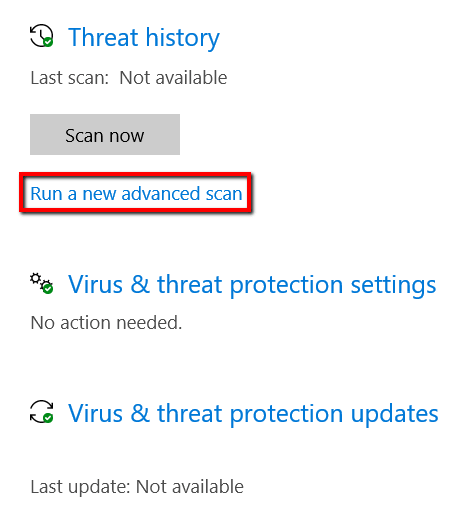
Go to Windows Security. And select Virus & threat protection.
Here, select Run a new advanced scan.
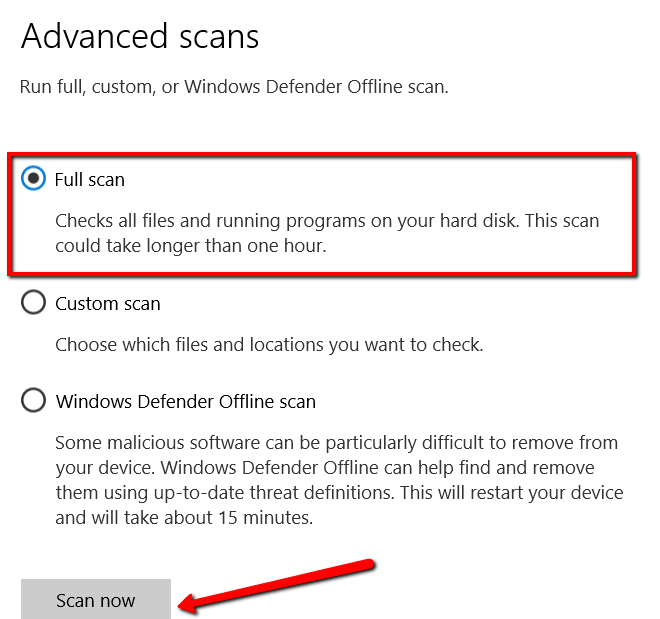
Then choose to do a Full scan. Finally hit Scan now.
Subscribe on YouTube!
Did you enjoy this tip? If so, check out our YouTube channel from our sister site Online Tech Tips. We cover Windows, Mac, software and apps, and have a bunch of troubleshooting tips and how-to videos. Click the button below to subscribe!
Subscribe